
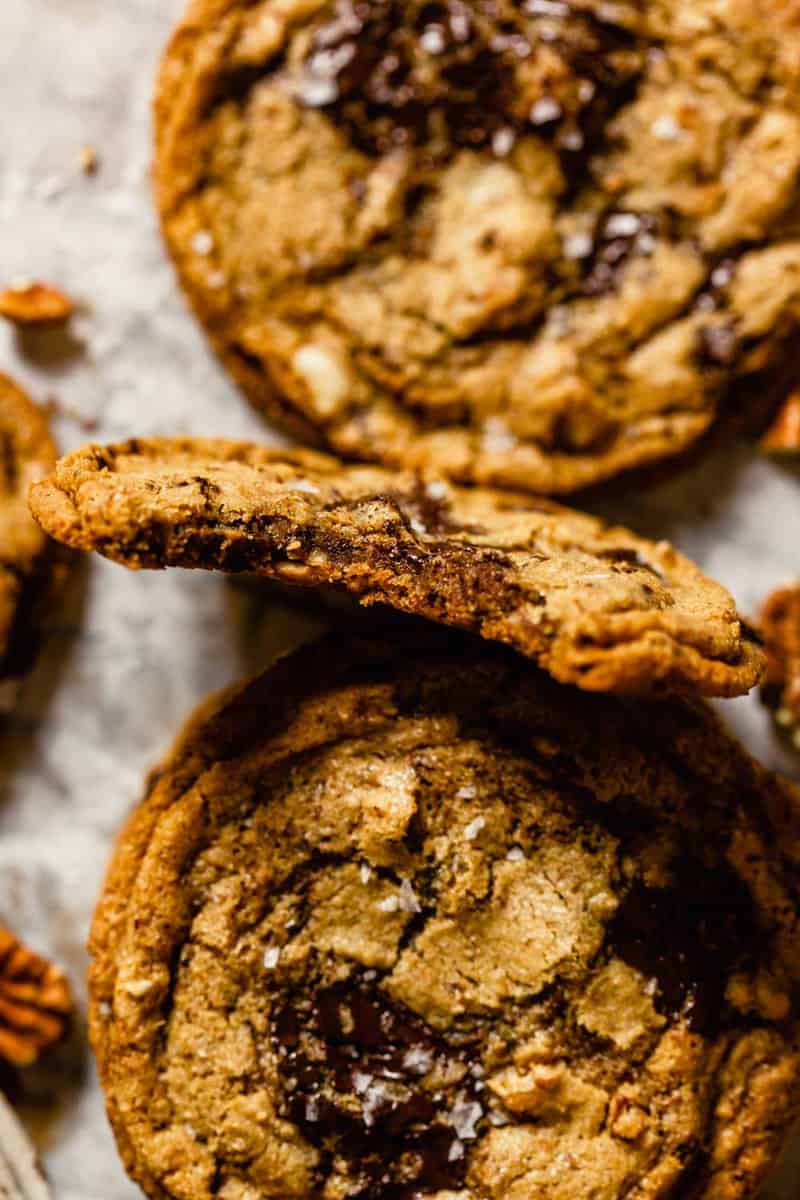
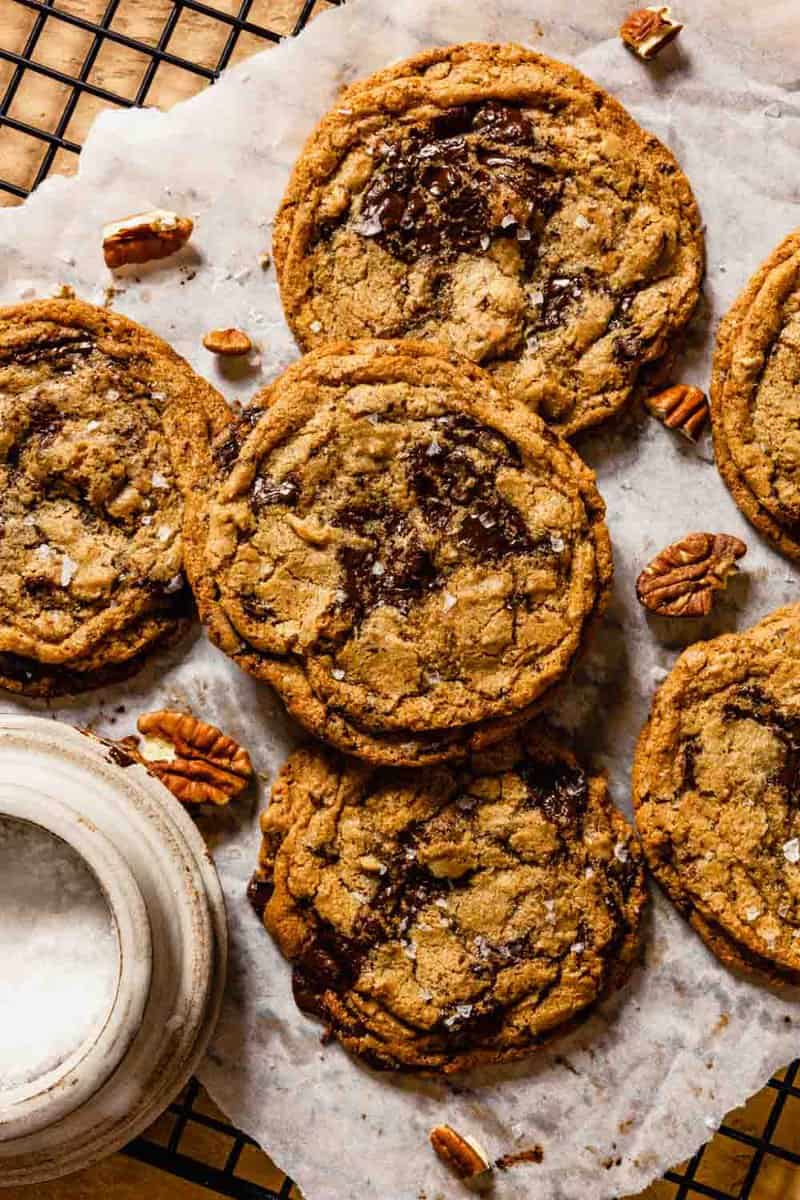
The perfect chocolate chip cookie should be chewy with crisp edges—our recipe which combines two types of flour and sugar, and uses browned butter, is the secret! Learn how to make cookies chewy, then put it all into practice in our recipe for How to Make Chewy Chocolate Chip Cookies!
What Makes a Cookie Chewy?
There are a lot of factors, but the most important are:
- flour type
- sugar type
- number of eggs
- amount of fat and type of fat
- baking technique
Type of Flour: Add Bread Flour
Bread flour has a higher protein content than all-purpose flour. More protein means more chew because and increase in protein directly correlates to an increase in gluten development (aka chew). For most cookie recipes you can swap the all-purpose flour out in favor of bread flour at a 1:1 ratio by weight (always by weight!).
Try bread flour in my Halva Cookies or Chocolate Chip Pecan Cookies.
Use Dark Brown Sugar and More of It
Many classic chocolate chip cookies use equal parts white sugar to brown sugar. And while our recipe still uses both types of sugar, we opted to increase the brown sugar and decrease the white sugar. This simple change increased the chewiness of the cookie and added depth of flavor.
Additionally, we opted for dark brown sugar instead of light brown sugar because it has more flavor and more moisture. For most recipes you can use about 1½ parts brown sugar to 1 part white sugar.
Add an Egg Yolk
Look at any old-school chocolate chip cookie and they likely use 2 large eggs. And if we’re attributing chewiness to protein (more on that later), you’d expect that extra egg white to be a good thing.
However, through testing we found that extra egg white dried out the dough. While egg whites are a good source of protein, they also have a fairly high water content. In order to get that luscious fat and protein from the egg without excess water, we ditched one of the whites and used just the yolk. The combination of one whole egg and one whole egg yolk strikes the perfect balance of structure and texture in the cookie.
Dissolve the Sugar
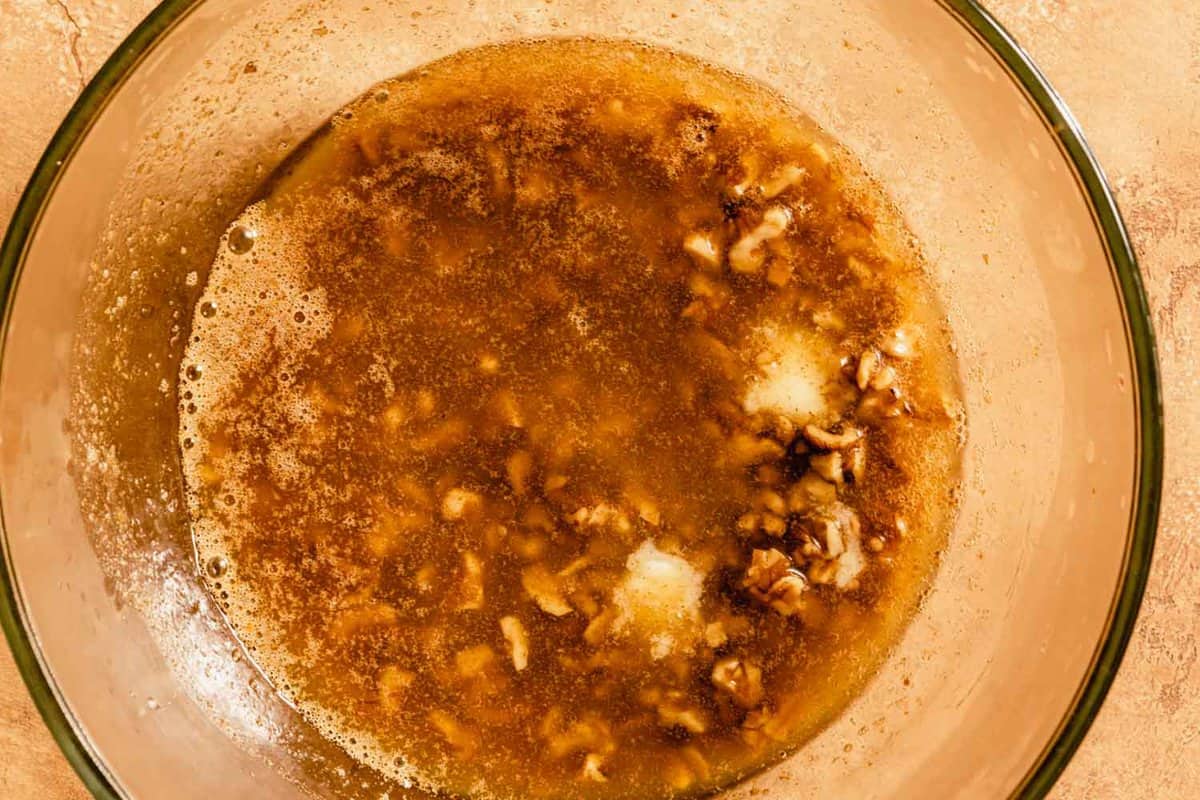
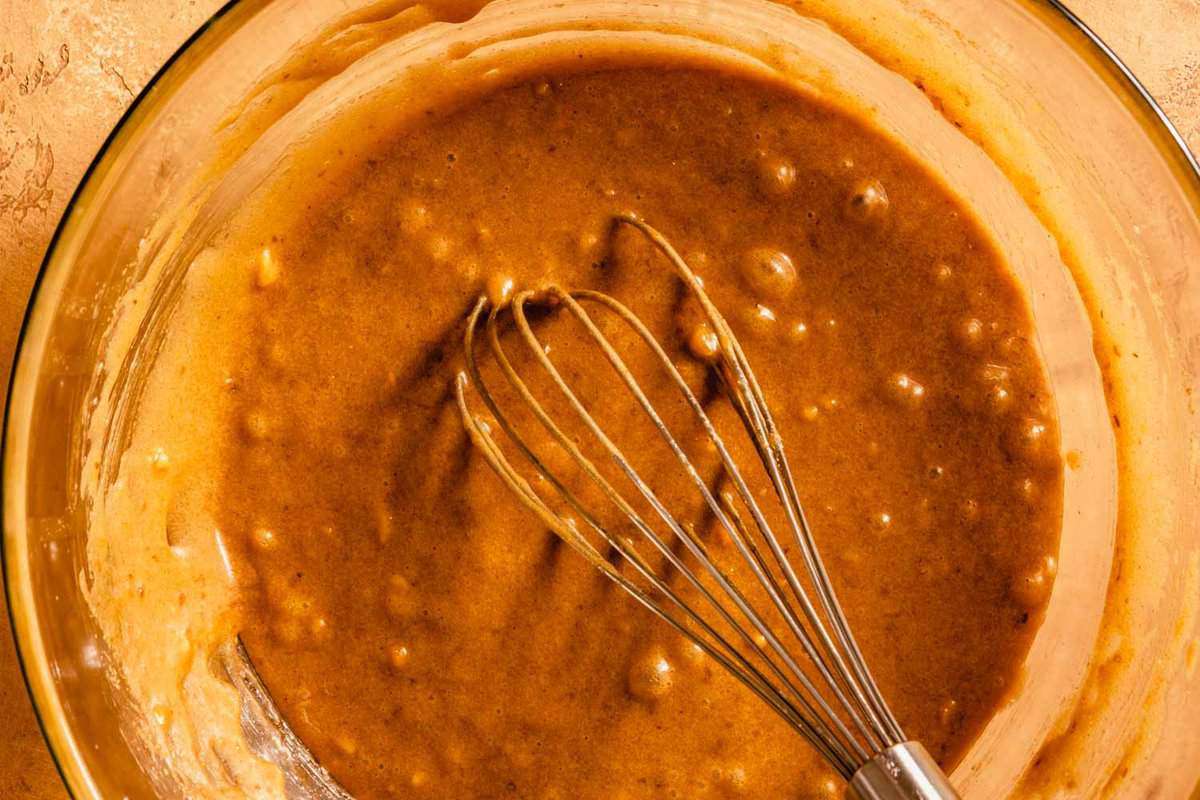
We find aggressively mixing the sugar, melted butter and eggs together is key to creating a consistently chewy cookie. Our technique, which we learned from America’s Test Kitchen, calls for a process of vigorously whisking then resting the dough, off and on, for about 12 minutes. This technique of whisking then resting allows the sugar to fully dissolve, resulting in a caramel-like mixture.
Use Melted Butter
If the goal is a chewy cookie, then you absolutely need to be using melted butter. The technique of creaming softened butter and sugar together is often used for making cakes. And for good reason! The process of creaming incorporates air into the butter which results in a more airy and cakey cookie.
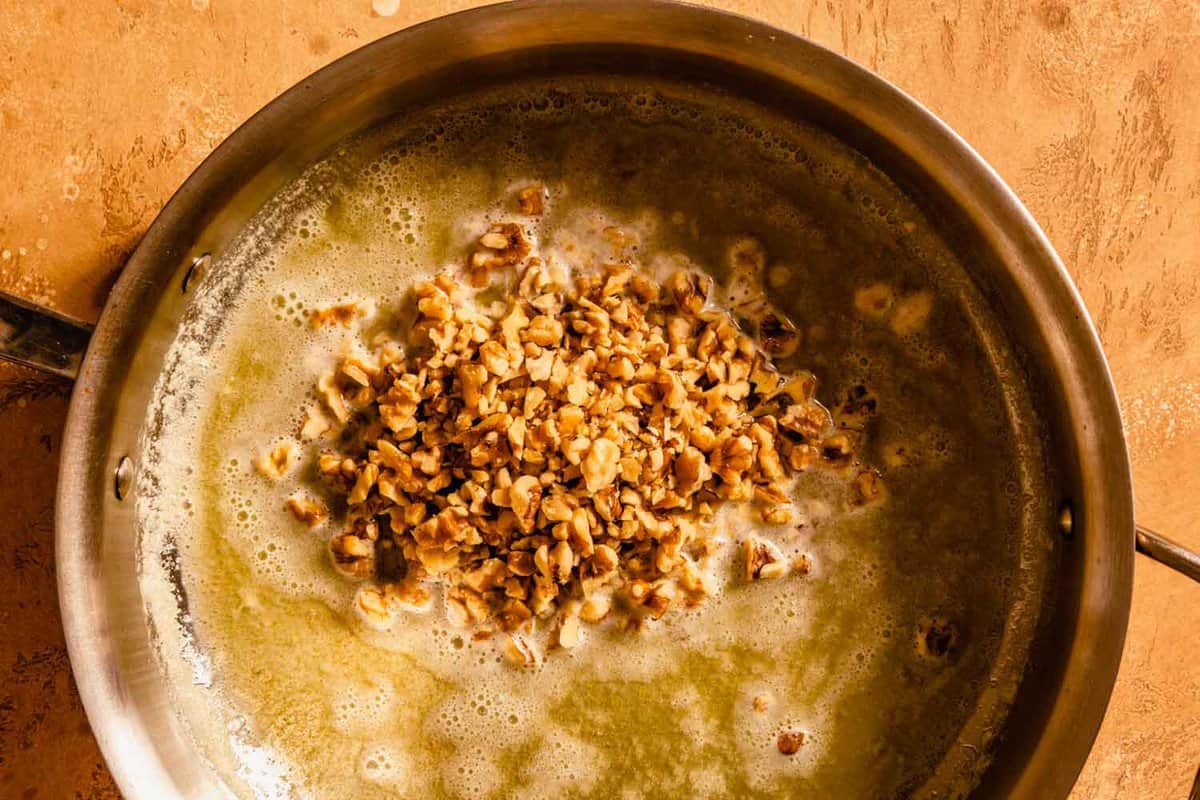
To take it even further, we also brown the butter which not only adds incredible depth of flavor, but it also decreases the amount of water in the resulting dough. (As the butter browns, excess moisture is evaporated off.) This simple technique means the excess water in butter doesn’t steam and evaporate off during baking. By removing the water ahead of time, we can add moisture to the dough in the form of protein and fat (butter and egg yolk) which contribute to chewiness.
Baking Technique: The Sheet Pan Slam
We use the “pan bagging method” coined by Sarah Keiffer. This technique of letting the cookies rise, then dropping the pan to deflate them creates gorgeous chewy ripples instead of tall-baked cookies.
Chill the Dough
Once the dough has been scooped and arranged on a baking sheet, pop the sheet pan in the freezer and freeze the dough balls for at least 30 minutes. This does a few things. One, it firms up the butter in the dough which means it won’t melt as readily when it’s placed in the oven.
It also means the moisture in the dough won’t evaporate as readily—meaning the cookies will retain more moisture and thus be more chewy.
How to Keep Cookies Chewy
Once cookies are baked and cooled completely, transfer them to a resealable zipper-lock bag or airtight container. They should stay chewy for up to 4 days.
Adding a slice of bread to the bag or container with the cookies is a great trick for imparting more moisture into the cookies. This method adds moisture the cookies and keeps them soft—but it won’t necessarily keep them incredibly chewy. The key is to enjoy the cookies while they are fresh!
Protein in Flour Matters
The protein content of the flour you use has a fairly large impact on the resulting baked good. The distinction between cake flour, bread flour and all–purpose flour all lies in the protein percentage of each.
So what’s the difference between say, cake flour and bread flour? Cake flour has a lower protein content than bread flour. This translates to cake flour resulting in a light and tender baked good while bread flour results in a chewy and structured bake.
That’s the “why,” but what’s the “how?” Protein is one of the most important factors when it comes to the amount of gluten development. The higher the protein content of a flour, the more gluten can be developed when hydrated. Plus, a higher protein content means more moisture can be absorbed. Together, a higher protein flour retains more moisture and creates more gluten—aka it’s more elastic and chewy.
| Flour Type | Protein Percentage |
|---|---|
| All-Purpose | 11.7% |
| Bread | 12.7% |
| Whole-Wheat Pastry | 9–10% |
Bread flour can be used in most cookie recipes that call for all-purpose flour (simply swap it in 1:1 by weight). But since we do things healthyish around here, we had to incorporate some whole-wheat flour. For cookies, we prefer to use whole-wheat pastry flour—it’s light, tender and allows us to achieve a lovely crispy edge on the cookies. However, whole-wheat pastry flour is lower in protein than all-purpose flour, so to achieve that perfect balance of protein content and chewiness, we added a half of a cup of bread flour which is high in protein.
Test Kitchen Tips
- When it comes to baking, measuring by weight (instead of cup) is always more reliable. Get our favorite food scale and see just how easy it makes baking!
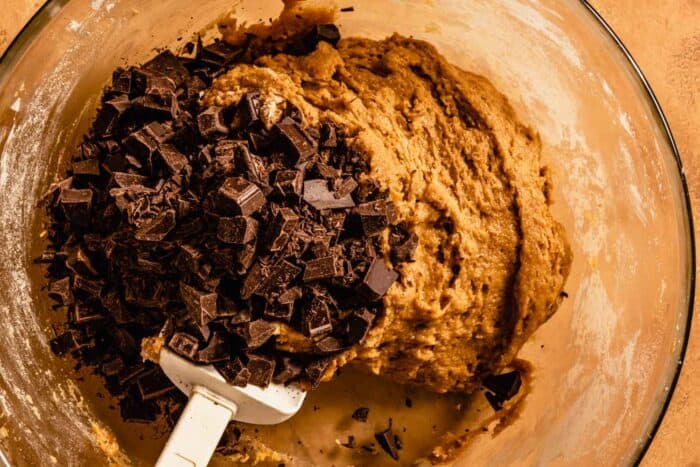
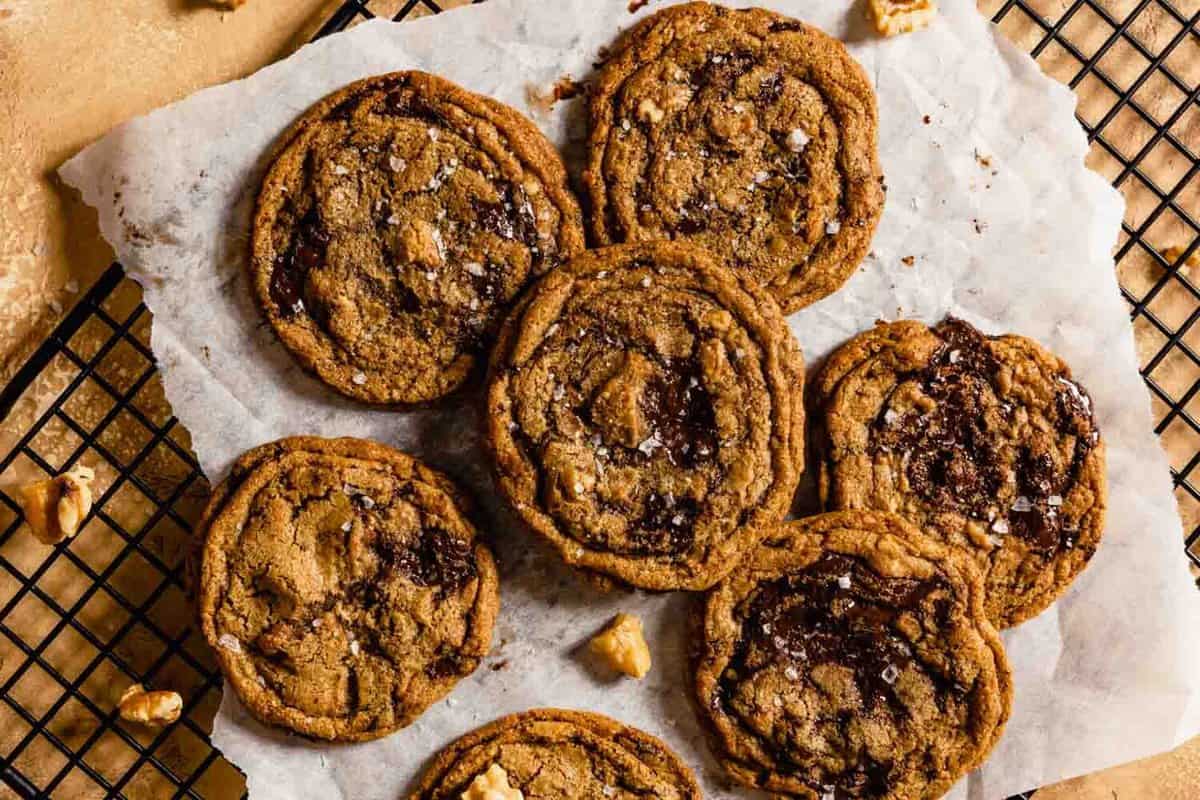
- We recommend using bar chocolate instead of chocolate chips or chunks. Chopped bar chocolate melts better and creates luscious pools of chocolate.
How to Make Chocolate Chip Walnut Cookies
1. Whisk together the dry ingredients; set aside.
2. Start browning the butter in a large sauté pan.
3. Cook the butter until fragrant and the butter is deeply golden brown.
4. Pour the browned butter into a large bowl with a few more tablespoons of butter. Stir to combine.
5. Add the sugars, egg and egg yolk and whisk until smooth and caramel-like in texture.
6. Stir in the flour and chocolate chips.
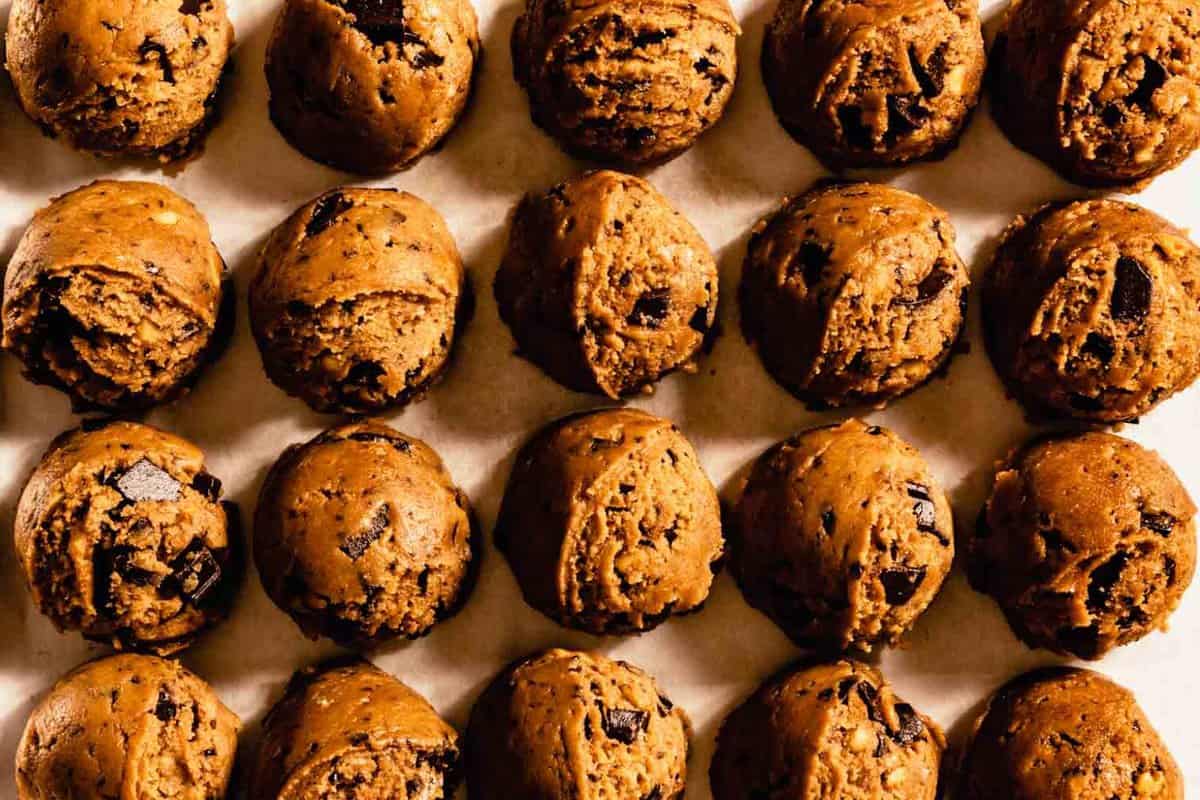
7. Scoop the dough using a #24 cookie scoop (or 3 tablespoon measure) and freeze for 30 minutes.
8. Bake the cookies, dropping the sheet pan a few of times throughout baking, until the edges are just set and the centers look under-baked.
9. Sprinkle with sea salt, if desired, and enjoy.
How to Store
Store these chocolate chip walnut cookies in an airtight container at room temperature for up to 4 days. You can freeze baked cookies as well in a resealable zipper-lock bag or airtight container.
How to Freeze
You can either freeze the cookie dough or freeze the baked cookies.
To free cookie dough: scoop dough into individual dough balls using a #24 scoop (3 tablespoons). Arrange cookie dough balls in a single layer on a parchment paper-lined baking sheet and place in the freezer. Freeze until solid, then transfer to a resealable zipper-lock bag labeled with the date and recipe name. Frozen cookie dough will last in the freezer for up to 6 months.
To freeze cookies: place baked and cooled cookies in a resealable zipper-lock bag or airtight container and store in the freezer for up to 4 months. Allow the cookies to thaw at room temperature for a few hours before eating.
FAQ
If you have a batch of cookies that have come out hard and crunchy you can somewhat save them! Place the cookies in an airtight container or zipper-lock bag with a slice of bread. In a few hours the cookies should be softer.
We recommend baking cookies until their edges are set and the centers look under-baked. Pull cookies from the oven when the centers still look raw and you will have a very gooey middle.
There are a few ways to keep cookies chewy and soft. Store them at room temperature in an airtight container. If you notice the cookies are starting to harden, add a slice of bread or a few marshmallows to the bag, the moisture from the bread or marshmallows should soften the cookies within a few hours.
There are a variety of reasons why your cookies are turning out crunchy, but the most common reason is over-baking. If your cookies often come out crunchy and over-baked, we recommend getting an oven thermometer so you can adjust the oven temperature as needed to match the temperature called for in the recipe.
Additionally, it’s likely that you are using too much flour. Read more about how to measure flour here.
Put all of this info into practice with our Chocolate Chip Pecan Cookie Recipe! Or make the nut-free recipe below.
How to Make Chewy Chocolate Chip Cookies
Description
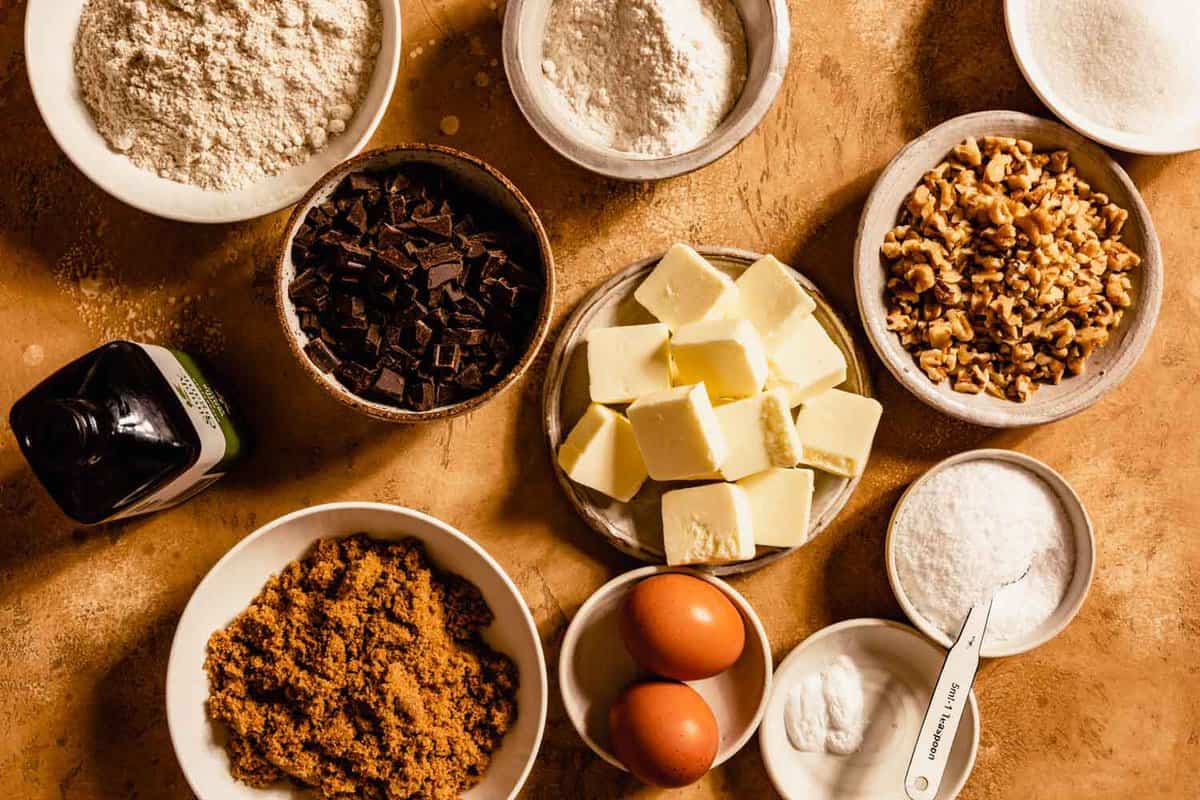
Ingredients
- 1 ¼ cup (134g) whole-wheat pastry flour, or all-purpose flour
- ½ cup (65g) bread flour, or all-purpose flour
- ¾ teaspoon (5g) baking soda
- 14 tablespoons (200g) unsalted butter
- ¾ cups (148g) packed dark brown sugar
- ½ cup (100g) granulated sugar
- 1 ¼ teaspoons Morton kosher salt
- 2 teaspoons pure vanilla extract
- 1 large egg (50g)
- 1 large egg yolk (20g)
- 6 ounces (170g) dark chocolate bar, roughly chopped, such as 72% ghirardelli
Instructions
- Line 2 baking sheets (half sheet pans) with parchment paper; stack together, then transfer to refrigerator to chill.
- Whisk flours and baking soda together in medium bowl; set aside.
- Heat 10 tablespoons (145g) butter in 10-inch skillet over medium-high heat until melted, about 2 minutes. Continue cooking, swirling pan, until butter is dark golden brown and has nutty aroma, 4–5 more minutes.
- Remove skillet from heat and transfer browned butter to large heatproof bowl with remaining 4 tablespoons butter; using a rubber spatula to scrap butter and solids into bowl. Stirn until completely melted.
- Add both sugars, salt, and vanilla to bowl with butter and whisk until fully incorporated. Add egg and yolk and whisk until mixture is smooth with no sugar lumps remaining, about 30 seconds. Let mixture stand 3 minutes, then whisk for 30 seconds. Repeat process of resting and whisking 2 more times (for a total of 4 mixes) until mixture is thick, smooth, and shiny.
- Using rubber spatula or wooden spoon, stir in flour mixture until just combined, about 1 minute. Stir in chocolate chunks.
- Divide dough into 20 portions, each about 3 tablespoons (or use #24 cookie scoop). Arrange closely on a small baking sheet and freeze for 30 minutes.
- Adjust oven rack to middle position and heat oven to 350ºF degrees.
- Arrange 6 chilled dough balls 3 inches apart on a chilled parchment-lined baking sheet. (Smaller baking sheets can be used, but will require multiple batches.)
- Transfer sheet to oven and bake until cookies are puffed, 10 minutes. Lift baking sheet up about 4 inches, then drop baking sheet down onto rack. Bake until cookies puff again, 2 minutes, then repeat lifting and dropping pan. Bake cookies another 2 minutes, then repeat lifting and dropping pan. Bake cookies until edges are golden brown and centers are slightly puffed and look under-baked, 1–2 minutes more. (Total bake time should be 14–16 minutes.)
- Transfer baking sheet to a wire rack; allow cookies to cool completely on sheet before transferring to an airtight container.
Equipment
Video
Notes
Nutrition