
This post may contain affiliate links.
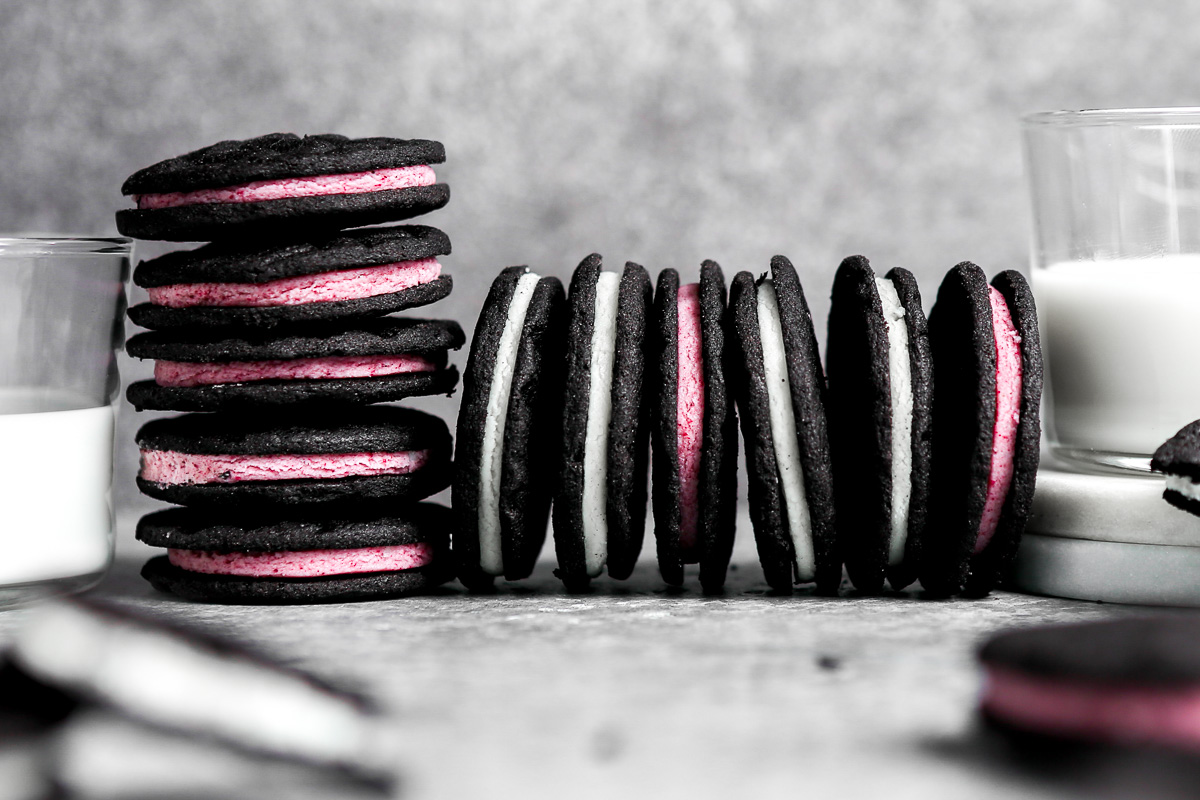
These homemade Oreos are so much better than the real thing. Crisp, deeply chocolatey cookies sandwich a filling that’s wildly similar to the classic dunkable cookie. If you’re looking for a homemade cookie that truly resembles the real thing, this is it.
I first published this recipe in 2018 and have since revisited it to make it even more foolproof. A few tweaks (like using confectioners’ sugar instead of granulated sugar) make the dough easier to work with and the cookies even crispier (that added cornstarch works its magic).
The Crisp Chocolate Cookies
Most of the recipes you’ll find for homemade oreos feature chewy chocolate cookies. Which makes no sense to me. That’s just a chocolate sandwich cookie marketed as a homemade oreo. Not it! This recipe is as close to the real deal as possible, and crisp chocolate cookies is the first step.
Making crisp cookies isn’t hard—they actually feature less ingredients than most cookies.
All you need is butter (both softened and melted), confectioners’ sugar, black cocoa powder, salt, an egg yolk, and flour (regular or gluten-free).
Black cocoa is key to achieving that deep color and rich chocolatey flavor. Black cocoa powder is heavily-Dutched and extra-alkalized (which mellows its acidity). I like this brand and just order it online. If you don’t want to buy black cocoa powder, you can use Dutch-processed cocoa powder—just know the cookies won’t be quite as black and will be more mild in cocoa flavor.
The most important part is rolling the dough thin enough so the cookies crisp but don’t burn during baking. A delicate balance that, after many rounds of testing, I finally honed in on.
Then as an optional touch, you can imprint the cookies with a design using a cookie stamp. This is optional, but does evoke that classic Oreo look.
Vanilla Filling
The second component of thees cookies is the filling. Another issue with other homemade oreo recipes is the filling simply doesn’t resemble that of a classic oreo. Most are buttercream adjacent and that’s just not what we’re going for.
After many tests—and many fails—I found an ingredient that achieves that perefectly dry yet melt-in-your-mouth texture that Oreo filling has.
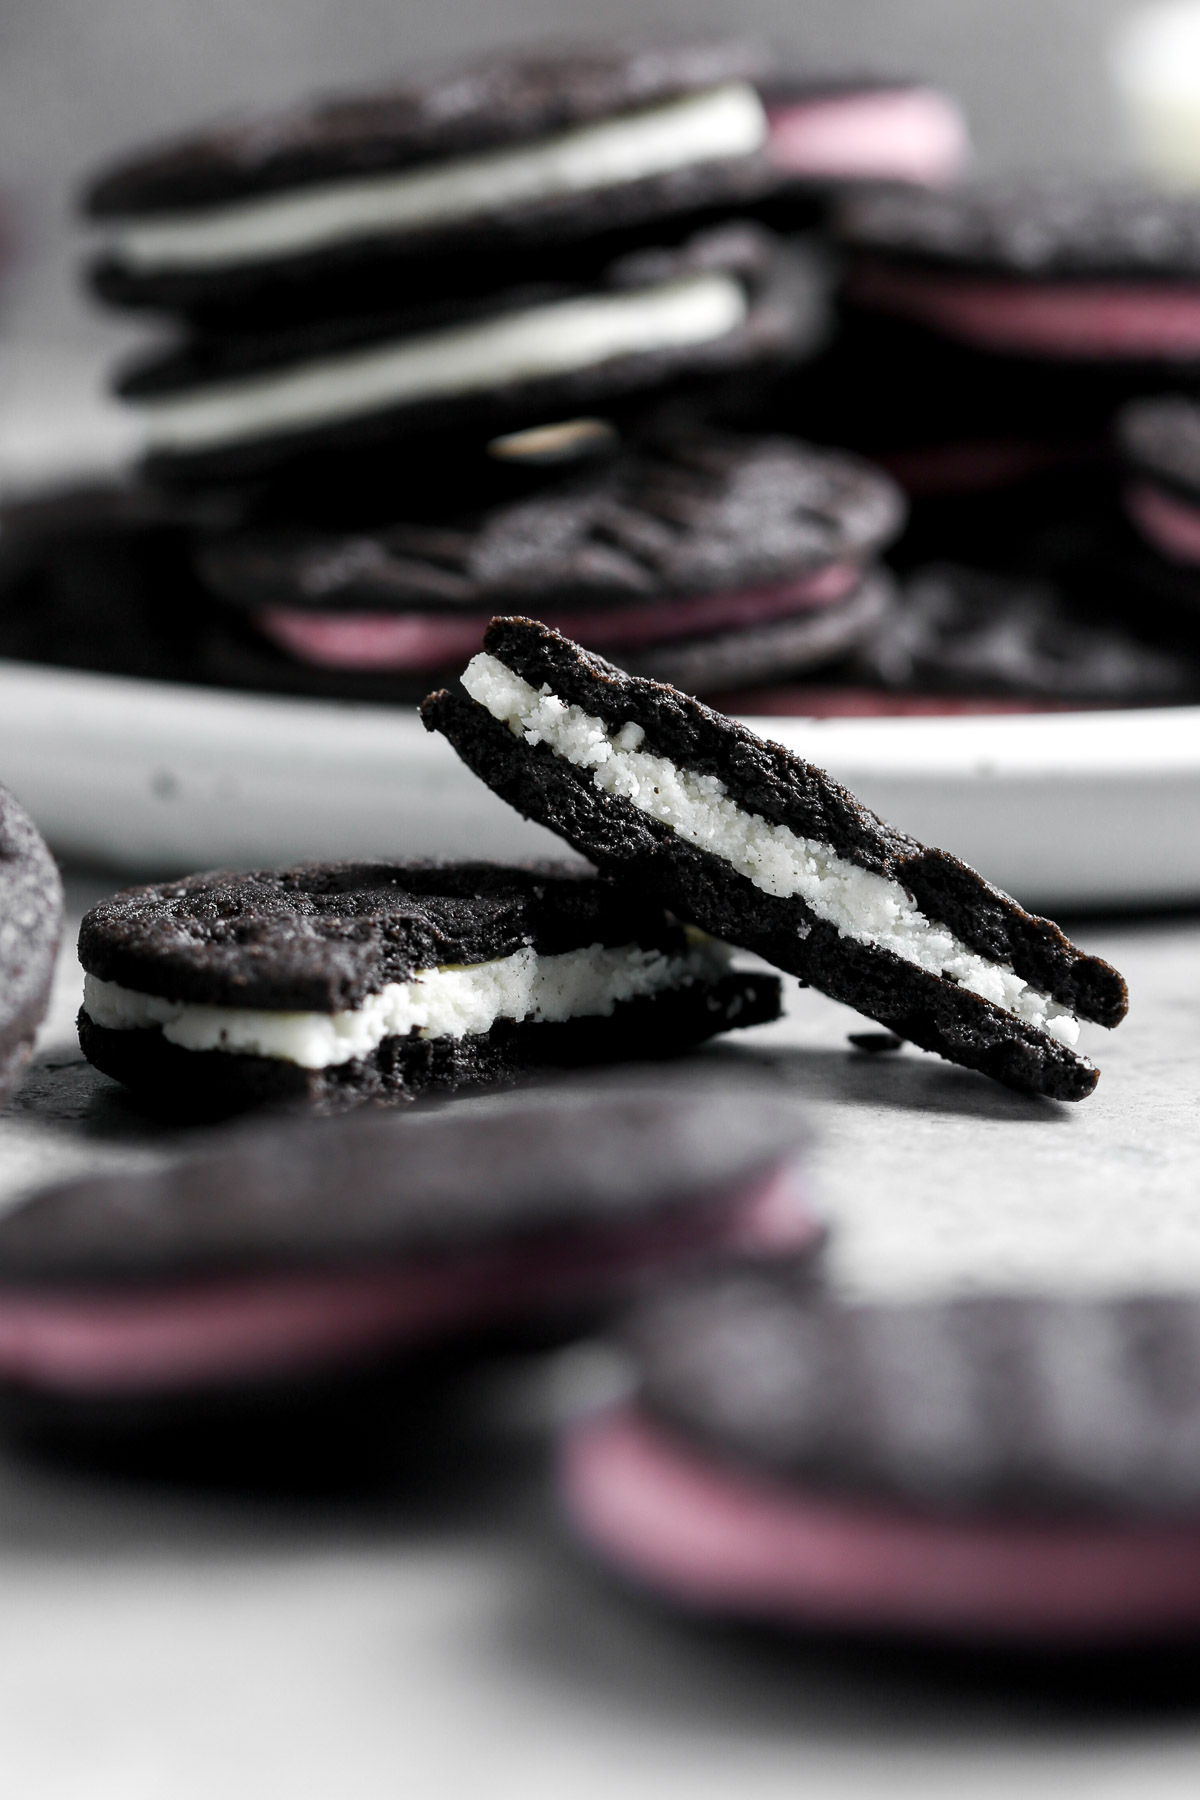
The key ingredient is coconut butter. Coconut butter is not coconut oil. Coconut butter is essentially puréed raw coconut meat. It’s a specialty ingredient that’s really worth seeking out. Generally, it can be hard to find in-store, so I recommend ordering some.
Key Ingredients
Step-by-Step Process
- Whisk together the melted butter, black cocoa powder and instant espresso powder; set aside.
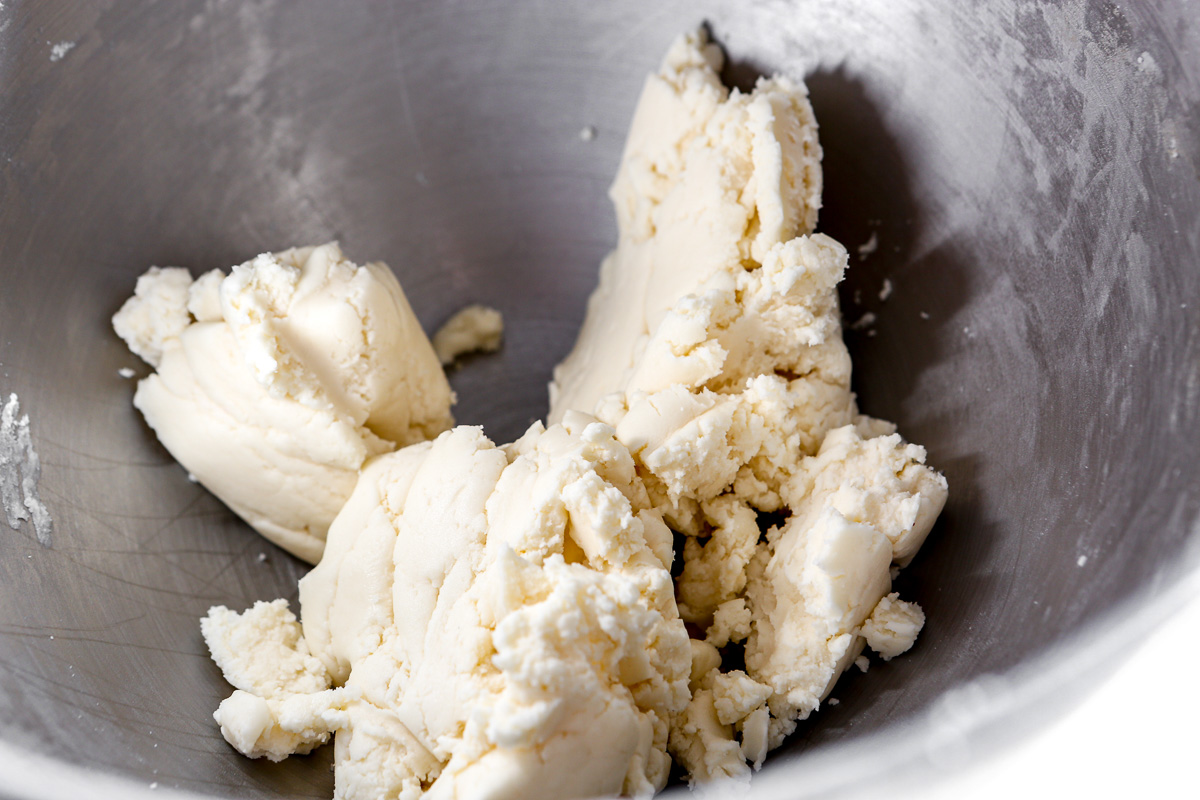
- Next, cream the softened butter and confectioners’ sugar until whipped and creamy. Be patient, it will start off as dry and crumbly, but as it comes together it will smooth out.
- Add in the cocoa-butter mixture and beat until creamy and whipped.
- Add in the egg yolk and vanilla and mix to combine.
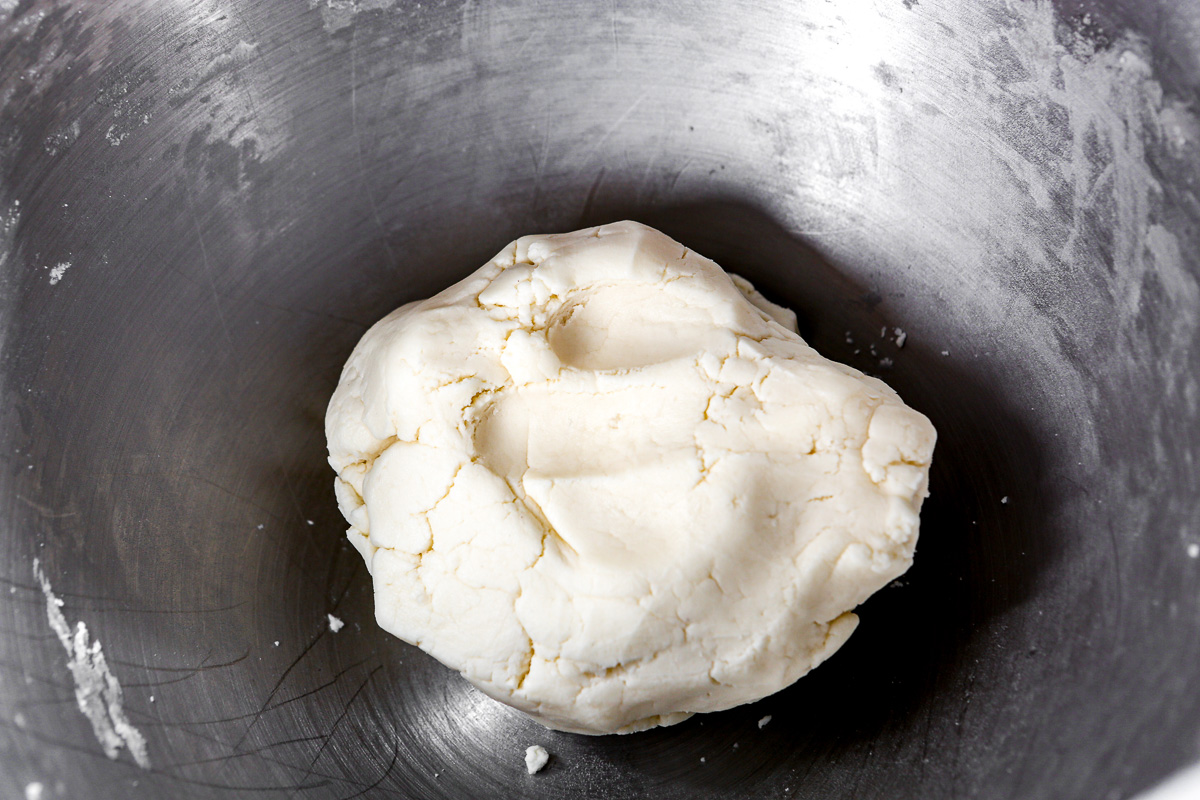
- Gradually add in the flour and mix until a dough comes together.
- Roll out the dough between two pieces of parchment paper until it’s 1/8-inch thick. Cut the dough out into 2-inch rounds and place on a parchment-lined baking sheet.
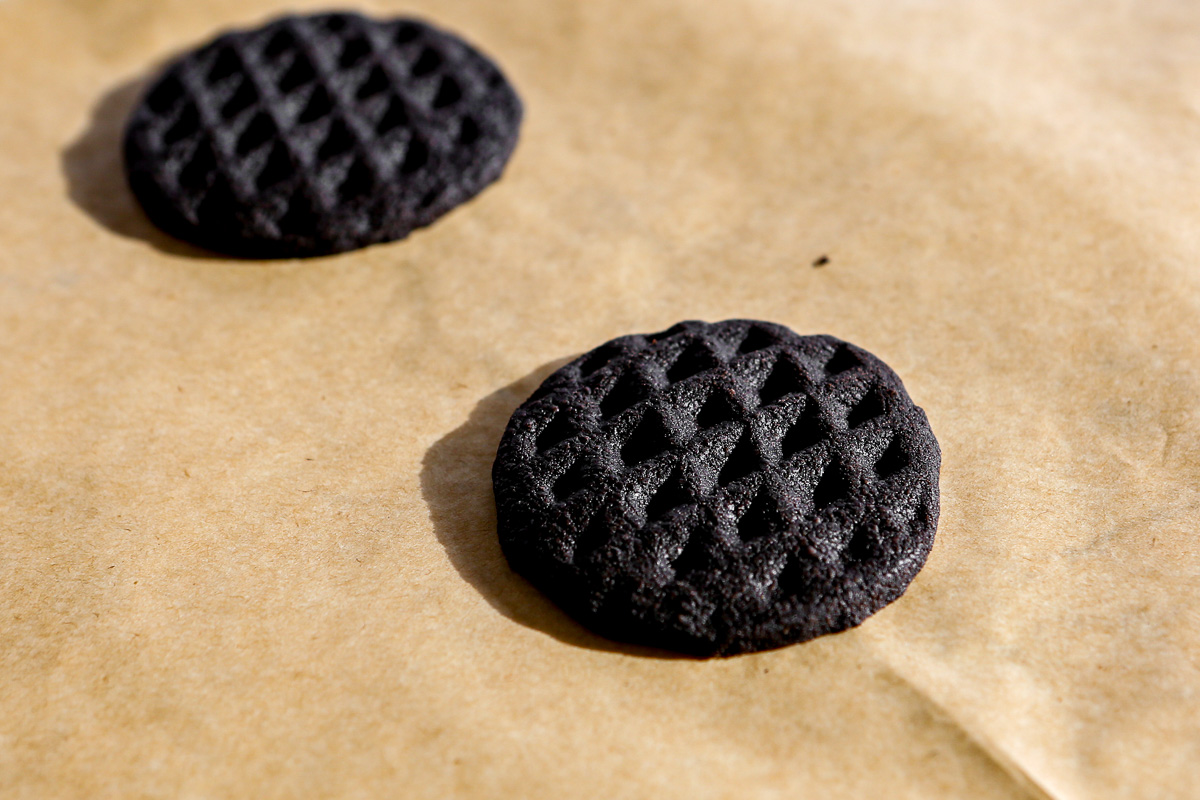
- Bake the cookies for 5 minutes, then remove from the oven and lightly press a cookie stamp down on the cookies. Return the cookies to the oven and bake until the edges are set, about 10 more minutes.
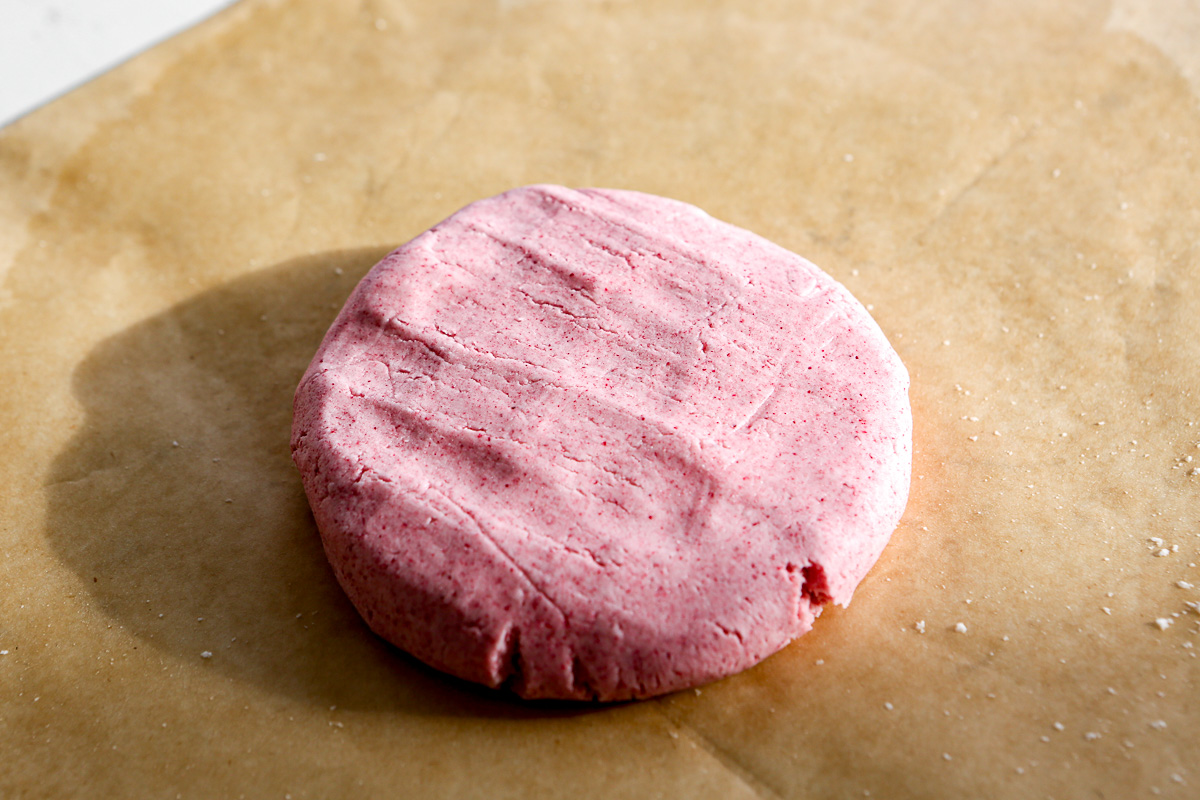
- While the cookies bake and cool, whip up the filling by beating together confectioners’ sugar, coconut butter, softened butter and vanilla. Mix in any added colors or flavors of your choosing.
TIP: coconut butter solidifies at room temperature—nothing a quick 30 seconds in the microwave can’t soften up. Just be sure to remove that lid before popping the jar in the microwave.
- Roll the filling out between two sheets of parchment paper to 1/4-inch thick. Cut the filling out into 2-inch rounds (same cookie cutter used for the cookies) then sandwich between two cookies.
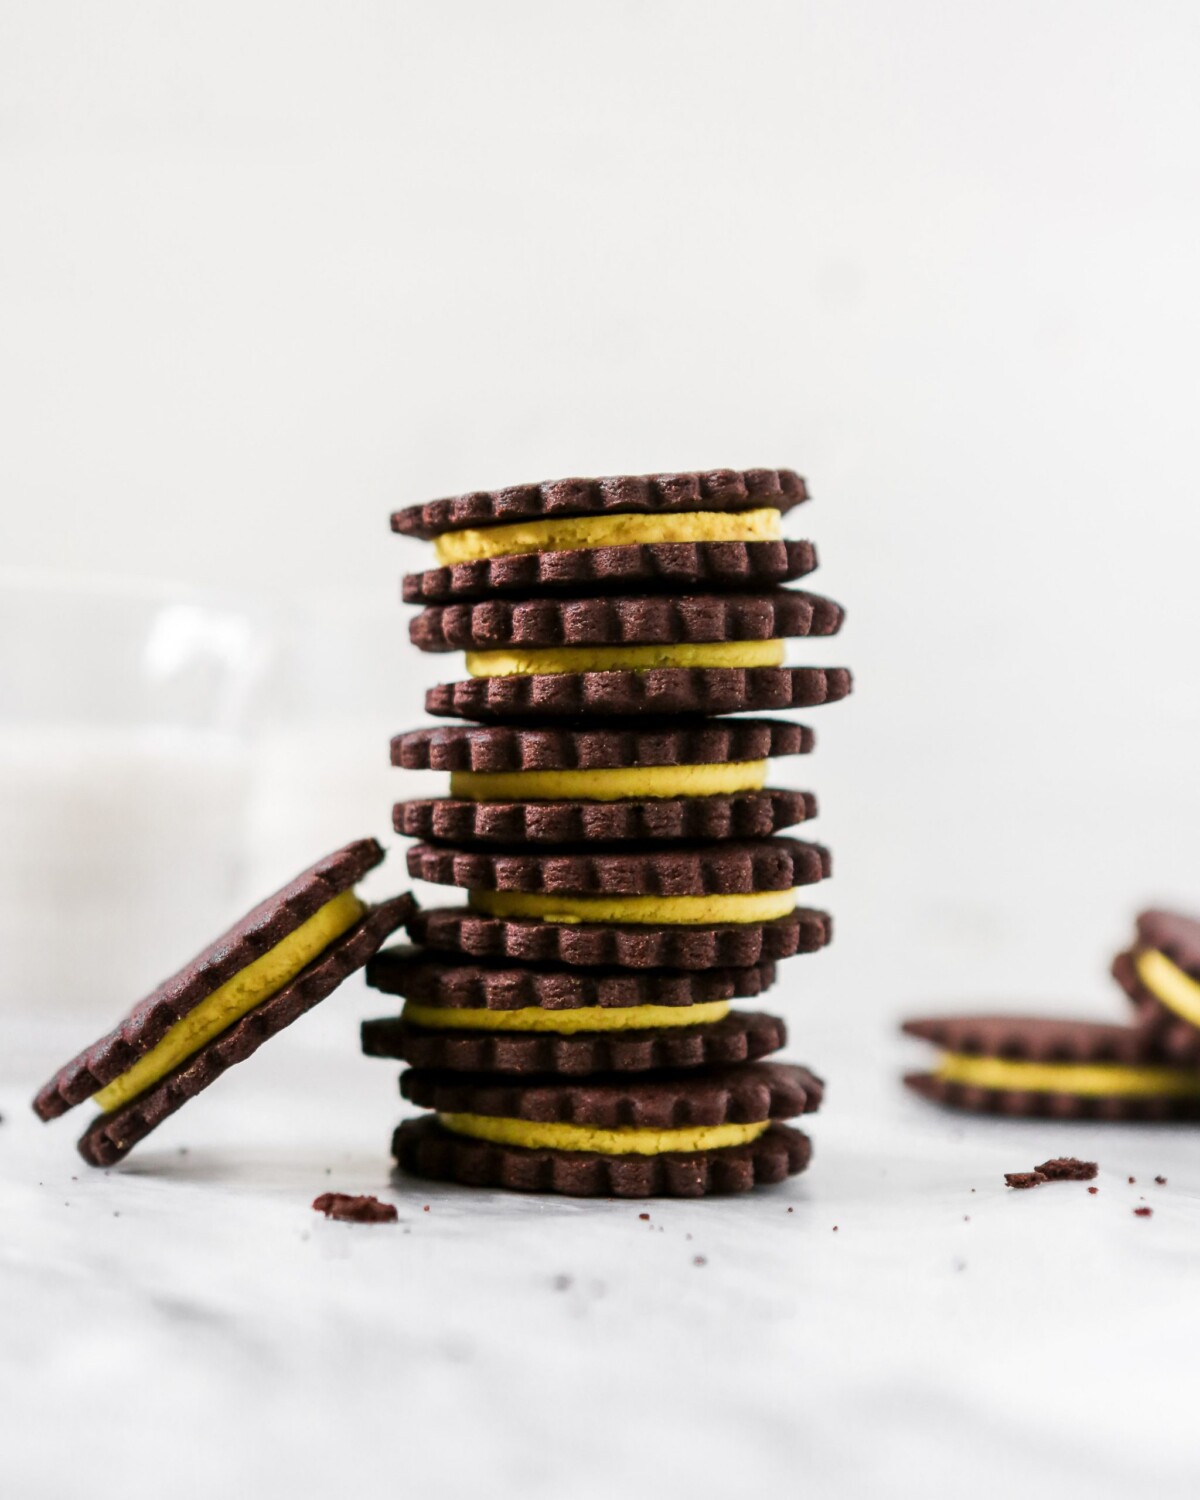
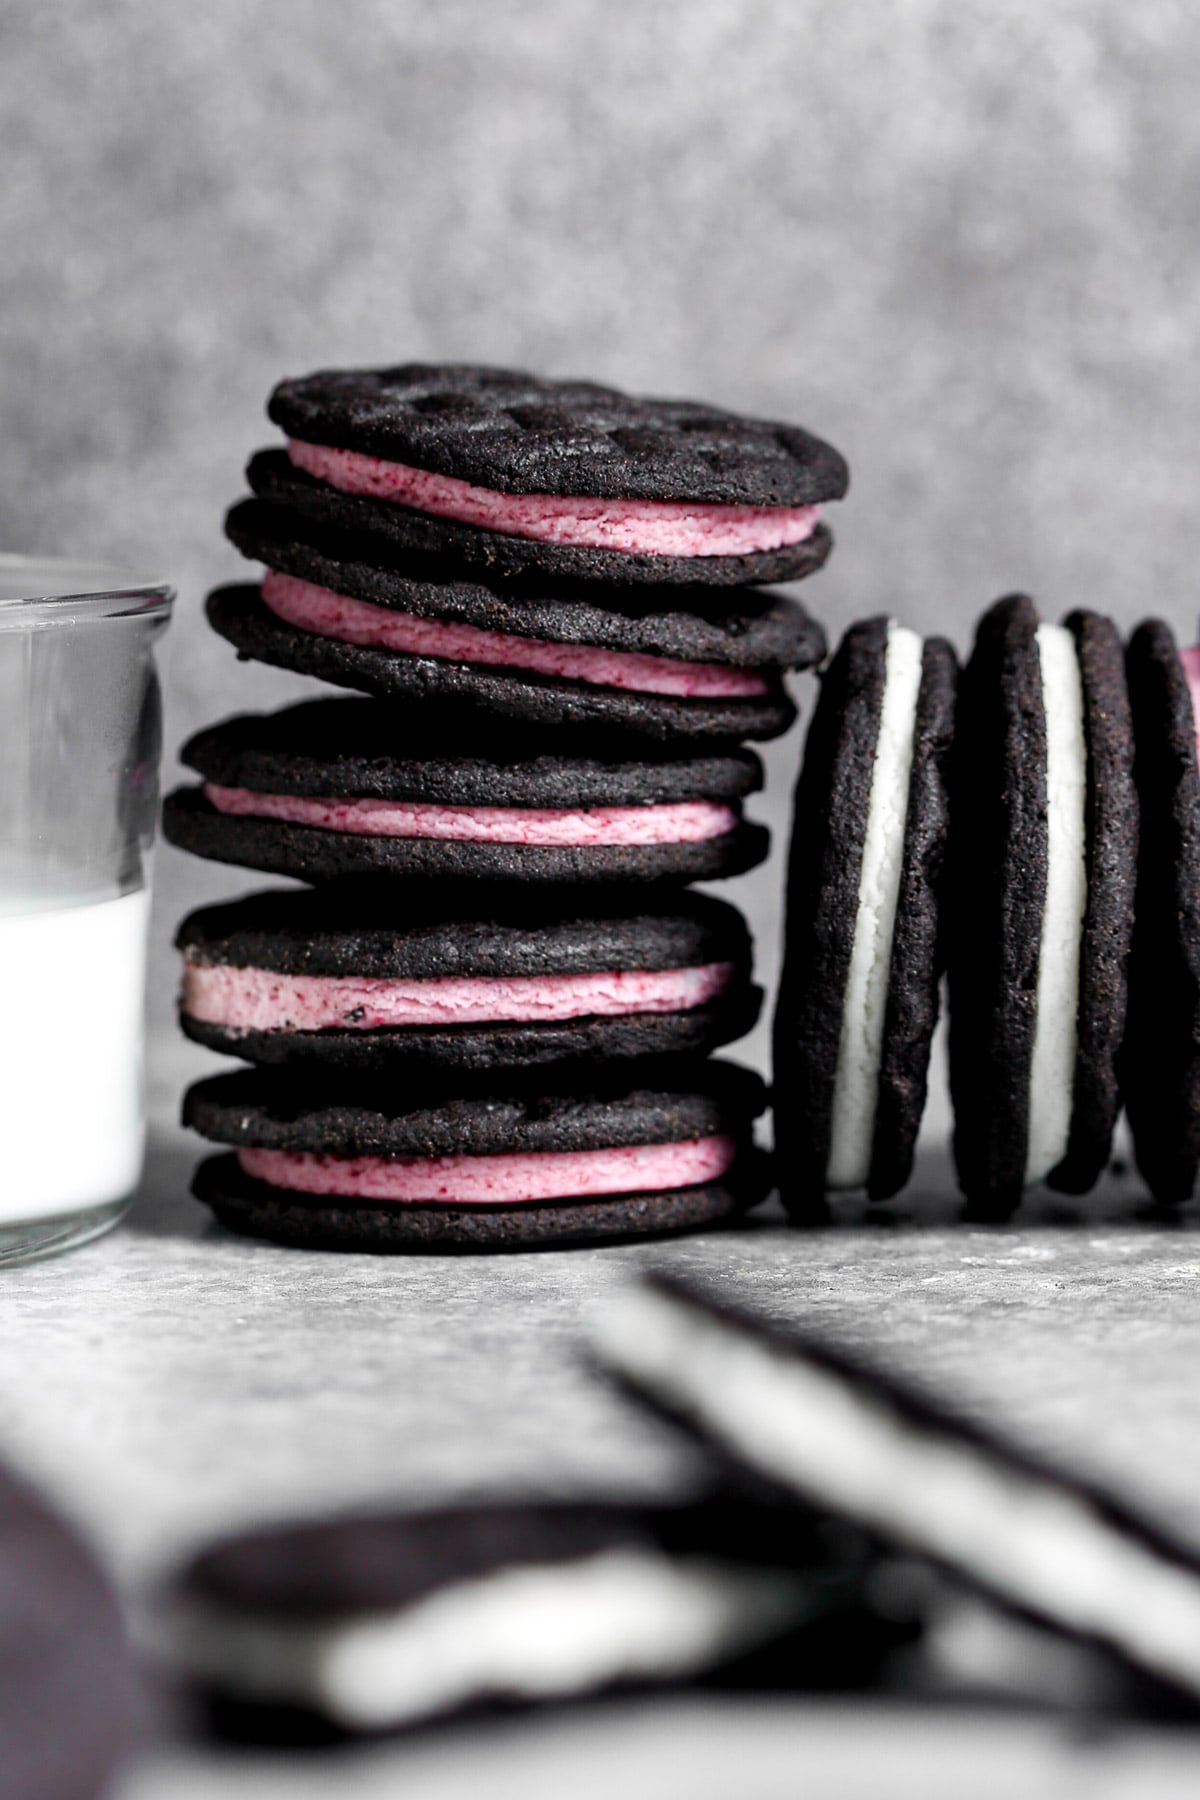
Flavor the Filling
As-written, the filling is classic vanilla. But feel free to play around with added colors or flavors. For natural-coloring, try adding a dash of turmeric, spirulina or matcha. A drop or two of food coloring also works.
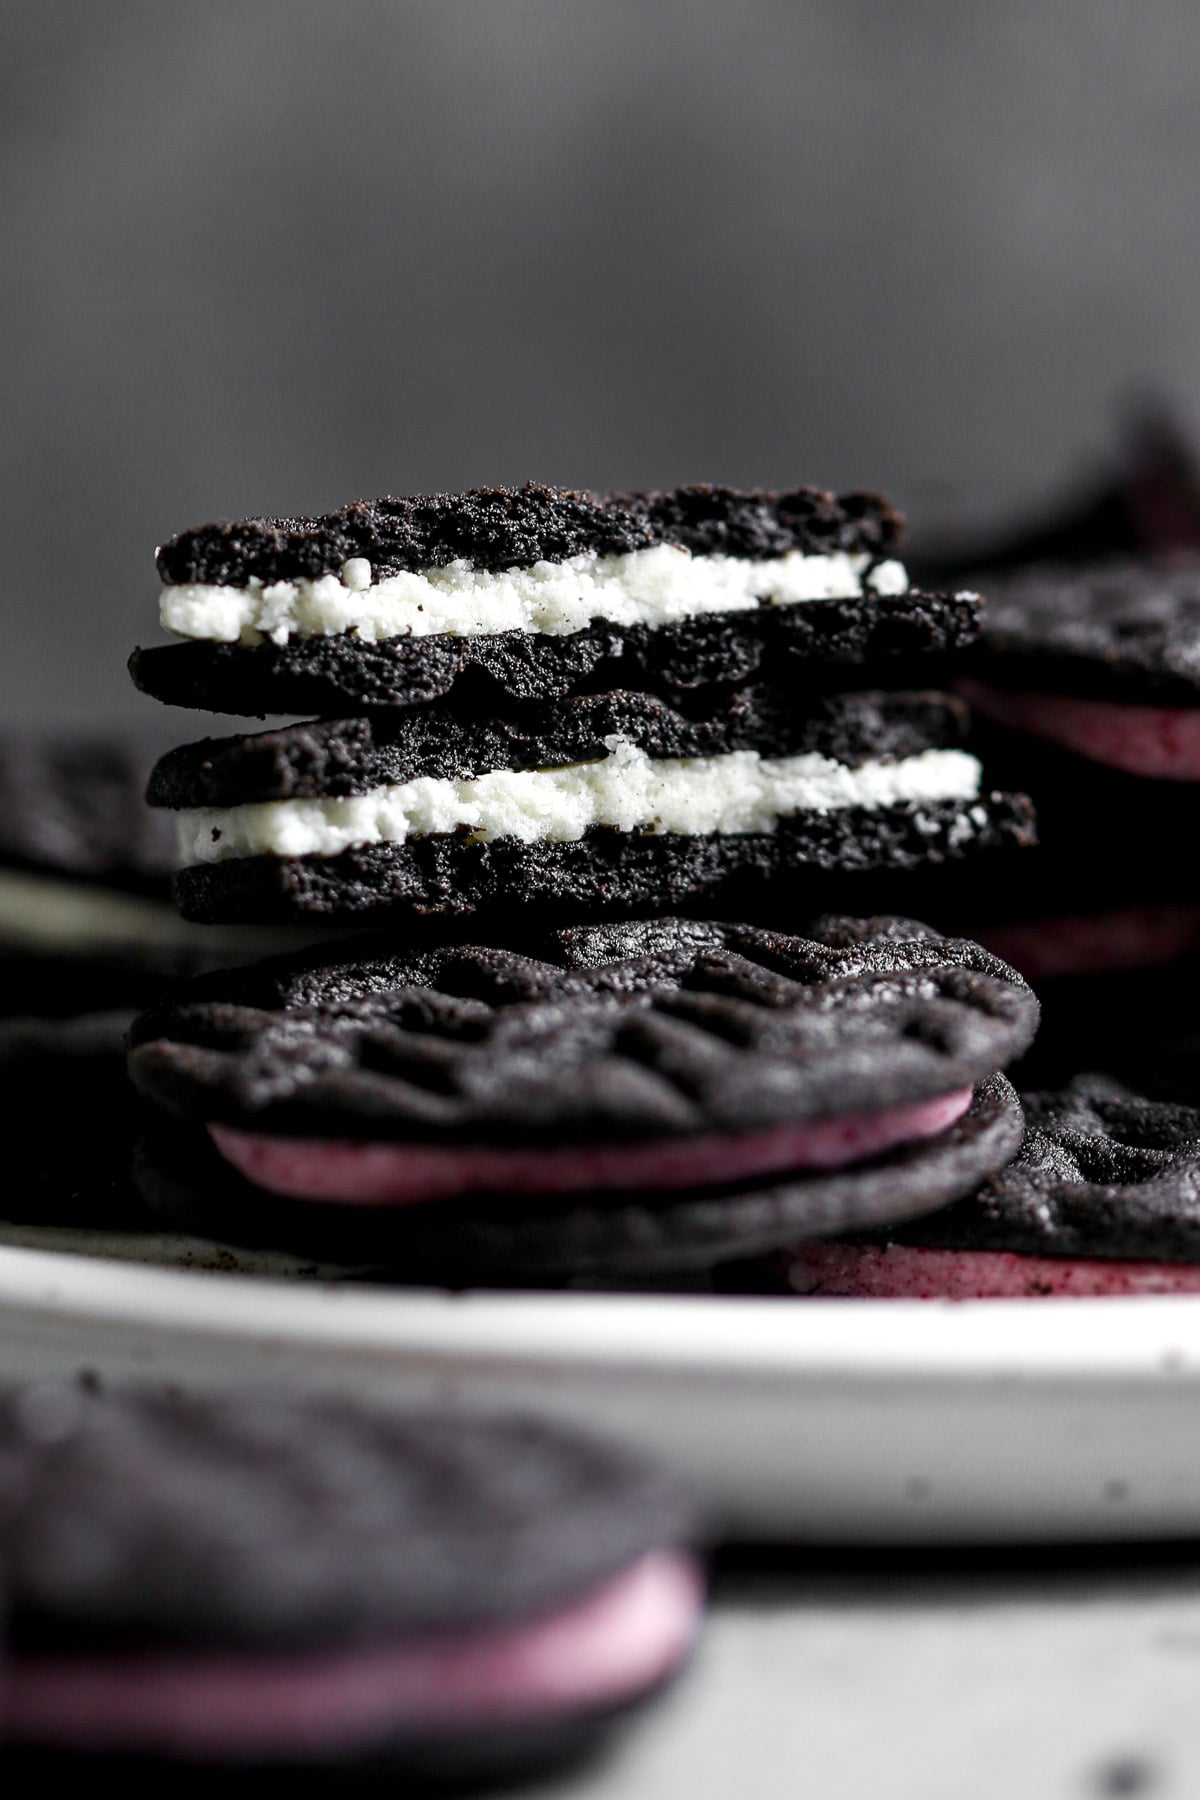
Then for added flavors, I like to blend in ground and sifted freeze dried raspberries or strawberries (pictured) or a dash of mint extract.
Storage & Make Ahead
Stored in an airtight container, homemade Oreos can last up to 1 week.
For longer storage, store baked, but not filled, cookies in an airtight container in the freezer for up to one month.
Form filling into a disk, wrap tightly with plastic wrap, and freeze for up to 1 month. Thaw the filling completely before rolling, cutting, and filling cookies.
Homemade Oreos
Description
Save This Recipe!
Ingredients
For the Cookies
- 8 tablespoons unsalted butter, softened and divided
- ⅓ cup (40g) black cocoa powder
- 1 teaspoon instant espresso powder
- 1⅓ cups (138g) confectioners' sugar
- ¾ teaspoon table salt
- 1 large egg yolk
- 1½ teaspoons pure vanilla extract
- 1 cup (130g) all-purpose flour, or gluten-free flour blend
For the Filling
- 1½ cup (150g) confectioners’ sugar, sifted
- 6 tablespoons (90g) coconut butter
- 3 tablespoons (45g) unsalted butter, softened
- ¾ teaspoon pure vanilla extract
- turmeric, freeze dried raspberry powder, spirulina or food coloring, for color, optional
Instructions
For the Cookies
- Adjust oven rack to middle position and heat oven to 325°F (163ºC). Line 2 baking sheets with parchment paper.
- Melt 3 tablespoons butter in a microwave-safe bowl. Whisk ⅓ cup (40g) cocoa powder and 1 teaspoon espresso power into melted butter until smooth; set aside.
- Using a stand mixer fitted with paddle attachment, blend remaining 5 tablespoons softened butter, 1⅓ cups (138g) confectioners' sugar and ¾ teaspoon salt together on low speed, gradually increase speed as it comes together and beat until light and creamy. Scrape down sides of bowl and add cocoa mixture; beat on medium-high speed until fluffy, about 2 minutes, scraping down sides of bowl as needed.
- Add egg yolk and 1½ teaspoons vanilla and beat until combined, about 30 seconds.
- Decrease mixer to low speed and add 1 cup (130g) flour in three additions, mixing after each addition; scrape down sides of bowl as needed. Continue to mix until a cohesive dough comes together, about 30 seconds.
- Using your hands, firmly press dough into a large disk (you may have to work it a bit). Break in half then roll half of dough to ⅛-inch thick between two sheets of parchment paper.
- Cut dough into rounds using a 2-inch round cookie cutter. Transfer rounds to prepared baking sheets, spaced 1-inch apart.
- Bake cookies 5 minutes, then remove from oven and using a cookie press, lightly press just to imprint design into each dough round (do not press hard or you risk spreading the dough too thin). Return sheet to oven and bake until dry to touch and edges are set, 9–11 minutes more (total bake time 14–16 minutes).
- Let cookies cool on sheet 5 minutes then transfer to wire racks to cool completely. Repeat rolling and baking with remaining dough and scraps.
For the Filling
- Beat 1½ cups (150g) confectioners’ sugar, 6 tablespoons (90g)coconut butter, 3 tablespoons (45g) butter, and ¾ teaspoon vanilla together in a stand mixer fitted with the paddle attachment (or with a hand-held blender) until a dough comes together (should feel similar to play-doh). Add coloring if desired and mix to incorporate.
- Roll filling to ¼-inch thickness between two pieces of parchment paper. Cut filling into rounds using a 2-inch round cookie cutter.
- Sandwich each filling round between two cookies, gently pressing so filling spreads to edges.
- Store cookies in an airtight container at room temperature for up to 1 week.
Notes
Make Ahead:
Cookie dough can be made up to 3 days before rolling, cutting, and baking. Just form the dough into a disk (or two), wrap tightly with plastic wrap, and refrigerate. Filling can be made up to 3 days in advance. Form the filling into a disk, wrap tightly with plastic wrap, and refrigerate until ready to use. The filling will need to sit at room temperature for 30–60 minutes before being soft enough to work with. Because of that, I recommend pulling it of the refrigerator when you start rolling out your cookie dough. Filling Flavor Variations: To make the berry-flavored filling, blend freeze dried raspberries or strawberries into a powder using a mini food processor. Pass the powder through a fine mesh sieve to filter out the seeds. Then add 3 teaspoons of the sifted powder to the filling and beat to combine. To make a mint filling, add ⅛ teaspoon spearmint extract to the filling; beat to combine then taste and add more extract, by drop, until desired mint flavor is reached.Nutrition
This post was sponsored by NuLife Market, as always the thoughts, opinions, recipe, photos, and content are all my own.
This post contains affiliate links, thanks for supporting all things ZK!
Hello! I have yet to make this recipe (although I plan to) and I was wondering if the instant expresso is necessary. My mom and I are gluten free and, while I love coffee, she can’t stand the flavour. How important is it to the recipe? Just for colour, for flavour, etc.? Thank you!
Hi Lillian! You can totally skip the espresso powder—it’s just there to enhance the chocolate flavor! A teaspoon of espresso shouldn’t give a discernible coffee flavor, it should just enhance the chocolate! But you can totally skip it. 🙂
Can I use regular sorghum flour ?
It’s impossible to find black sorghum in my country ..
Yes, definitely! Regular sorghum flour will work great here.