This post may contain affiliate links.
I’ve been developing recipes for more than ten years, and early in my career I worked with a sorghum company to develop gluten-free baked goods and meals. So I know how tricky gluten-free baking can be!
This recipe has been tested and tested and tested. And it’s proven to be one of the most reliable gluten-free crust recipes time and time again. It’s easy, requires no special ingredients, and comes out flaky and crisp every time.
What flour to use for gluten-free quiche crust?
Arguably the most important part of gluten-free baking is the flour blend you choose to use.
In general, it’s important to find a blend that works at a 1:1 ratio to regular all-purpose flour.
There are quite a few on the market now but a few things to look for in a blend are:
- Xanthan gum should be listed as an ingredient
- Have at least one type of starch listed in the ingredients (such as tapioca or potato
I really like Bob Red’s Mill 1:1 gluten-free baking flour.
Gluten Free Crust Recipe Ingredients
All-purpose gluten-free flour blend: I like Bob’s Red Mill or King Arthur for this.
Sugar: just a tablespoon is needed. If you’re making a pie, I would consider increasing the sugar to 2 tablespoons.
Salt: just a half a teaspoon of kosher salt to enhance the flavor.
Butter: use cold, unsalted butter for the best results. If you’re using salted, reduce the added salt to just a pinch.
Egg: you’ll need a large egg. This is key for keeping the dough together and achieving structure.
Vinegar: traditionally for a regular pie crust, vinegar is added to reduce gluten development. But that’s not why I use it here. First, it keep the dough from oxidizing (purely important for appearance) and secondly, I think it really boosts the flavor of the crust. You can certainly skip it and use additional water instead.
Quiche Crust Recipe Tips
Making a gluten-free quiche crust (or gluten-free pie crust) is just as simple, if not a bit easier, than making a regular crust using regular all-purpose flour.
The aspect that makes gluten-free baking so challenging also makes it less stressful—at least in this application.
When it comes to making any quiche crust or pie crust, it’s important to not overwork the dough. In order to create a flaky crust, the key is to mix the ingredients together without mixing too much and encouraging gluten formation.
Well that isn’t an issue in gluten-free baking. A blessing and a curse in most cases. But here, when making a gluten-free quiche crust it’s actually helpful! We can work the fat into the flour without worry too much about over mixing.
How to make a gluten-free quiche crust (or gluten-free pie crust):
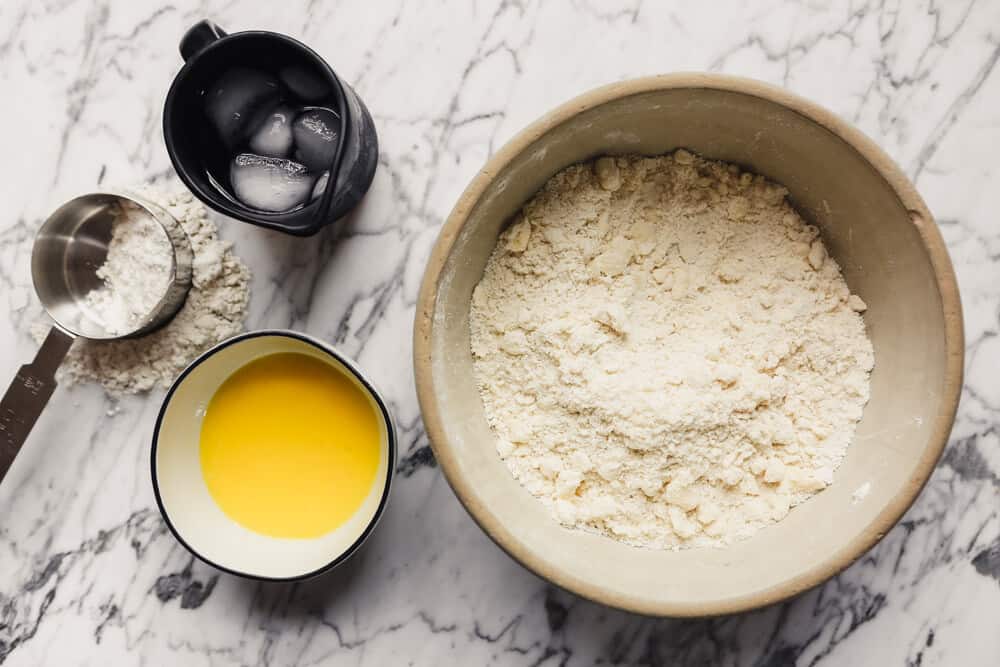
Step 1: Measure or weigh (I love this scale) out your dry ingredients. Combine dry ingredients (flour, sugar, salt) in a large bowl.
Step 2: Cut butter into dry ingredients using a pastry blender or by pulsing in a food processor.
Step 3: Beat egg and vinegar together then add to butter-flour mixture and use a spatula to mix just until combined.
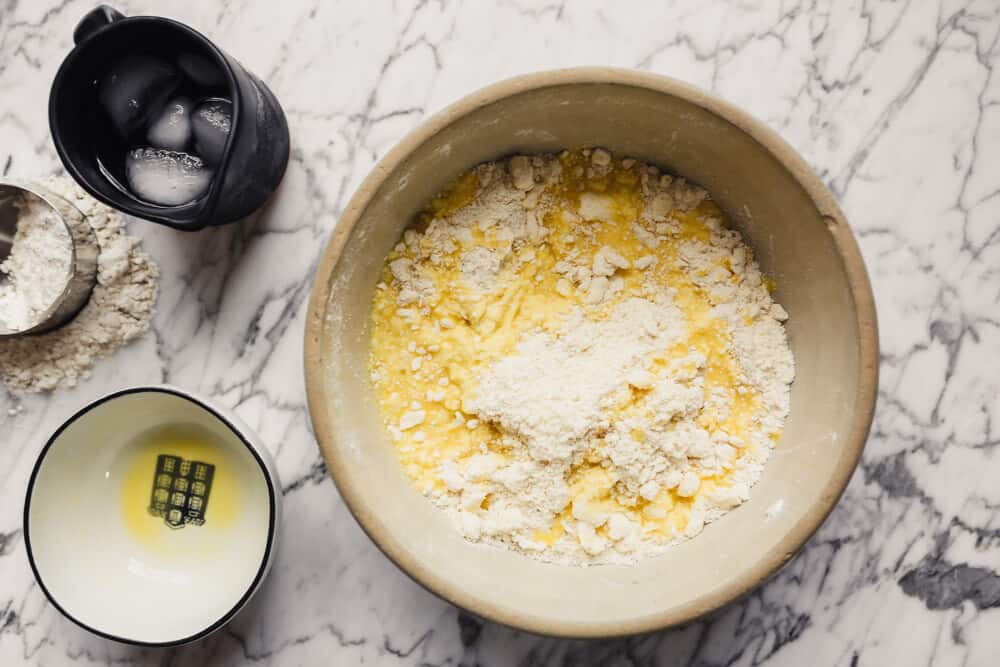
Step 4: Add water to flour mixture, 1 tablespoon at a time, gently mixing after each addition, just until a dough comes together.
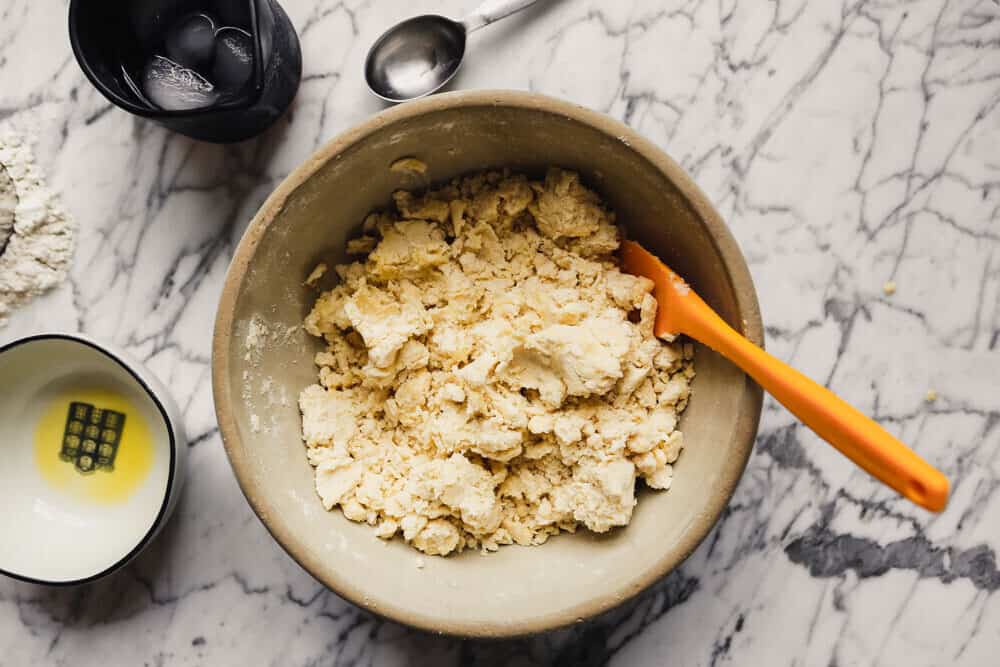
Step 5: Form dough into a disk, wrap with plastic wrap, and chill in the refrigerator for at least 1 hour.
Step 6: Use as directed in your favorite gluten free quiche or pie recipe!
Gluten Free Quiche Crust Variations
Pie Crust
You can definitely use this gluten-free quiche crust as a pie crust. The only change I would make would be to increase the sugar from 1 tablespoon to 2 tablespoons.
As the recipe specifies, it makes one single crust for a deep dish pie plate or two crusts for a regular pie plate. So double the recipe if needed.
Tart Crust
This crust can also be used for sweet or savory tart crusts. If the recipe you’re using calls for a pre-baked or partially-baked tart crust, blind bake it using parchment paper and baking weights (instructions are in the recipe card).
You can also use to as a free-form tart crust which are used to make galettes.

Gluten Free Pie Crust Recipe
Description
Save This Recipe!
Ingredients
- 2 cups (269 grams )all purpose gluten free flour blend, such as Bob's Red Mill
- 1 tablespoon sugar
- ½ teaspoon salt
- 12 tablespoons cold unsalted butter, diced
- 1 large egg, beaten
- 1 tablespoon white vinegar
- 2 –3 tablespoons ice water
Instructions
By hand:
- Whisk together flour, sugar, and salt in a large bowl. Cut butter into flour mixture using a pastry cutter until butter is pea-sized.
- Whisk egg and vinegar together until foamy, then stir into flour mixture just until combined. Add water 1 tablespoon at a time, mixing after each addition, until a dough comes together.
Food processor:
- Add flour, sugar and salt to a food processor. Scatter butter over flour and pulse until it resembles a very coarse meal with some butter pieces pea-sized. Whisk egg and vinegar together until foamy then pour over flour-butter mixture, pulse just until combined, about 5 pulses. Add water 1 tablespoon at a time, pulsing after each addition, until a dough comes together.
- Form dough into a disk (for a single deep dish crust) or form into 2 disks (for two regular crusts, or a regular double-crust pie), wrap tightly with plastic and chill at least 1 hour.
- Use as directed in favorite quiche or pie recipe.
For a single pre-baked deep-dish quiche crust:
- Heat oven to 375° with rack set in middle position.
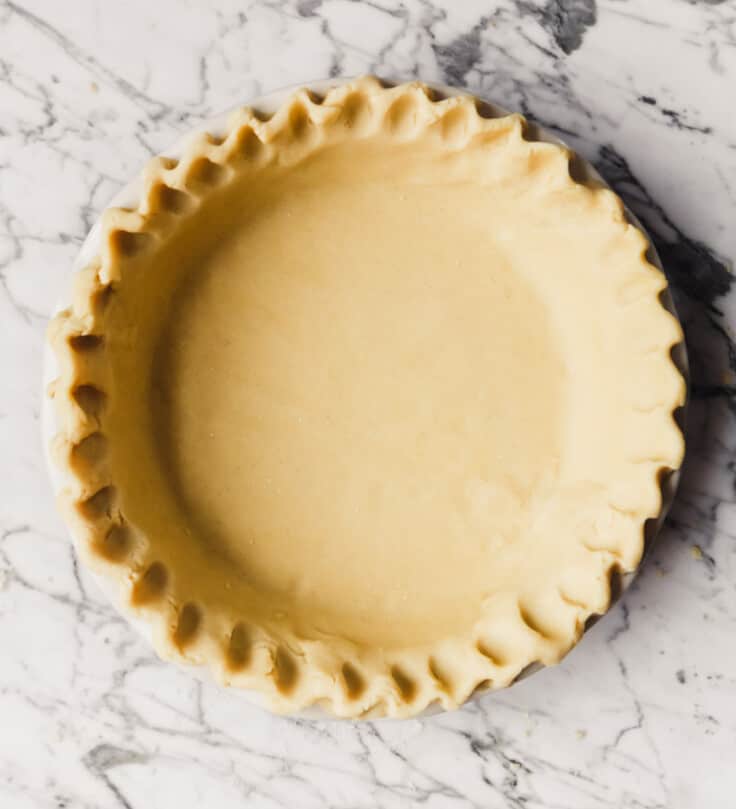
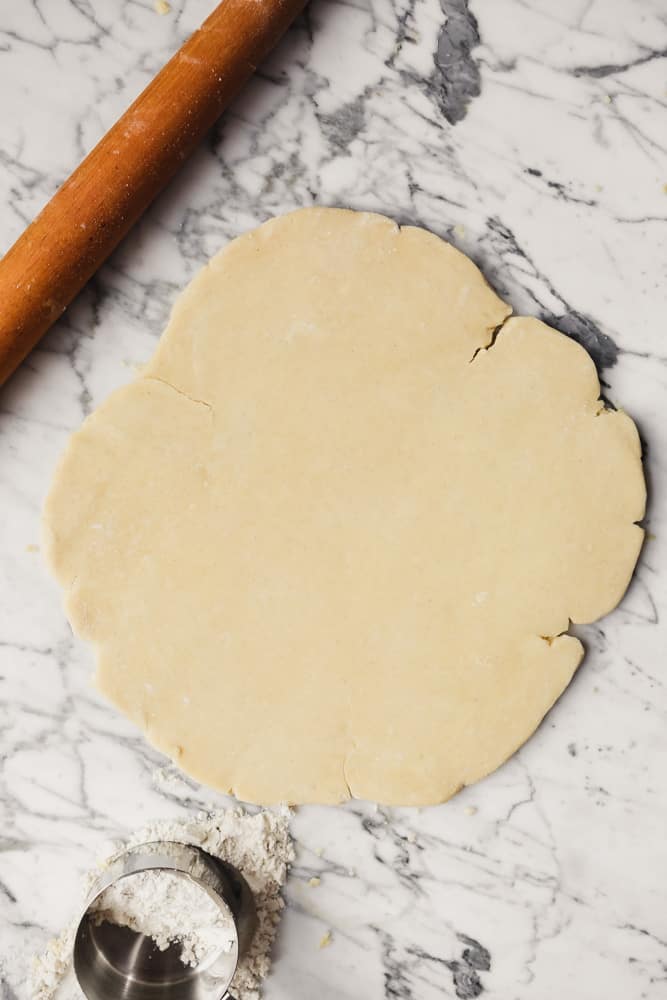
- Roll dough out into an 11-inch, ¼ -inch thick round, transfer dough to a 9-inch deep dish pie plate and gently press into bottom and up sides. Fold edges under and crimp, freeze 20 minutes. Line pie shell with parchment paper and fill with baking weights or beans.
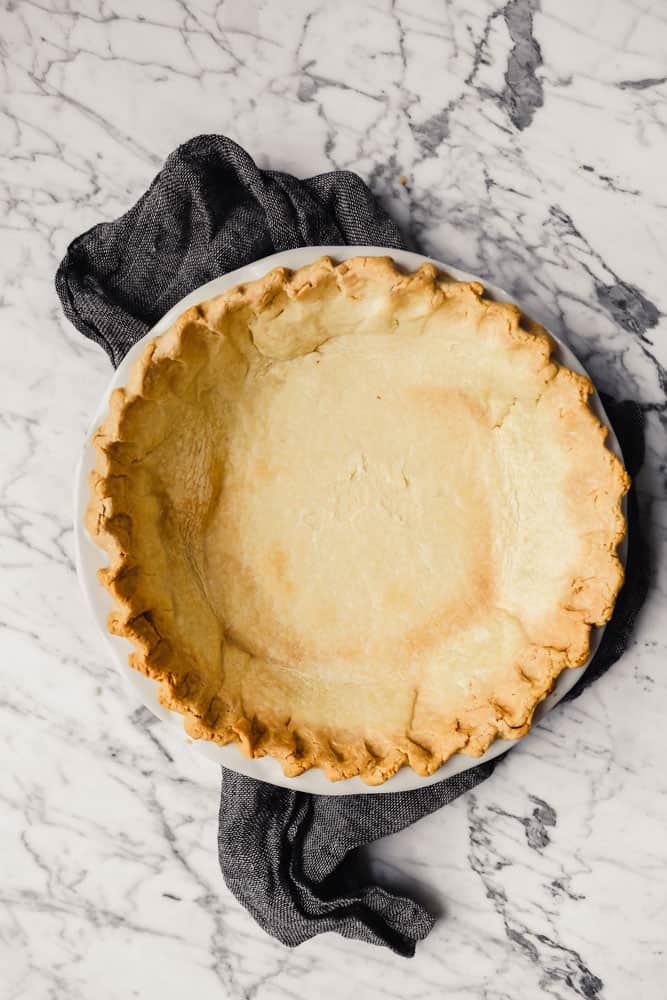
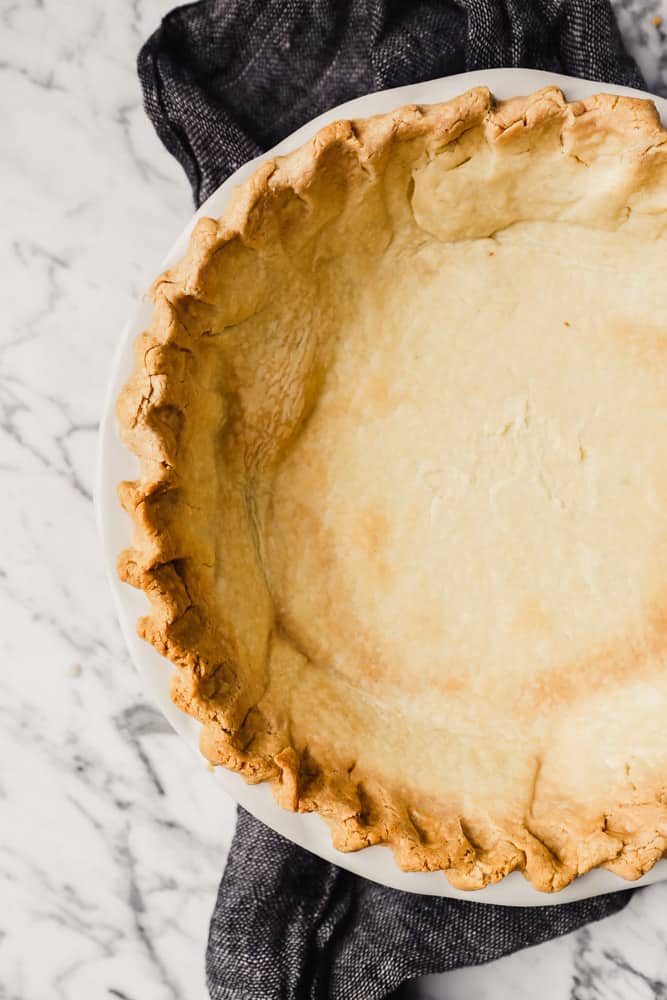
- Bake crust until edges are golden brown, and bottom is set 40–45 minutes. Remove parchment and baking weights, and bake until bottom is golden brown about 15 minutes more. Use as desired according to quiche or pie recipe.
Everyone needs a great pie crust recipe… & gluten free makes it even better! Can’t wait to try this recipe
Thanks Amy! It’s great for sweet or savory too!
Made this over the long weekend for my mom since she’s gluten free and it the quiche turned out amazing! Thank you!
Yay! I’m so glad you tried it!! 🙂
Hi can this be frozen? raw or baked empyt
Hi Esther! Yes, it can be frozen either way! I prefer to freeze the dough crust raw but lined in the pie plate. To do so I line the pie plate with the dough and transfer it right to the freezer and freeze for an hour, or until frozen solid. Once it’s frozen solid, I remove it from the freezer and wrap it plastic wrap. Then I pop it back in the freezer and store it there until I need it! When ready to bake, remove the dough-lined pie plate, remove the plastic and bake as directed. No need to thaw it prior to baking, it may just need a few more minutes in the oven.
Hope that helps! 🙂
pre-bake as directed above or just fill and bake?
It depends on the quiche recipe you’re using with this crust, but most will call for pre-baking, then filling and baking again (with the filling). I would recommend following the instructions for pre-baking.
Here is a quiche recipe that uses this crust pre-baked (https://zestfulkitchen.com/gluten-free-quiche-crust-recipe/).
I hope that helps!
Hi Lauren This is my second time trying your recipe. It is really wonderful. I have a question. Must I bake the crust prior to making the quiche. I tried that the first time and the crust was delicious but very cooked after I added the quiche cooking time.
thanks
Hi Corey! I’m glad you’re enjoying the recipe! It’s important to bake the crust prior to filling it with the custard mixture, without that initial baking step the crust will come out soggy and wet on the bottom. I would recommend decreasing the blind bake time to 30–35 minutes and then decreasing the uncovered portion of baking to 5–8 minutes. Are the edges the part that’s getting over-baked? If that’s the case, I would recommend covering the edges with a thin strip of foil, that will shield the edge from heat and keep it from browning.
I hope that helps!
Can you chill the crust overnight and then bake in the morning?
Yes, absolutely! I would just make sure to wrap the crust in plastic so it doesn’t dry out.
I’m curious if the vinegar is necessary? Because normally isn’t it used to stop gluten development to make it more flaky but there’s no gluten.
Hi Perry, I find the addition of vinegar helps to create a more tender crust. Gluten-free flour blends can lend toughness in baking and the evaporation of the vinegar during baking helps with that. You can certainly try it without the vinegar, but I would replace it with a bit more water. My only fear is the crust will come out harder. Let me know how it goes!
Finally! A flakey gluten-free crust! (I made a quiche). I used King Arthur all-purpose gluten free flour and used glass pie plates. When pre-baking the crust, I didn’t have parchment paper or weights? so I just poked fork holes in the bottom of the crust and cooked for 30 minutes and it was perfectly ready for the filling. Then cooked my quiche for 30 minutes and it came out perfect.
Hi Kaera! I’m so happy to hear it turned out flakey! And that it worked well without the pie weights and parchment—great tip for other readers. Thanks for sharing that!
A fantastic recipe that I have just printed out because my family really enjoyed the quiche crust it made. Thanks!
I’m so glad your family enjoyed this crust recipe!! Enjoy all your future quiches!
Easy to make
Great flavor
I only used 3/4 of the crust because I didn’t make a deep dish
Yum! Really delicious! The vinegar definitely made for a flakey crust. Thank you!!
I’m so glad you enjoyed this one! 🙂
This was an awesome recipe! I have made other GF crusts and had pretty much given up on making a quiche crust. This was so easy to work with, flaky, and delicious!! I’d love to use this for a sweet pie. Are there any alterations that could accomplish this?
Hi Sue! I’m so glad you found this recipe to be easy to work with, and most importantly, flaky!!
I have been meaning to test this with a sweet pie but haven’t gotten around to it. The most important thing to keep in mind is how long the pie filling will need to bake. I recommend at least partially blind baking the crust before filling and baking again (this just ensures the crust will be crisp and flaky). If the filling needs a long time—keep an eye on the edges of the crust and cover them with foil if needed. Otherwise, I wouldn’t change anything!
Let me know if you have any other questions!
Oh my goodness. This crust is a keeper. And so easy! I put it together last night and blind baked it this morning. Then I used it for a quiche. It was tasty and the texture was excellent. I’m not gluten free and sometimes miss a tradition crust. My son-in-law has celiac disease so this crust made us both so happy. I used the King Arthur Gluten Free Flour blend.
Yay! This just made my day. I’m so glad you enjoyed this crust recipe—such a great option for when serving those who don’t eat gluten and those who do—no one misses out!
I’m happy to hear the KA Gluten-Free Flour Blend worked well!
Excellent, flaky, easy GF crust
if this pie crust is completelybaked before adding the filling, i fer the edges would be badly burned after it was baked yet another 30 minutes with the filling.
An understandable concern! If the crust edges start to get too brown, use pieces of foil to shield them. This recipe for gluten-free quiche uses this crust recipe and it bakes for a full hour with the filling (after first blind baking) and it works just fine. Keep and eye on it, and use foil to shield the crust if needed.