This post may contain affiliate links.
This recipe has been tested, and tested, and tested some more. I’ve personally made it upwards of 20 times over the years—slowly tweaking and perfecting the crust, filling, bake temp, and bake time.
Pies are one of my favorite recipes to develop because making one is such an act of love. They take time and effort, so you aren’t making it for just anyone!
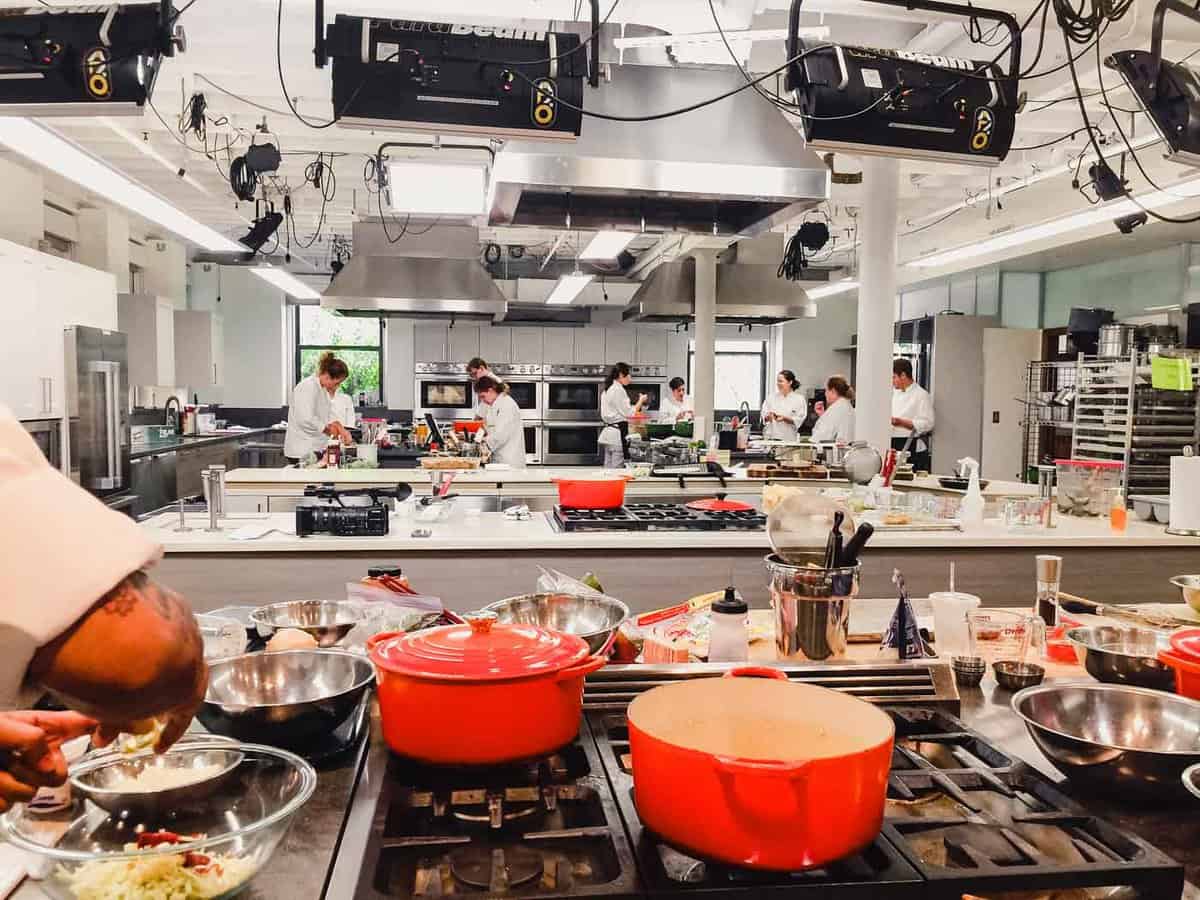
Back when I was an assistant editor at Cuisine at Home, I developed a pecan pie for the holiday issue and it was through that process that I learned how important pie plate size and depth really matters.
The pie plate you choose is so much more than just reaching for what you have on hand. It impacts bake time, crust thickness, and most importantly—crust-to-filling ratio.
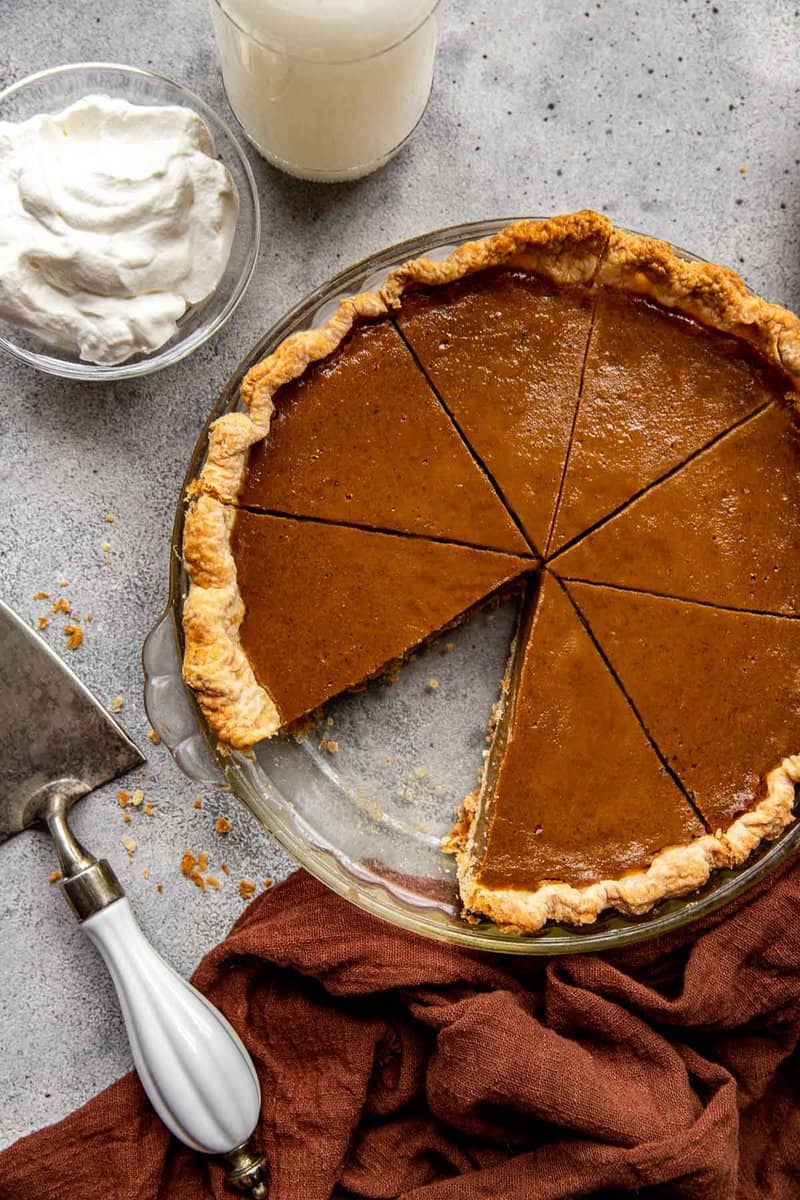
For this recipe, be sure to use a standard pie plate—not a deep-dish one. This matters for a few reasons, but the biggest is that it allows you to blind-bake and pre-bake the crust until it’s nearly done before adding the filling. Since there’s less filling, the final bake is shorter—which means the crust won’t overbrown or burn.
The Best Pumpkin Pie Recipe
What makes this the best? Well it starts with an all-butter pie crust (which uses the food processor for incorporating the butter—hello easy!). And since the food processor is already out and dirty, you’ll also use the food processor to make the filling. This recipe has a lot of steps, but once you read through it, you will find it’s as efficient as possible by using equipment and pans multiple times throughout the process.
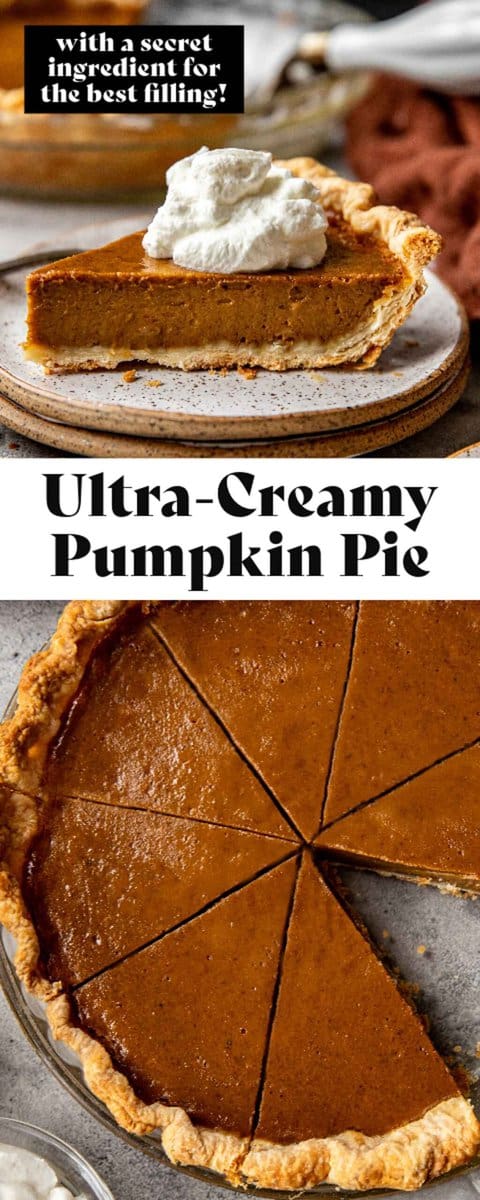
Plus, my secret ingredient makes the filling insanely creamy but also foolproof—it keeps the filling from cracking or weeping if over-baked. What is the ingredient? …Mayonnaise! Now before you knock it, hear me out. Mayonnaise is an emulsification, which means it stabilizes the filling. So, no cracks and once baked it has lovely custardy texture.
If you’re a beginning baker, intimidated by homemade pie, or simply want to level up the ho-hum pumpkin pie, this is the recipe to use. It truly is the best pumpkin pie recipe out there (in my opinion, of course!).
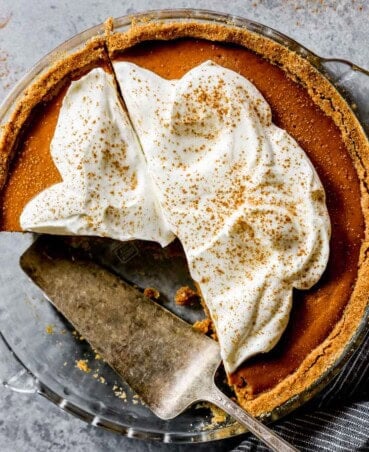
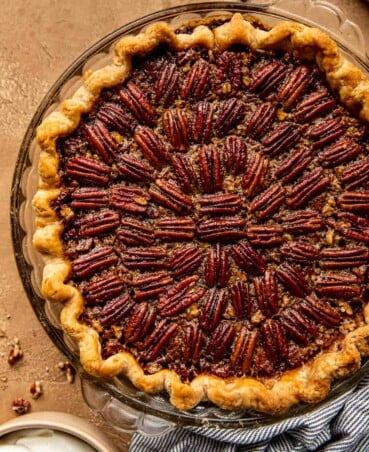
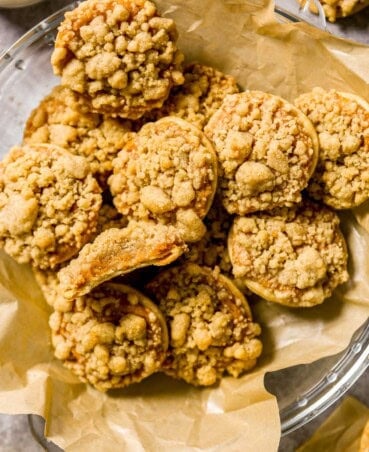
And don’t sleep on these other pie recipes! Maple pecan pie (infused with bourbon through and through), pumpkin pie with graham cracker crust, and my fun little pumpkin pie cookies are all great place to start.
Pumpkin Pie without Evaporated Milk Ingredient Notes
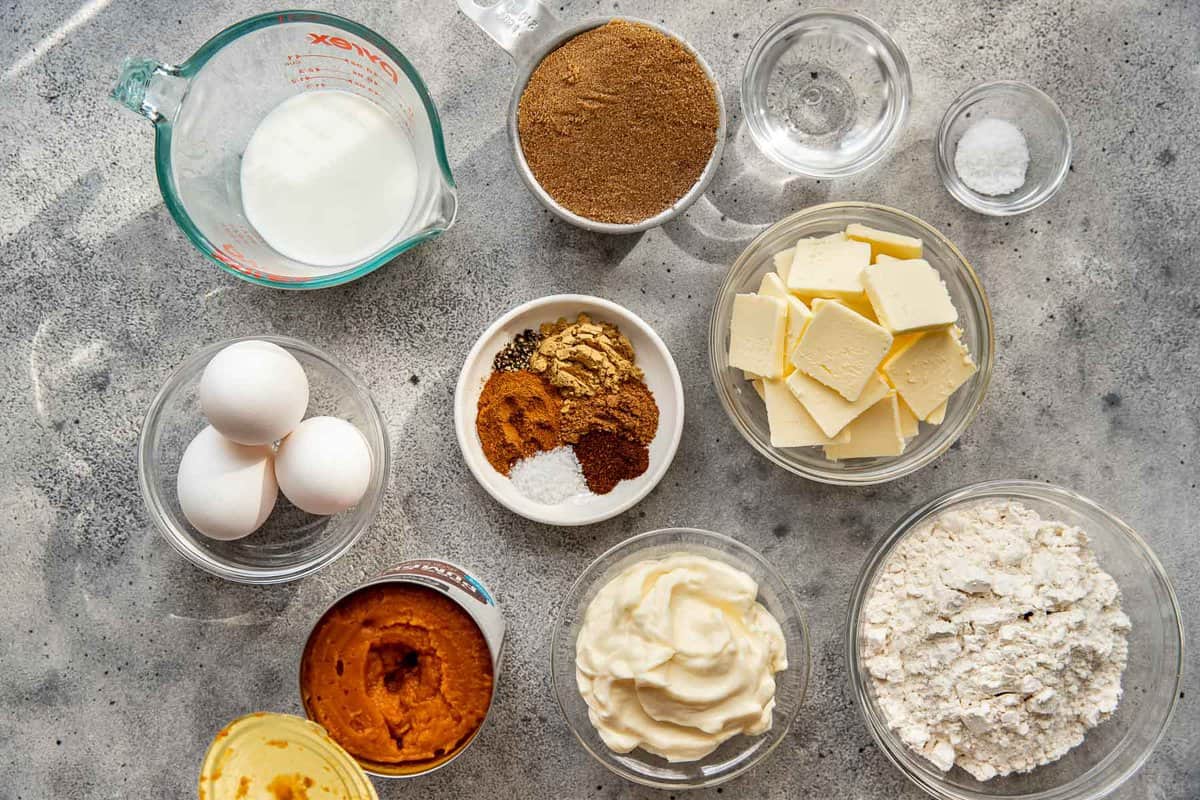
- Flour: this pie crust recipe is simple which makes it perfect for pumpkin pie. All-purpose flour is what you’ll need for this recipe, though if you want to make a whole-wheat pie crust that also works.
- Butter: unsalted butter is the way to go here. Using unsalted butter just gives you more control over the seasoning of the pastry.
- Pumpkin: you can use canned or homemade pumpkin puree. You’ll need one (15-ounce) can or 2 cups.
- Dark brown sugar: opt for dark brown sugar instead of light for the most molasses flavor.
- Spices: this filling uses a handful of warm spices. Sure, you can use pumpkin pie spice, but I think this mix of spices results in a more nuances and flavorful filling. You’ll need cinnamon, ginger, nutmeg, cloves, kosher salt and black pepper (yes! black pepper!).
- Mayonnaise: OK, don’t knock it before you try it. The addition of mayonnaise to pumpkin pie filling is a game changer (like it is in mayonnaise chocolate cake).
Mayonnaise is just egg, oil and vinegar. Use a standard mayonnaise such as Hellman’s or Kraft—do not use Miracle Whip.
It adds a nice creaminess and a bit of tang, which balances out the sweetness and warm spices. No one will know it’s in there, but they will notice the creaminess and the balance of flavor! Use full-fat mayonnaise for the best results. - Eggs: you’ll need three large eggs. It’s important to use eggs labeled as “large.” A large egg, out of the shell, should weigh 50 grams.
Let’s Make a Homemade Pumpkin Pie!
Make the Pie Dough From Scratch
This crust uses a food processor to make the process quick and easy. If you don’t have a food processor, you can use a pastry cutter to cut in the butter.
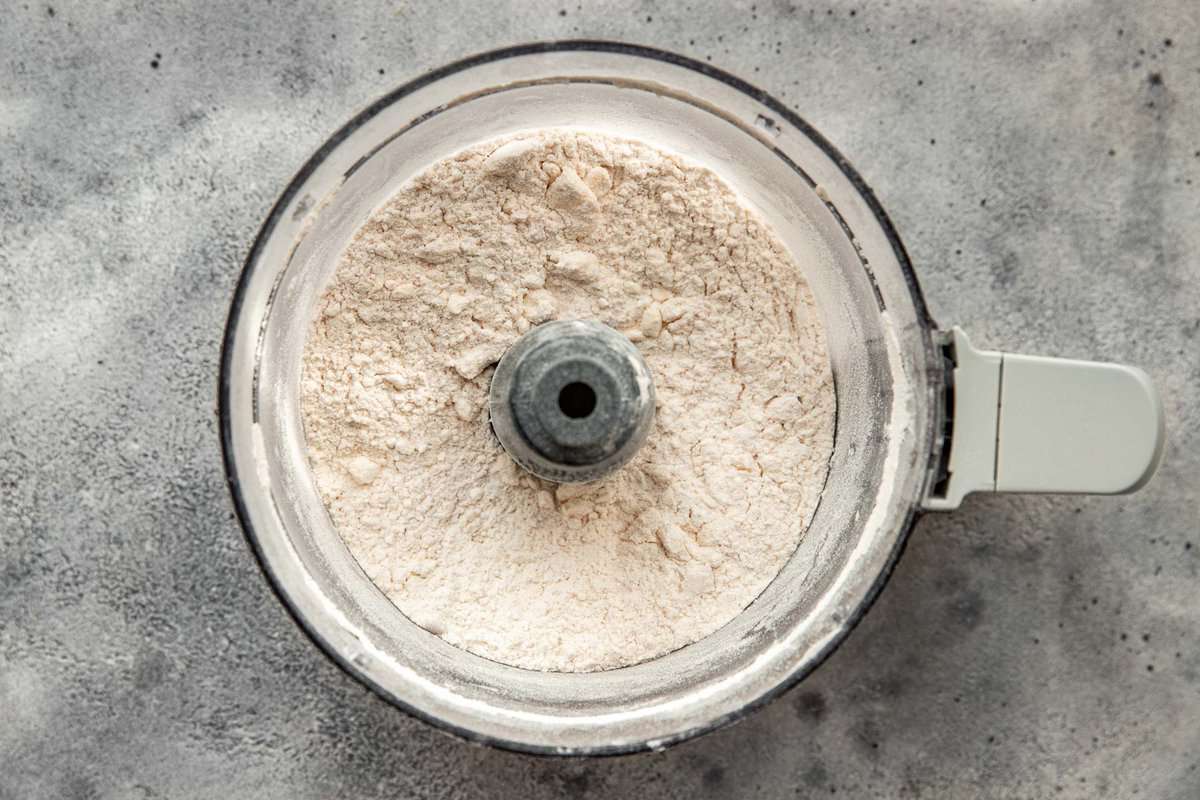
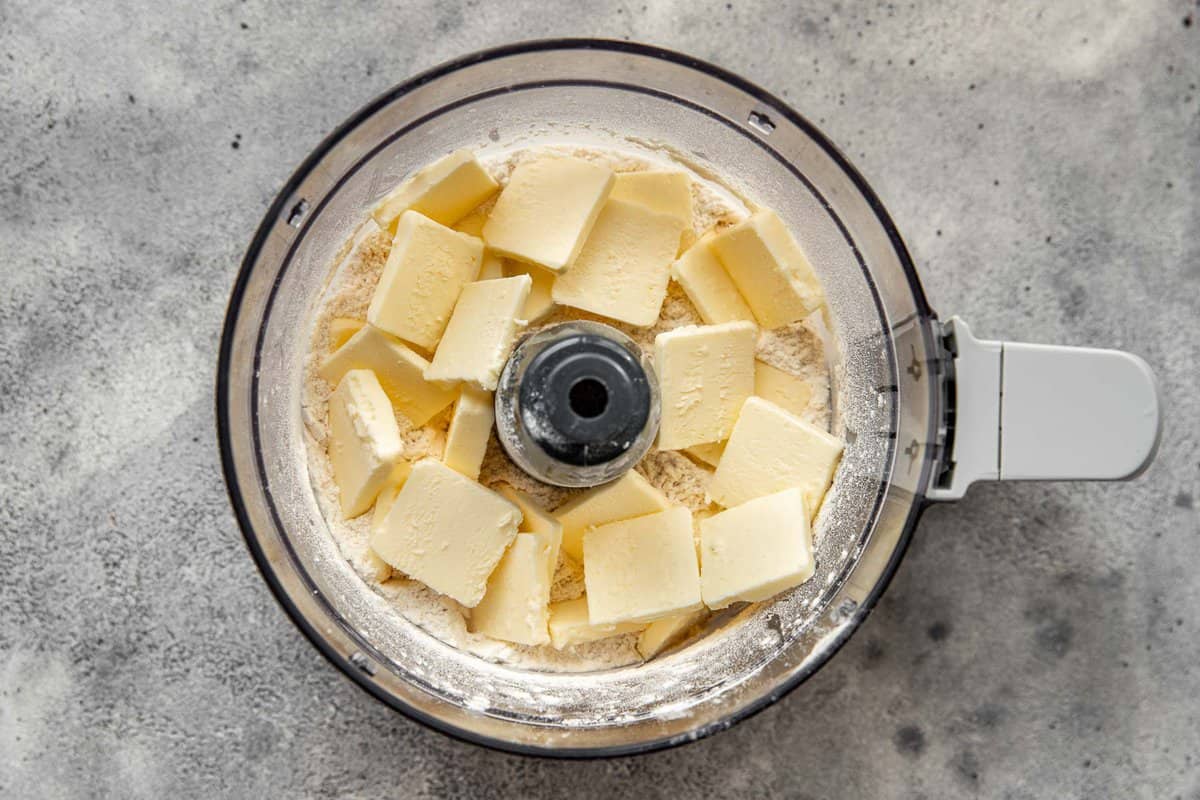
- Start by combining the flour and salt in the food processor. Scatter the butter over top and pulse the mixture until it resembles coarse cornmeal.
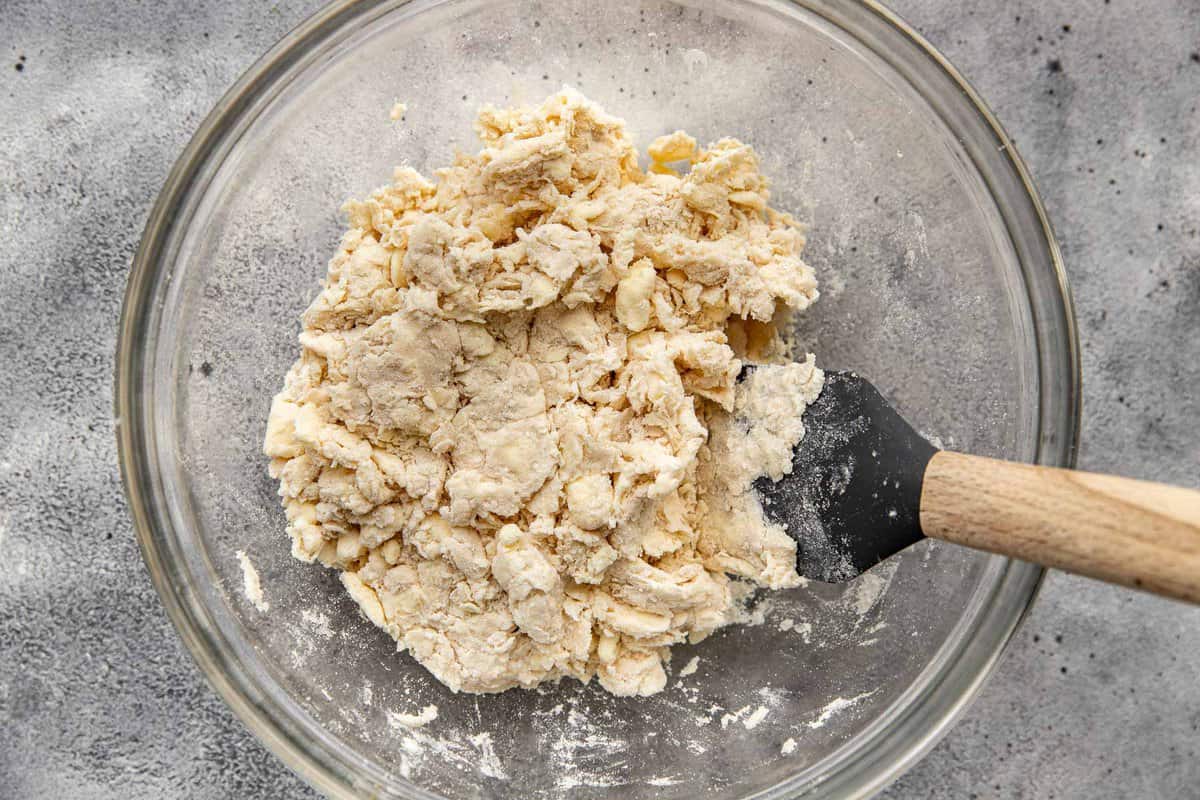
- Transfer the flour mixture to a medium bowl and drizzle with a couple tablespoons of water. Then use a rubber spatula to bring the dough together by mixing and pressing the dough against the sides of the bowl.
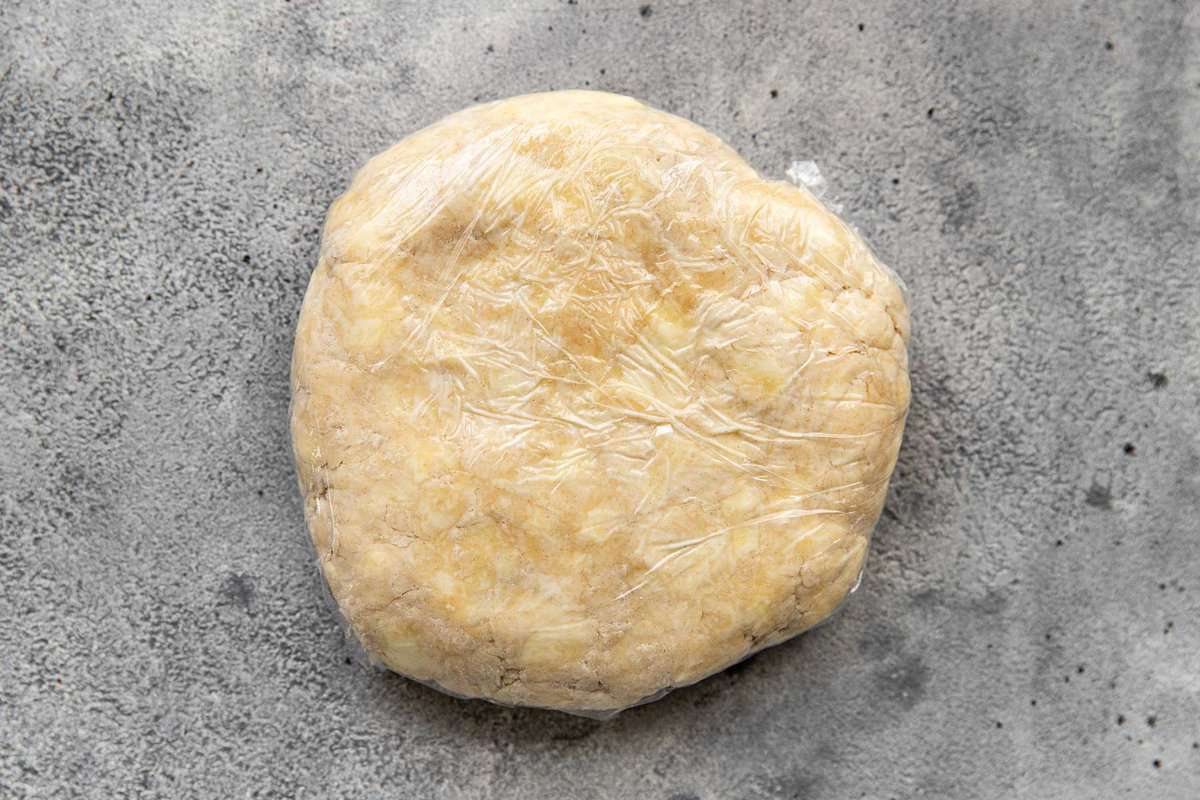
- Form the dough into a disk then wrap it in plastic wrap and refrigerate for about 30 minutes, just to let the butter firm up a bit. (The dough can be refrigerated for up to 3 days.)
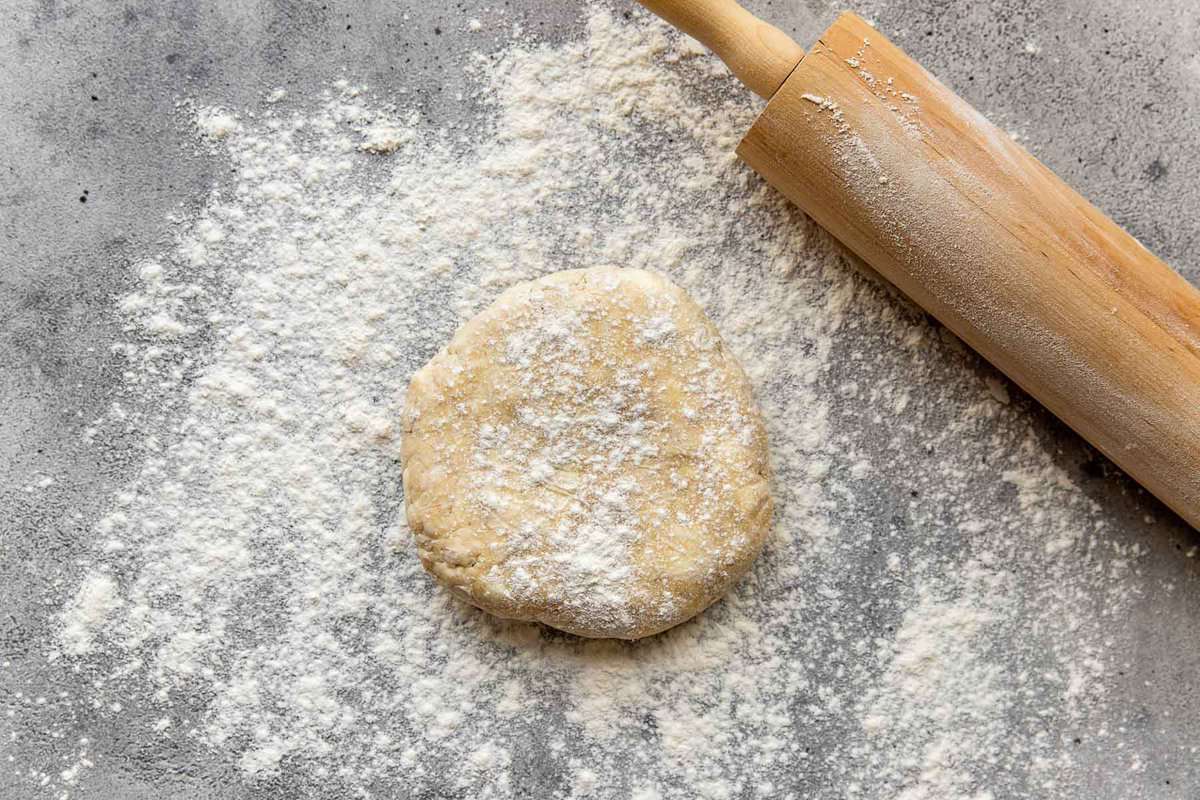
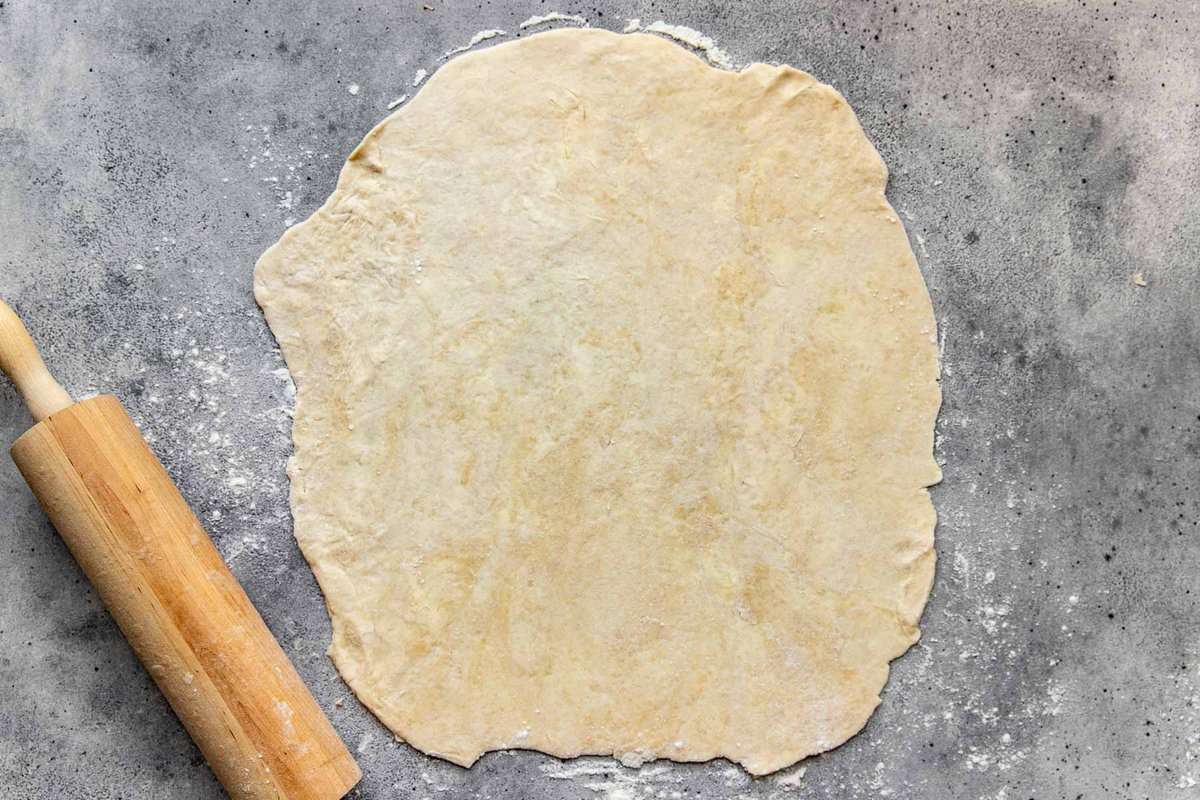
- After the dough has chilled, roll it out on a lightly floured surface into a 13-inch circle. Depending on how long the dough chilled, you may need to let it sit out for a bit before it’s warm enough to roll out.
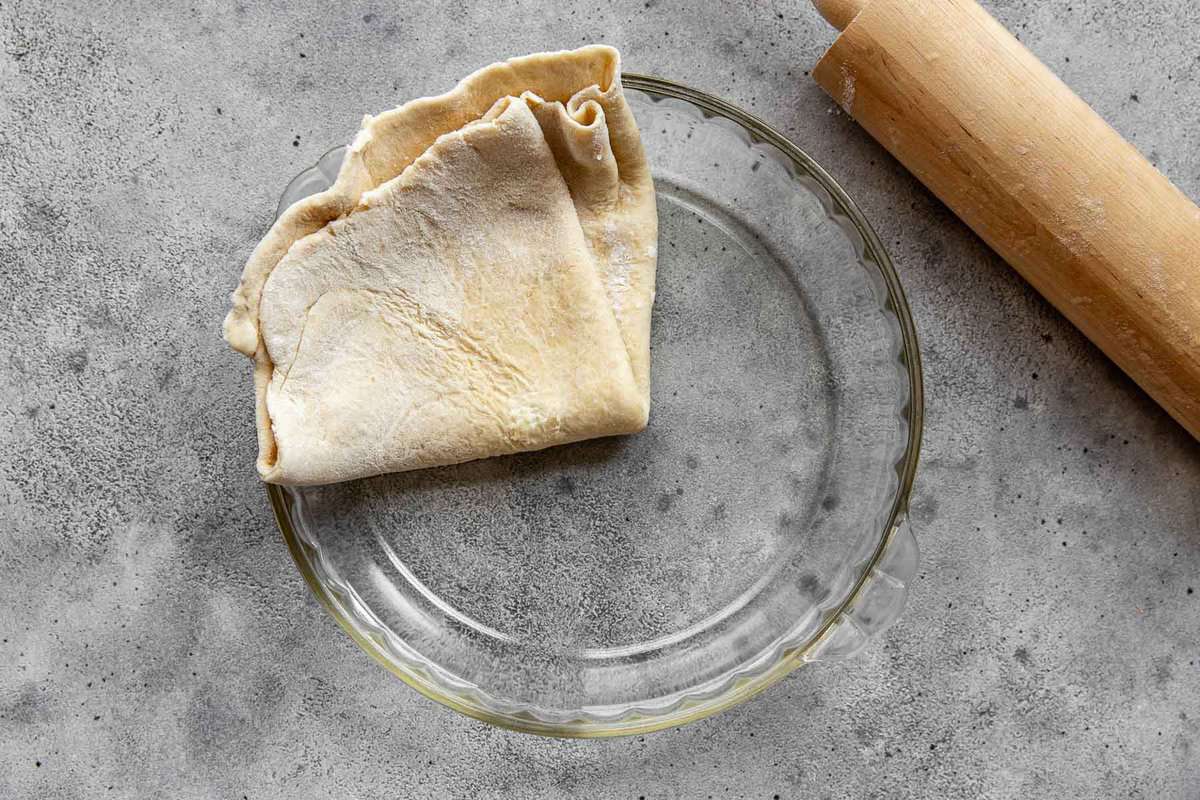

- Fold the dough into quarters (this makes it easier to move to the plate) then unfold in the pie plate.
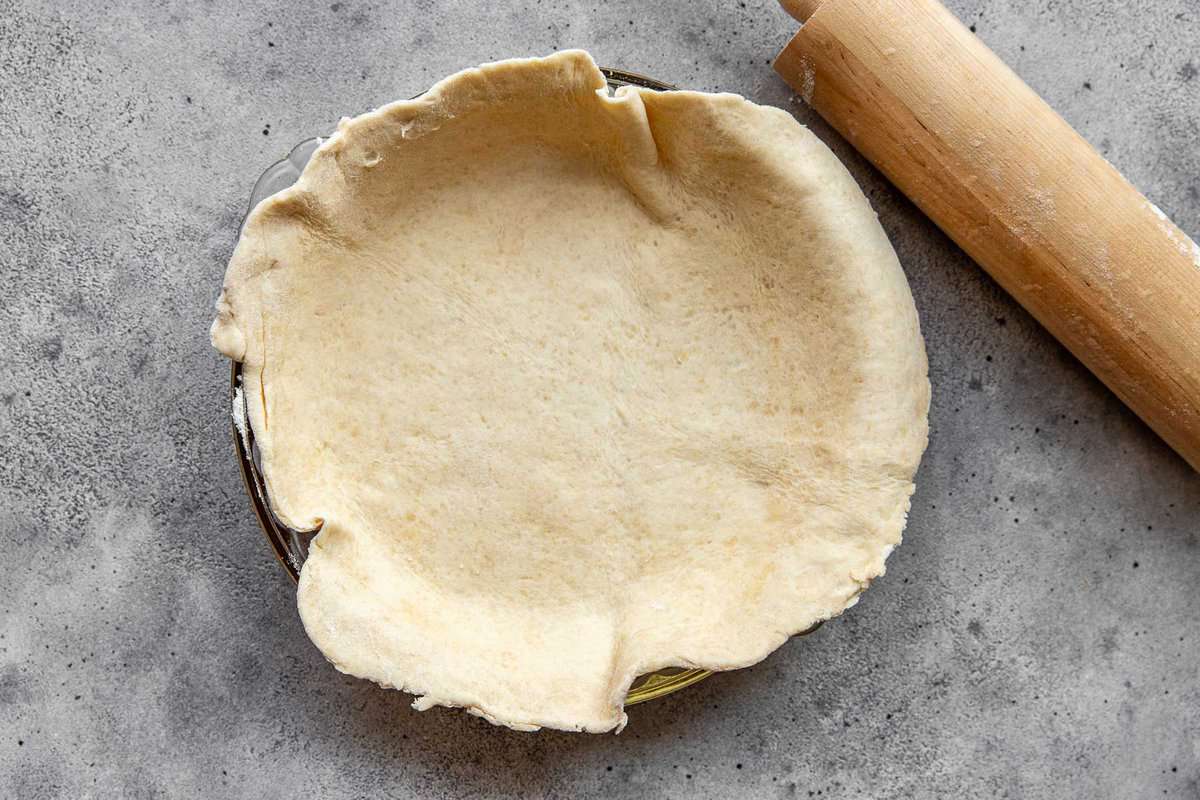
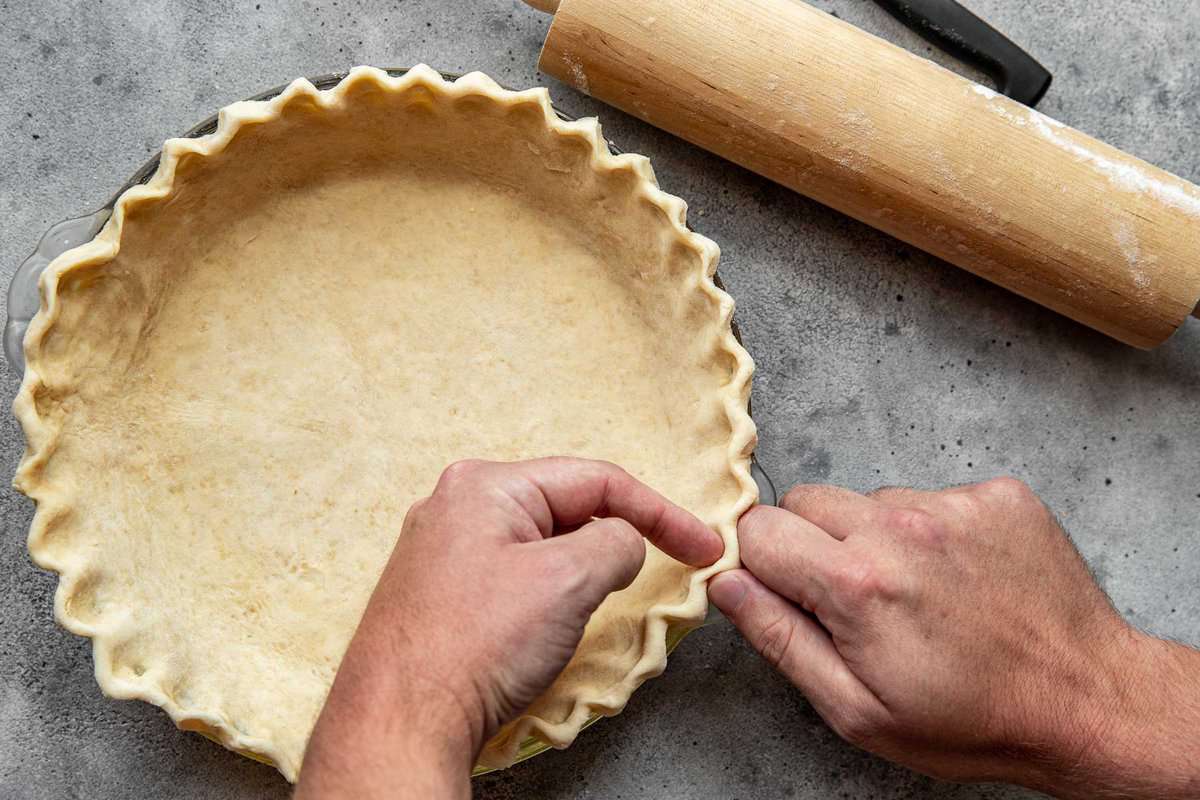
- Crimp the edges using your fingers.
- Chill the dough-lined pie plate until it’s set, this will take about 20 minutes.
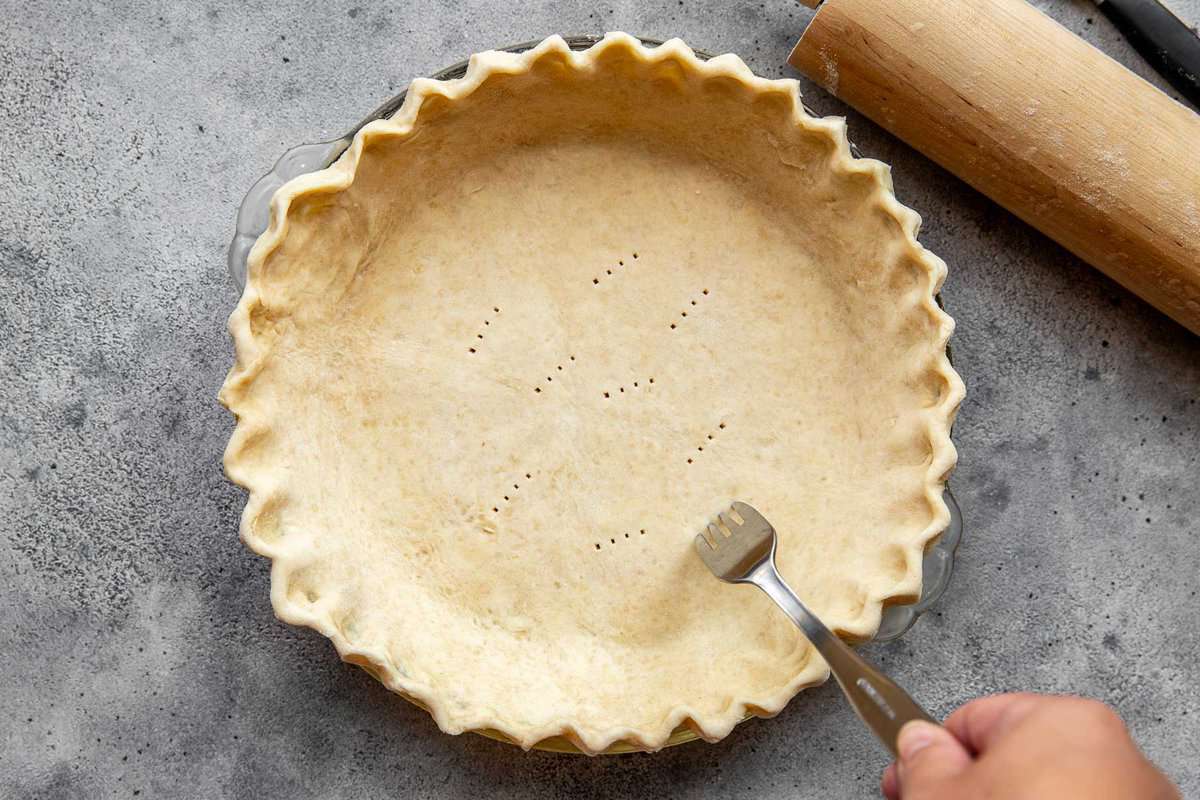
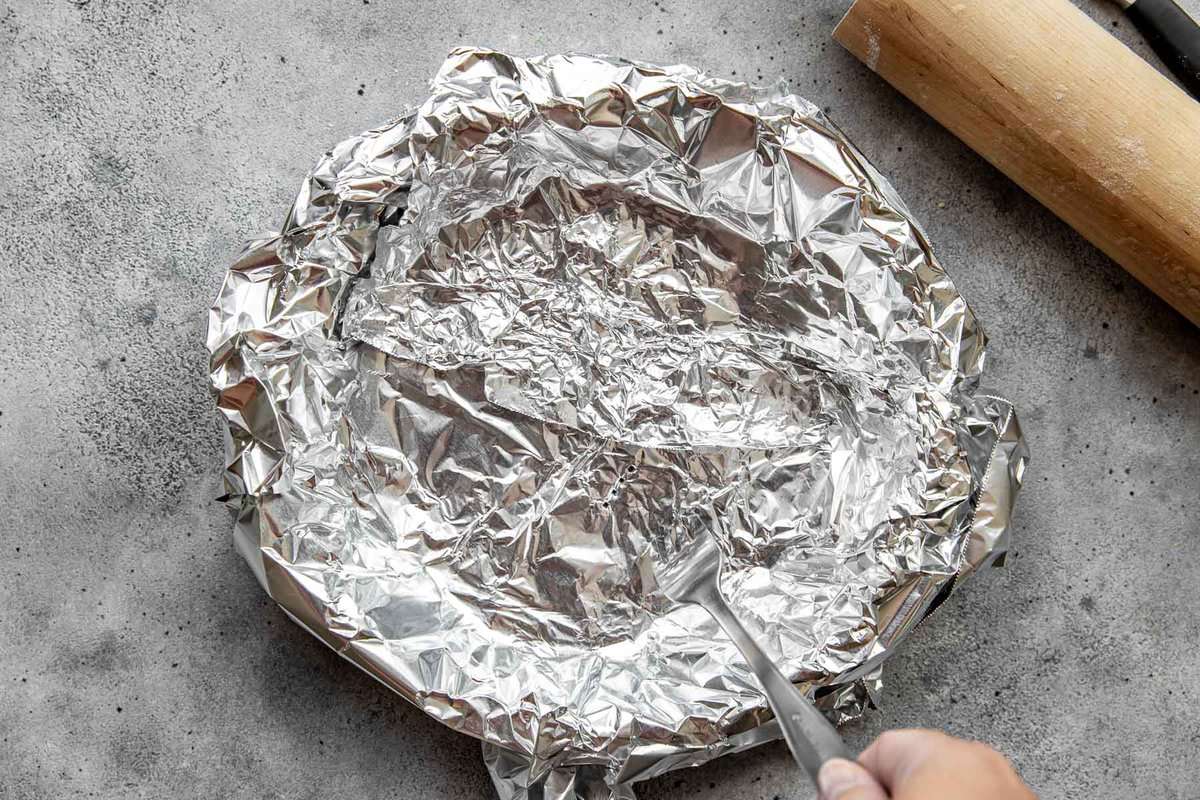
- Prick the dough with a fork, then line the crust with foil and prick through the foil as well. Refrigerate again for 1 hour. (All this chilling might seem annoying, and maybe it is, but it’s key for creating a crisp and flaky pie crust).
- Blind bake the crust at 400ºF on the lowest rack (this ensures the bottom of the crust is cooked through and flaky, not stodgy—important for pumpkin pie and pecan pie) for 15 minutes. If the crust and foil puff up, press it back down with an oven mitt.
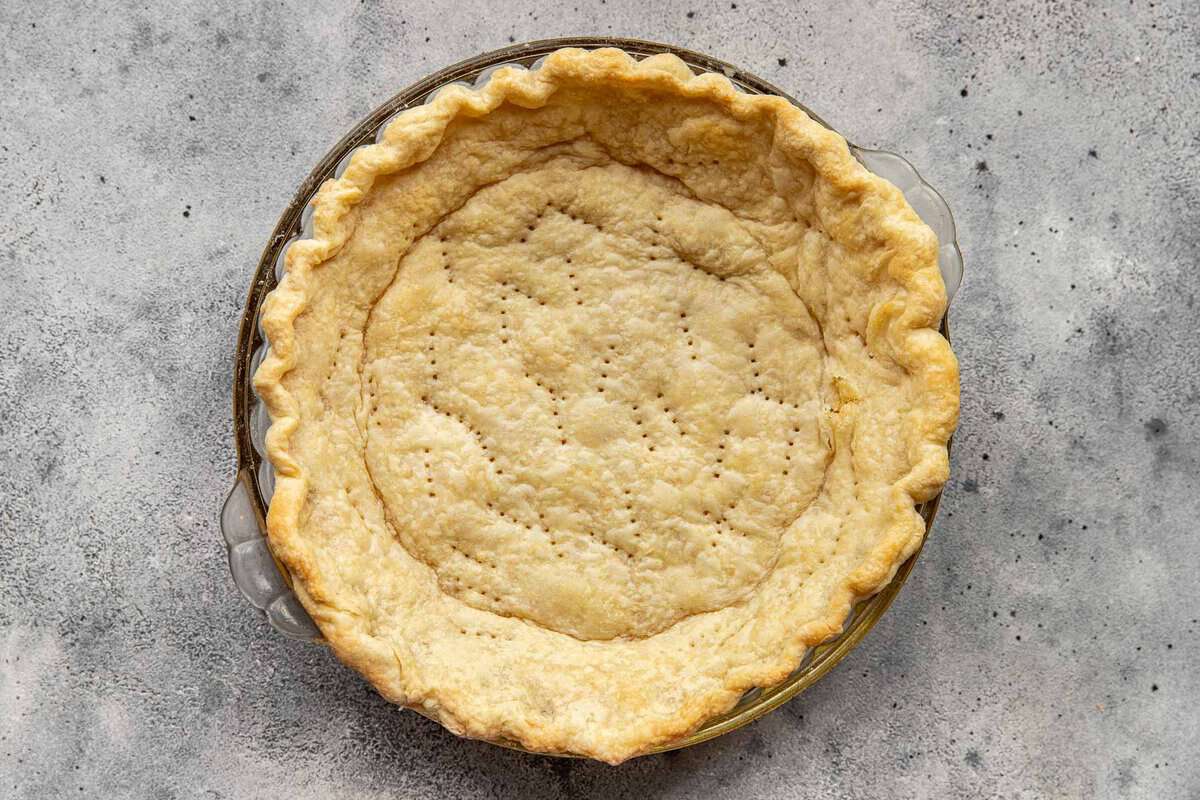
- After 15 minutes, remove the foil and continue to bake the crust just until it begins to color, about 10 minutes.
Make The Pumpkin Pie Filling without Evaporated
We’ll also be using a food processor for the filling. If you don’t have a food processor, you can use a blender.
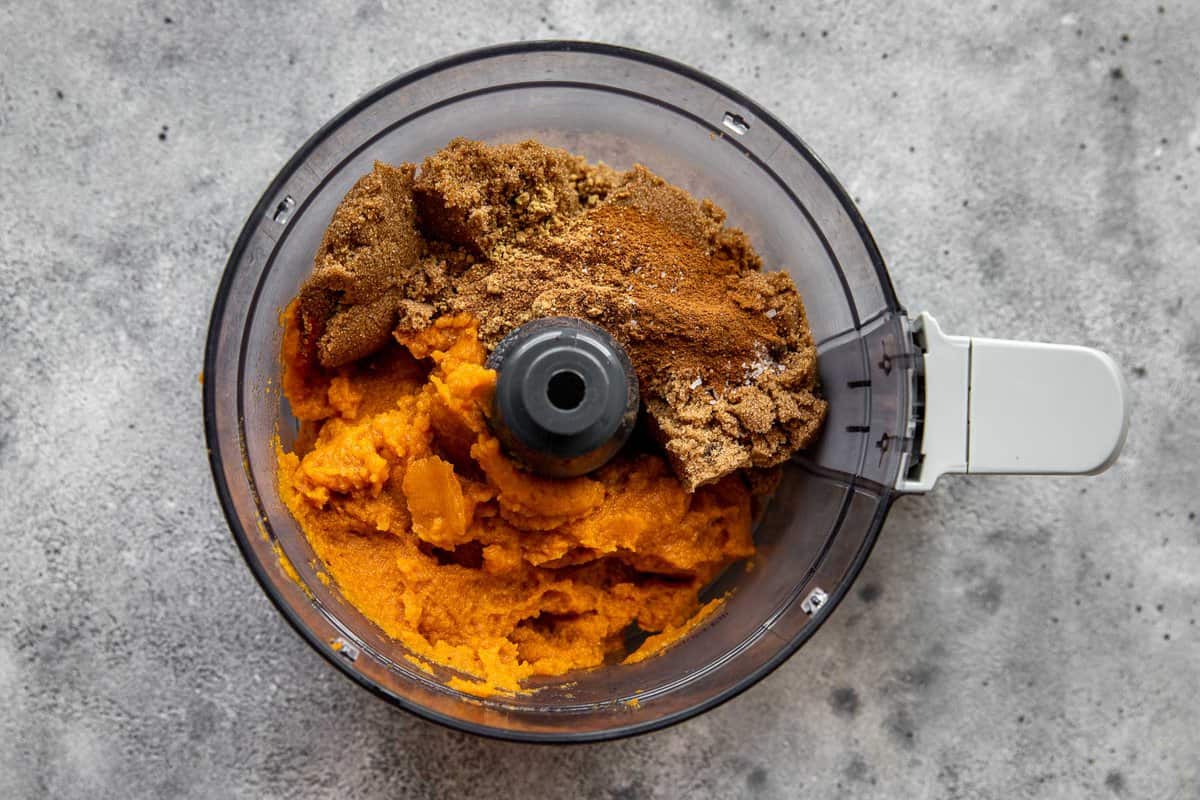
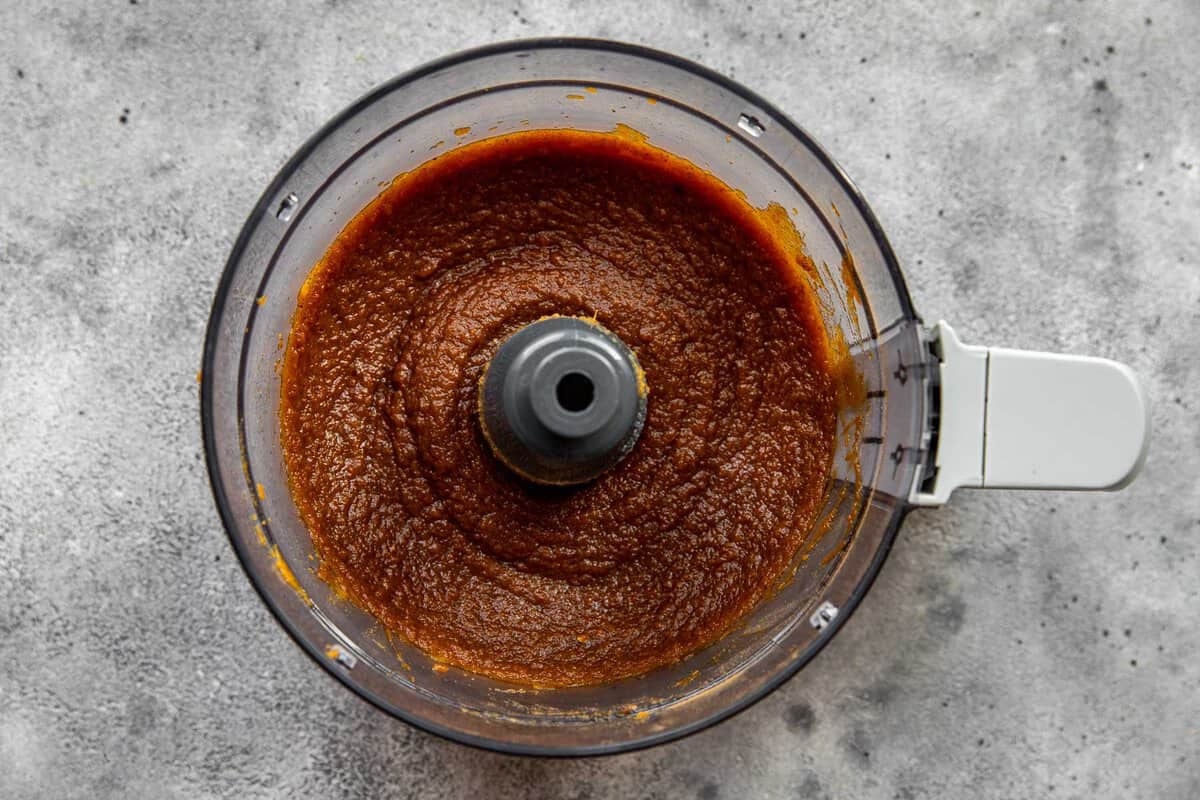
- Combine the pumpkin, brown sugar, and spices in a food processor and blend until smooth.
- Cook the pumpkin mixture in a saucepan until it’s thick and shiny (be careful, the hot sugary mixture will sputter and can burn you).
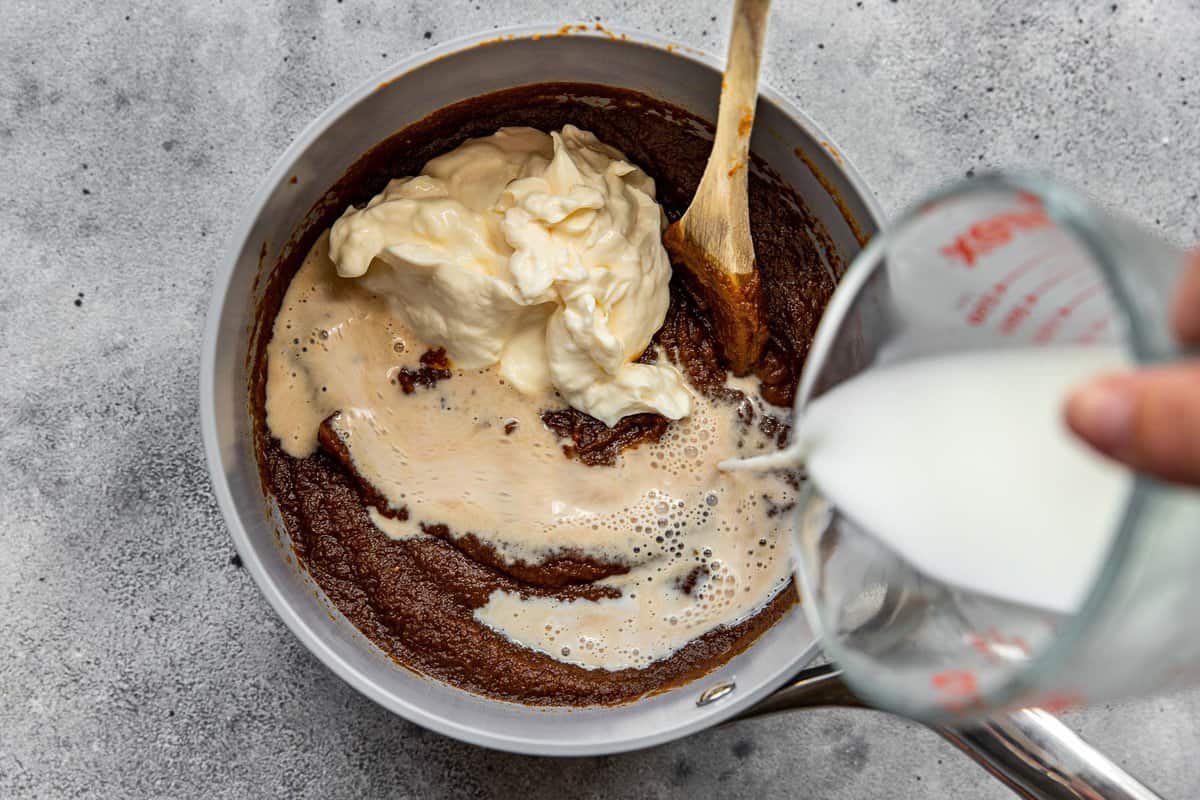
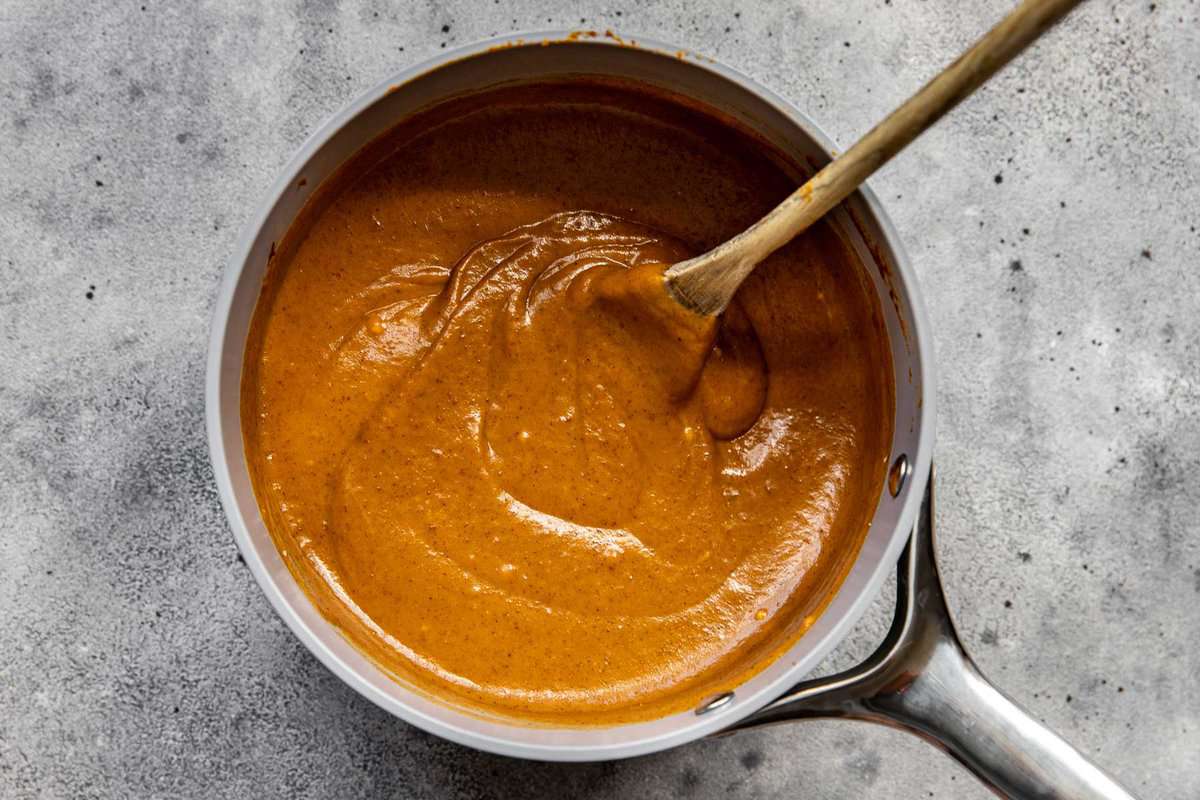
- Whisk in the mayo and the milk then bring to a low simmer. Keep the filling warm until the pie shell comes out of the oven.
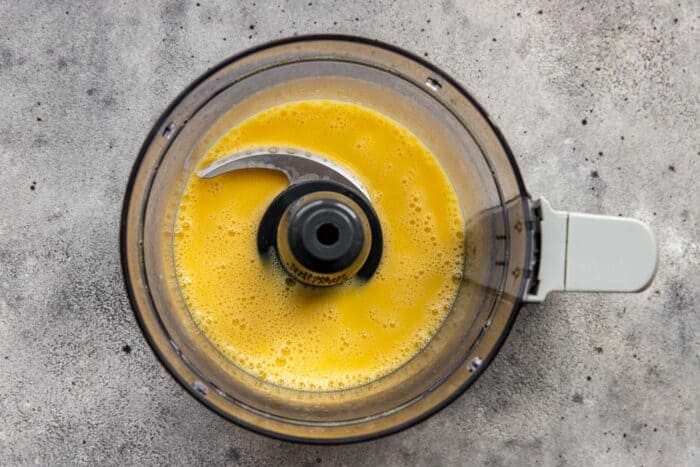
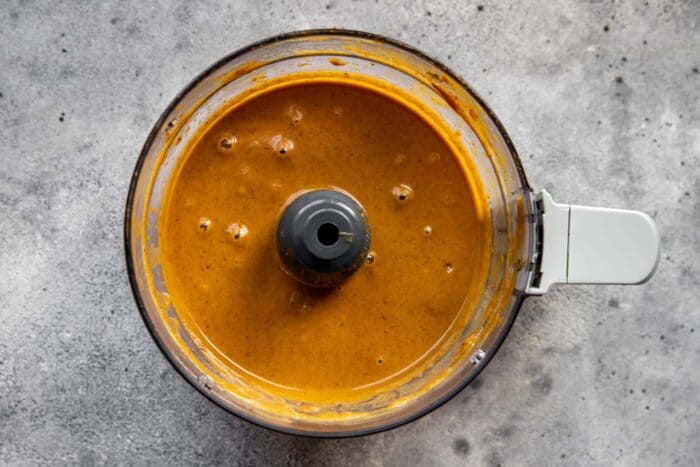
- When ready to fill the shell, add the eggs to the now-empty food processor and blend until they become slightly foamy, this should take just a few seconds. Then, with processor running, slowly stream in the warm pumpkin mixture.
Bake the Best Pumpkin Pie
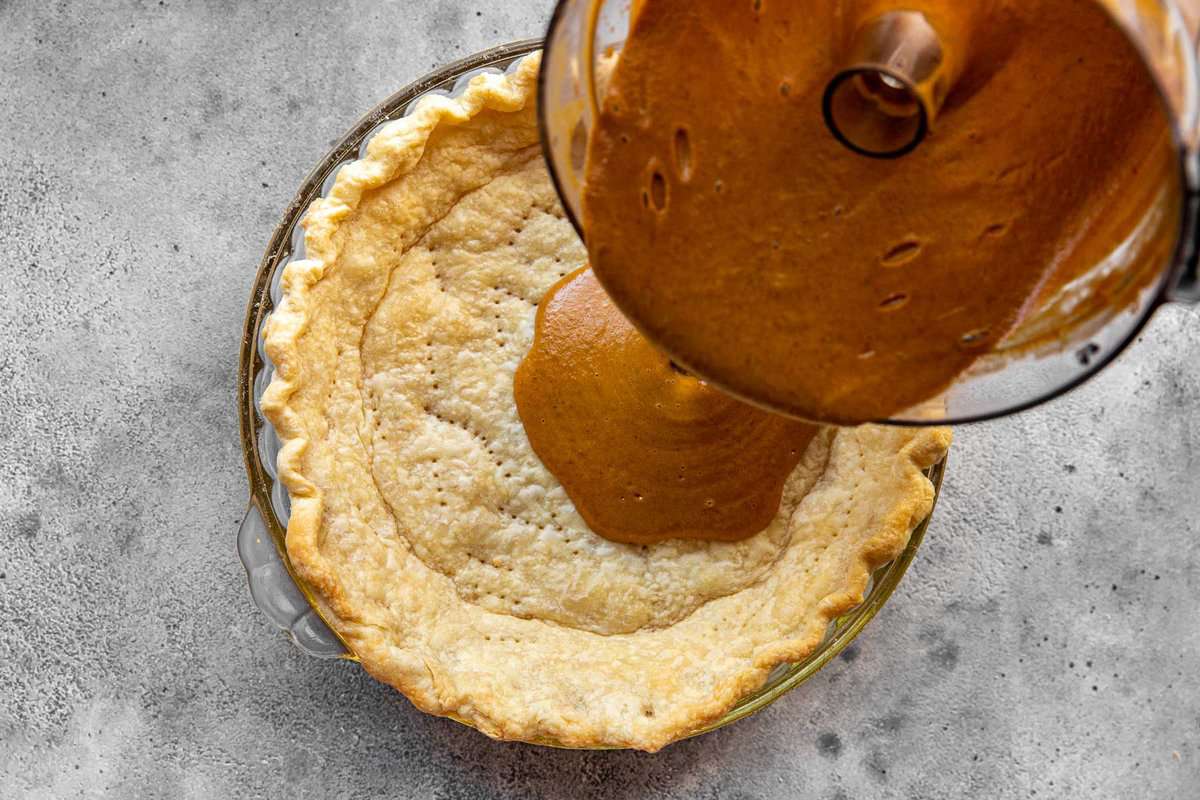
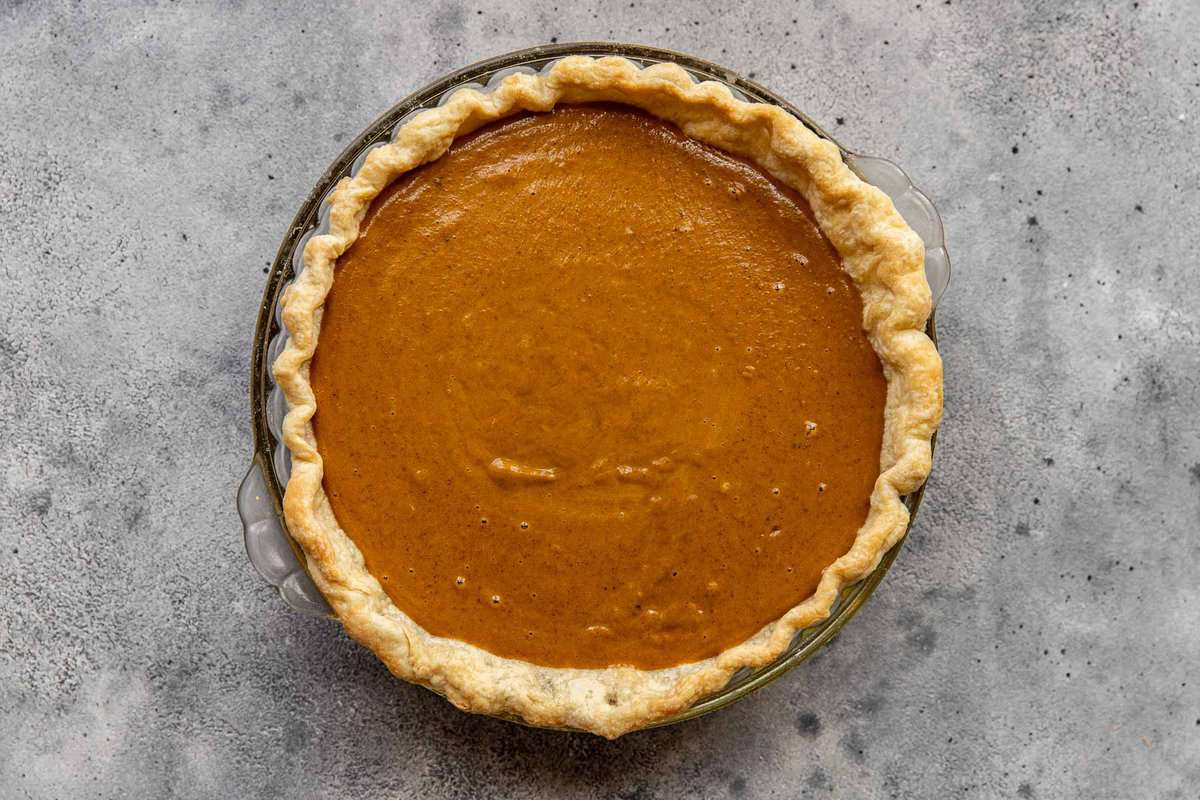
- Pour the warm filling into the hot pie shell and transfer to the oven. If you have excess filling, hold onto it and add it to the pie after the first 5 minutes of baking.
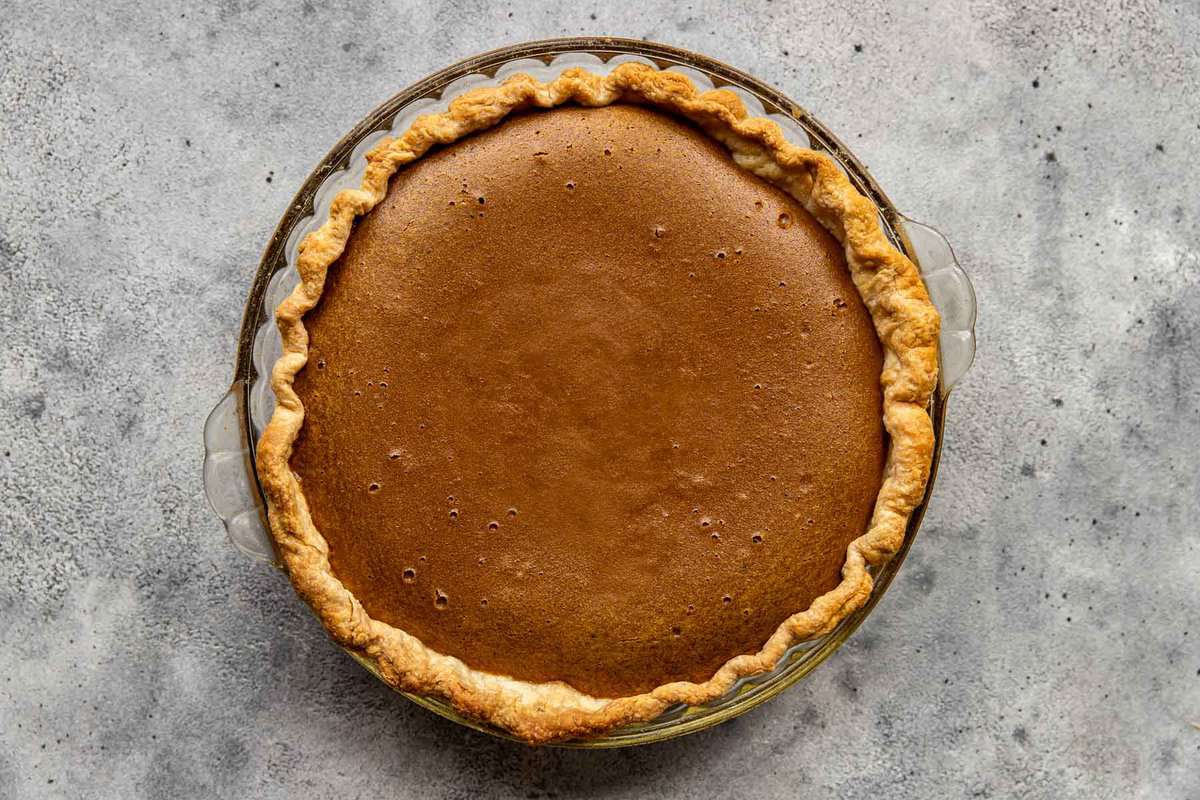
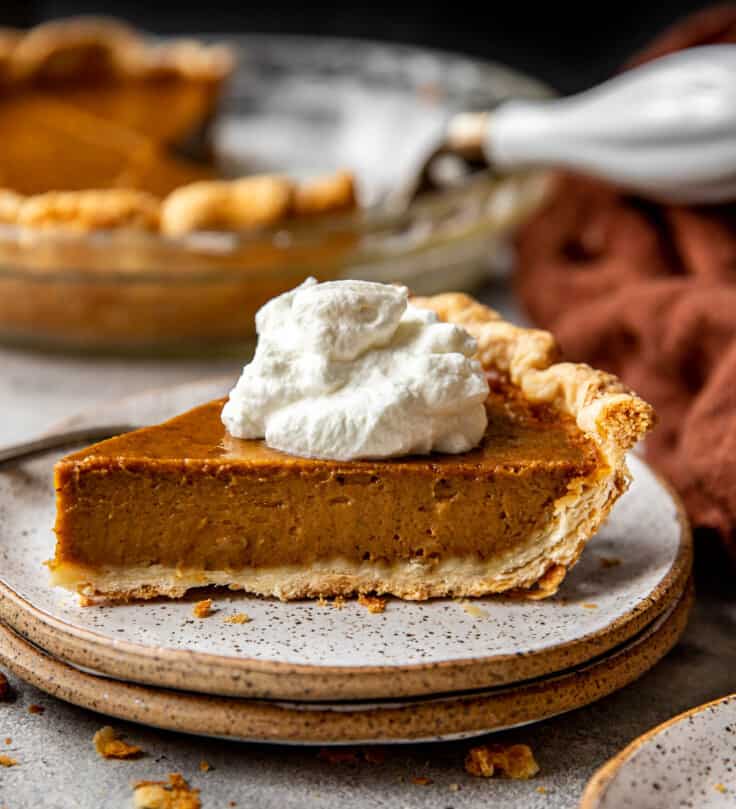
You’ll know the pie is done when the filling is puffed up, looks dry on top and the center jiggles slightly when lightly shaken.
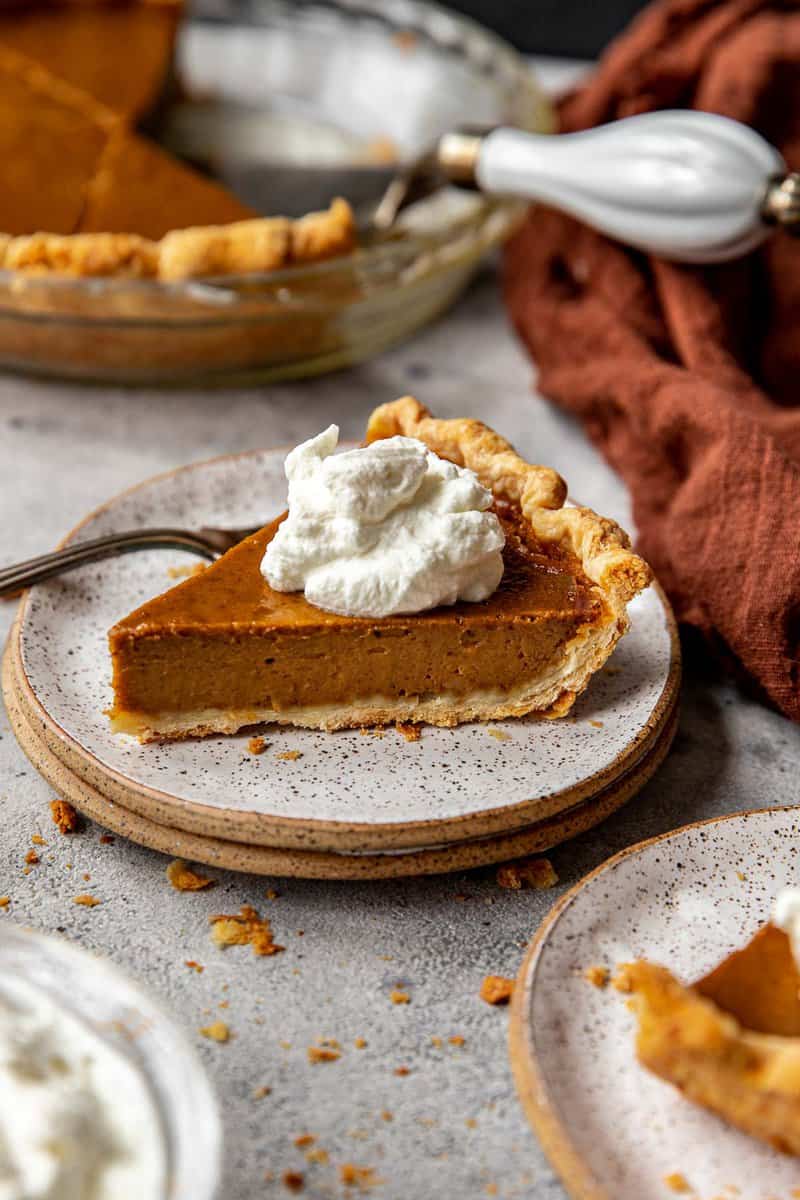
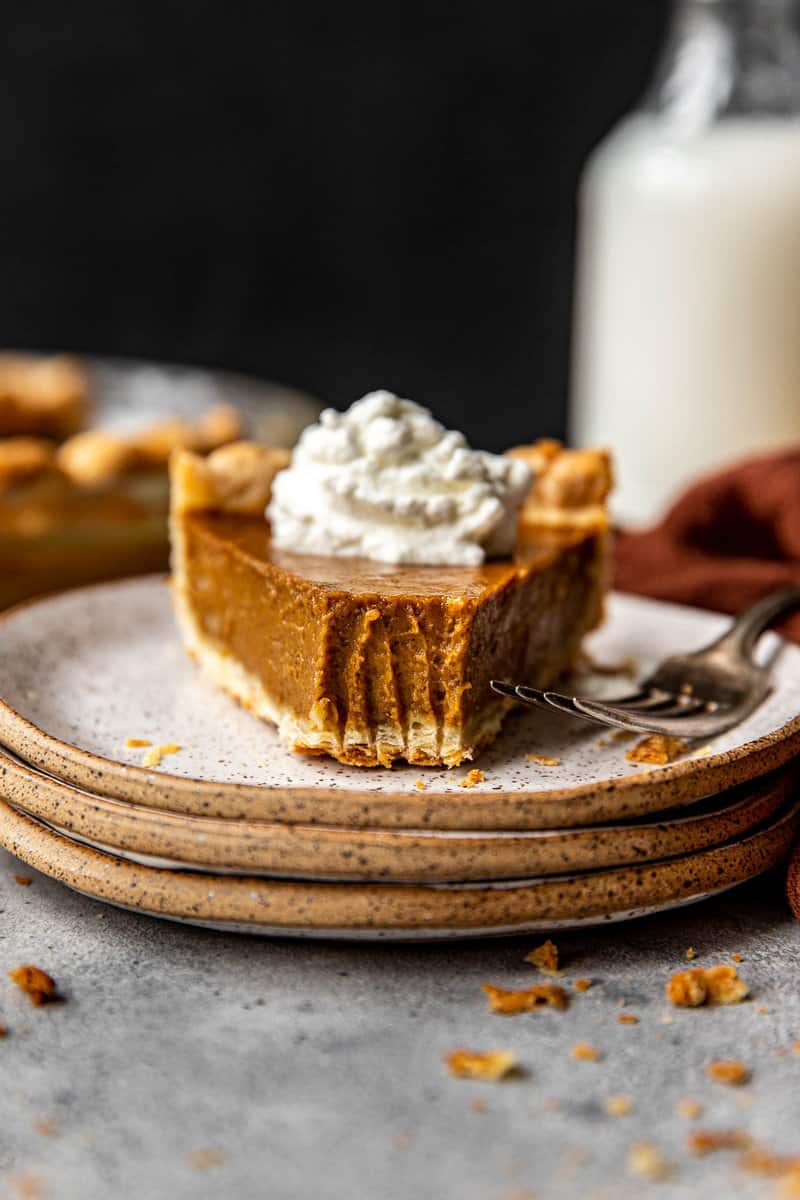
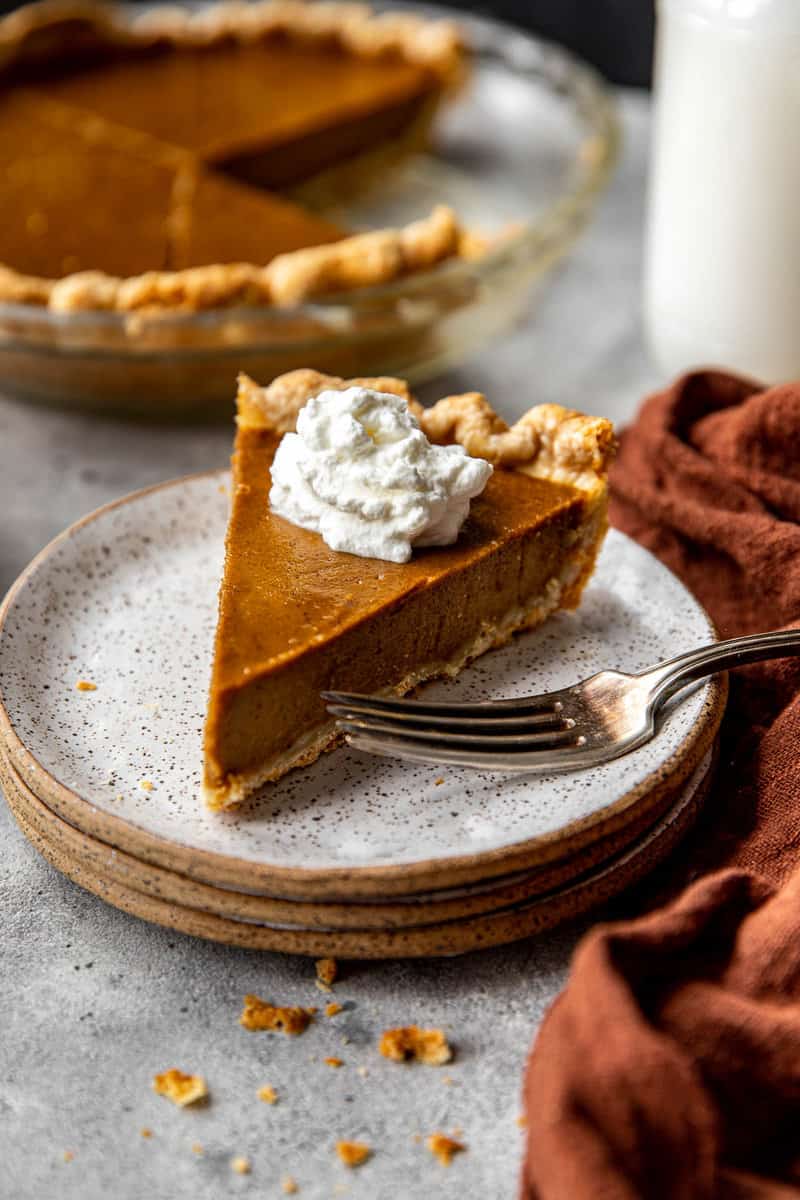
- Let the pie cool completely (at room temp—don’t rush it in the fridge!) before slicing and serving with lightly sweetened whipped cream.
Expert Tips
- To safely transfer the pie crust to the pie plate, you can either roll it around your rolling pin and unroll it over the plate, or you can fold the dough round into quarters and unfold it into the pie plate.
- Blind baking is common for pumpkin pie. And while it helps set the crust, it still creates a pretty dense and stodgy bottom.
To create a crisp, flaky crust throughout, line the chilled dough with foil and blind bake the crust without pie weights. This allows the specks of butter melt and steam, creating flaky layers of crust. Just press down the foil and crust, using an oven mitt, if it puffs during baking. - Make sure your pie crust ingredients are cold. This makes for the flakiest, most tender pie crust you can imagine. I like to pop the butter in the freezer for a few minutes before using it.
- Don’t over bake your pie. This leads to a filling that will crack and be a little dry. Make sure you remove the pie from the oven when the center just slightly jiggles. Cool the pie on a wire rack on the counter.
The Secret Ingredient
My secret ingredient is such a curveball, I think it deserves a bit more info. Most pumpkin pies are made with evaporated milk or cream. Instead of either of those, my filling uses mayonnaise and milk.
The addition of mayonnaise makes the filling creamier for two reasons. One, it’s simply creamier and thicker than cream or condensed milk. And two, it retains its creaminess more than any kind of dairy during the baking process because it’s made with oil (100% fat) and eggs (fat and structure).
Use a full-fat mayonnaise such as Hellman’s. Do not use Miracle Whip.
Make Ahead, Storage and Freezing
Make Ahead: I find pumpkin pie is best enjoyed the day-of baking or one day after baking. You can make homemade pumpkin pie up to 3 days ahead of time.
Storage: If you’re planning to store the pie for longer than a couple of hours, cover it in plastic wrap and place it in the refrigerator for up to 5 days. Allow it to to come to room temperature before slicing and enjoying.
Freezing: I don’t recommend freezing pumpkin pie, but if you must, here’s how to freeze pumpkin pie. Once the pie has cooled completely, wrap it tightly in plastic, and place it in a large resealable freezer bag and place it in the freezer. When you’re ready to serve, thaw the pie in the refrigerator overnight.
How to Avoid Cracks in Pumpkin Pie
There are two reasons a pumpkin pie will crack. One, it was over-baked. And two, it was cooled too quickly. Keep an eye on the pie and remove it from the oven when it’s puffed, the filling looks dry, and the center jiggles just slightly when gently shaken.
And secondly, let the pie cool completely at room temperature on a wire rack. If you try to rush the cooling process by popping it in the refrigerator or setting it outside in the cold winter weather, you will likely end up with a cracked filling. Over-baking and cooling too quickly are also why your pumpkin pie filling will separate from the crust.
But good news, the addition of mayonnaise in the filling should mitigate the risk of your filling cracking! One more reason this recipe for pumpkin pie is foolproof!
Why Pumpkin Pie is Wet on Top
The beads of moisture on the surface of the pie filling is from the filling weeping. This usually means the pie was over-baked or cooled too quickly. Still delicious and still edible, it was just over-baked and thus the filling is pushing out excess moisture.
More Pies & Tarts to Try
Tarts and Pies
Pumpkin Pie with Graham Cracker Crust
Tarts and Pies
Bourbon Pecan Pie (No Corn Syrup)
Cookies
Pumpkin Pie Cookies
Desserts
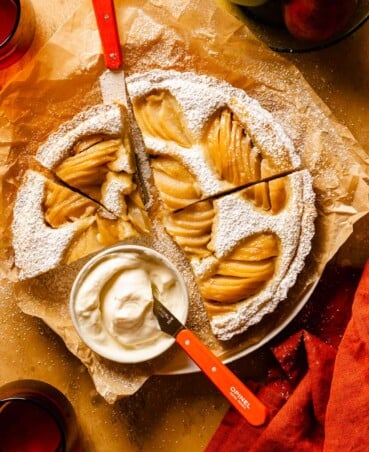
Pear Tart
Best Pumpkin Pie Recipe from Scratch
Description
Video
Save This Recipe!
Ingredients
Pie Crust
- 1¼ cups (154g) all-purpose flour, spooned and leveled
- ½ teaspoon Morton kosher salt (or ¾ Diamond Crystal)
- 10 tablespoons (142g) unsalted butter, chilled and cut into 1/4-inch pats
- 3 –6 tablespoons ice water
Filling
- 1 (15-ounce) can pumpkin purée (about 2 cups) (not pumpkin pie filling)
- 1 cup packed dark brown sugar
- 2 teaspoons ground cinnamon
- 2 teaspoons ground ginger
- 1 teaspoon fresh grated nutmeg
- ¼ teaspoon ground cloves
- ½ teaspoon Morton kosher salt (or ¾ Diamond Crystal)
- ⅛ teaspoon black pepper
- ¾ cup (157g) mayonnaise
- ⅓ cup (80g) whole milk
- 3 large eggs
Instructions
Pie Crust
- Process flour and salt in a food processor. Scatter butter over flour; pulse until mixture resembles cornmeal, 7–12 pulses. Transfer mixture to a medium bowl.
- Drizzle 3 tablespoons ice water over flour mixture. Using a rubber spatula, mix dough together, pressing against sides of bowl, until a rough dough comes together. If it's still too dry, drizzle in additional water, by tablespoon, just until it comes together.
- Dump shaggy dough out onto a large piece of plastic wrap. Form dough into a 4-inch disk, then wrap tightly in plastic and refrigerate at least 30 minutes (or up to 3 days).
- Generously flour a work surface. Unwrap dough and lightly dust with flour. Roll dough out into an ⅛-inch thick 13-inch round.If dough is too firm, let it sit at room temperature for about 5 minutes before rolling out.
- Fold dough in quarters; place corner in center of a 9-inch pie plate. Gently unfold dough to cover plate, using one hand to pick up edges of dough and an index finger to press dough into corners and up sides. Trim dough overhang to ½-inch then tuck edges under and crimp using thumbs and pointer fingers. (*see note on crimping.) Dough edges should be somewhat one top of pan edges (to avoid shrinking during baking).
- Refrigerate dough-lined pie plate for 20 minutes. Prick bottom, sides and corners with a fork. Line dough with a piece of foil, pressing it firmly into corners and sides, and folding over rim. Prick foil about a dozen places with a fork. Refrigerate shell for at least 1 hour or up to 2 days.
- Heat oven to 400ºF (204C) with rack set in lowest position.
- Place pie plate on a baking sheet. Bake shell until edges are set and starting to brown, pressing down on foil with an oven mitt to deflate when it starts to puff up (this happens for me around 8 or 10 minutes—continue deflating every minute or so after that) 15–20 minutes total.
- Remove foil and continue to bake just until shell is light golden brown, about 10 more minutes.
Filling
- Keep oven heated to 400ºF (204ºC).
- Process pumpkin, brown sugar, ginger, cinnamon, nutmeg, cloves, salt and pepper in a food processor for 1 minute. Transfer pumpkin mixture to a saucepan over medium-high heat and bring to a sputtering simmer, cook, stirring constantly, until thick and shiny, about 5 minutes.
- Whisk mayonnaise and milk into pumpkin and bring to a low simmer; keep warm until the pie shell comes out of the oven.
- Process eggs in now-empty food processor until foamy, about 5 seconds. With processor running, slowly stream in half of the warm pumpkin mixture. Scrape down sides of bowl as needed, add remaining pumpkin and process 30 seconds more.
- Carefully pour warm filling into warm pie shell, making sure to fill just below edge of crust so it doesn't overflow. (You will likely have excess filling, *see notes.)
- Bake pie until filling is puffed, dry-looking, and center slightly wiggles when gently shaken, about 25 minutes. Transfer pie to a wire rack; cool completely before slicing and serving.
- Serve with whipped cream.
Notes
Nutrition
Hi Lauren…going to try your recipe x two pies…..love it…and lately have found myself using hellmans mayo in many things….stay tuned….love Aunt Sarah
The mayo is a surprising addition but it really creates a luscious pie. And the balance of flavors is unbeatable! I hope you enjoy it!
Hi, I see that the recipe requires you to transfer a cold pie crust/pan into the hot oven. What pan do you recommend because I have one of the classic Pyrex pie dish but they are known to shatter if you change the temperature drastically. Unless the recipe allows leeway for the dish to warm up prior to going into the oven? Please let me know.
I read somewhere that to prevent this, the chilled pie pan should be put on a room-temperature baking sheet, which helps to heat the glass pie plate gradually and prevents potential cracking from sudden temperature changes. That’s what I did (I chilled my crust overnight) and it was perfect!
Hi, I see that the recipe requires you to transfer a cold pie crust/pan into the hot oven. What pan do you recommend because I have one of the classic Pyrex dishes but they are known to shatter when changing temperatures drastically. Or is there a way for the recipe to let the dish warm up prior to cooking?
Hi Krystin, great question. The risk of shattering is highest when a glass plate is transferred from a freezer to an oven. Since this one is transferred from the fridge, the risk of cracking/exploding is much, much lower. I use a very affordable Sur la Table glass pie plate for this pie and I’ve never had an issue. That being said, for the safest bet, you could use a metal pie plate. The only drawback is the crust might brown a bit faster on the bottom. Let me know if you have any other questions!
I have never taken the time to comment on a recipe…. This one deserves it. MAKE THIS PIE!
!!! You just made my day!!!
I can’t wait to try, what if I don’t have fresh nutmeg. Is there a substitute?
Yes! You can use pre-ground nutmeg. It won’t be as potent but still delicious. You could use a rounded teaspoon measure to ensure it’s adequately spiced! Hope that helps. Let me know how it goes!
It doesn’t say what temperature to bake the pie at once the filling is added?
Keep the oven at 400ºF! Just keep it on after baking the crust, it’ll go right back in! Let me know how it goes!
I always have a hard time with pie crust so that part will take more practice but I’m shocked how it’s not nearly as dense as normal pumpkin pie! Tastes light and airy!
Wonderful!! I’m so glad it turned out well for you!! it takes a few tries with this crust to get it down pat, but I’m glad it turned out well!
Hi, my pie is slightly cracked. What could be the issue?
Dang!! Your oven was likely a tad high in temp and it was probably over-baked slightly.
How long do you bake the crust, total time?
15 minutes with foil, 10 minutes without (for a total of 25 minutes unfilled), then fill with the pumpkin filling and bake for 25 minutes. I hope that helps!
This was really awful. I have made many pumpkin pies but this was just not it. I’m confused with all the good reviews.
I’m sorry to hear you didn’t like it. Curious to know what you didn’t like about it.
My pie crust stuck to the foil when I tried to remove it. Where did I go wrong?
Really?? I’m shocked by that! That shouldn’t happen. Did you let the crust chill in the fridge before lining it with foil and chilling it again? The crust needs to chill a bit before the foil is added. After it bakes for a while with the foil it should lift right out.
Wow, I have to admit I was skeptical about the mayo (just a mental thing), but I’m glad I didn’t let that stop me! It’s an amazing pie! It’s light, creamy, and spice-forward…and the crust (!!!)…so good. I used ground nutmeg and fresh ginger because that’s what. I’m excited to make this again — before next Thanksgiving for sure! 🙂
I’m a pretty good cook/baker but I’ve always struggled with pie crust. I make good bread and rolls so it’s really bothered me that my crust is always blah. Not this one! It does take longer, but it’s so good I can’t believe it. I finally found the crust I’ll be using permanently. I was a bit intimidated by all the steps, to be honest. It seemed hard at first. I printed it which made it easier to understand. I can’t thank you enough for sharing this wonderful recipe. We love it. My husband is a really good cook. His Mom was a local chef. He’s real picky about pie crust, which has always been a fail for me until now. I usually make graham cracker crust so I don’t have to have another fail. He said this was good, so I’m super happy. Thank you so much.
I agree, the multiple steps in the recipe make it very intimidating, but so many of those steps are chilling that once you’re in the middle of the process, it feel so much more manageable. I’m so happy to hear you enjoyed it and even your husband did too! What a win!!!
Why do so many people give recipes with no way to print them? I am so tired of trying to save screen prints & then I cannot tell what the recipe is anymore. Not worth the trouble if I cannot print!
There is a print button in the recipe card which immediately opens a tab where you can print a PDF version without images or ads.
Haven’t tried it yet, but I am curious as to the reason why you cook the filling on a stovetop before baking? Thanks!
Great question—it cooks out some of the excess moisture in the pumpkin, it caramelizes the pumpkin and the sugar, and it toasts the spices. All in all, it makes for a more luscious and flavorful filling. Plus, using the hot mixture to temper the eggs makes for a more custardy filling.
I hope this helps!
I used this recipe last year but had a graham cracker crust and milk powder in the filling. It was the BEST pumpkin pie I have ever eaten. I will keep using the other version being it was so delicious. Thank you for making me love pumpkin pie!
I loved this filling, it’s delicious, but I shouldn’t eat mayonnaise. Can I substitute it with cream? Or what do you recommend?
Hi Issa! Yes, cream would be perfect. I would replace the 3/4 cup mayo with 3/4 cup heavy cream.
I want to use this crust for a Sweet Potato Pie recipe that I have, but it says to use an unbaked crust. Would this work unbaked; or would this baked shell work with another filling?
Hi Karen, how long does the sweet potato pie bake, and at what temperature? That will help me determine!