This post may contain affiliate links.

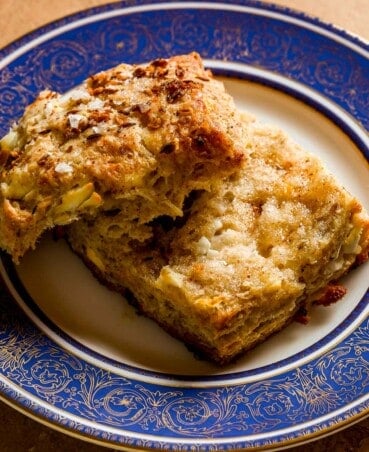
There’s nothing quite as satisfying as the first bite of a warm Homemade Buttermilk Biscuit. It’s the definition of comfort. Savory, buttery, soul-soothing. Add in a dollop of chicken bouillon and some dried spices, and you have yourself one of the most flavorful and savory biscuits one can make. I’m beyond excited to share this Homemade Buttermilk Biscuit Recipe with you!
Why You’ll Love these Chicken Soup Biscuits
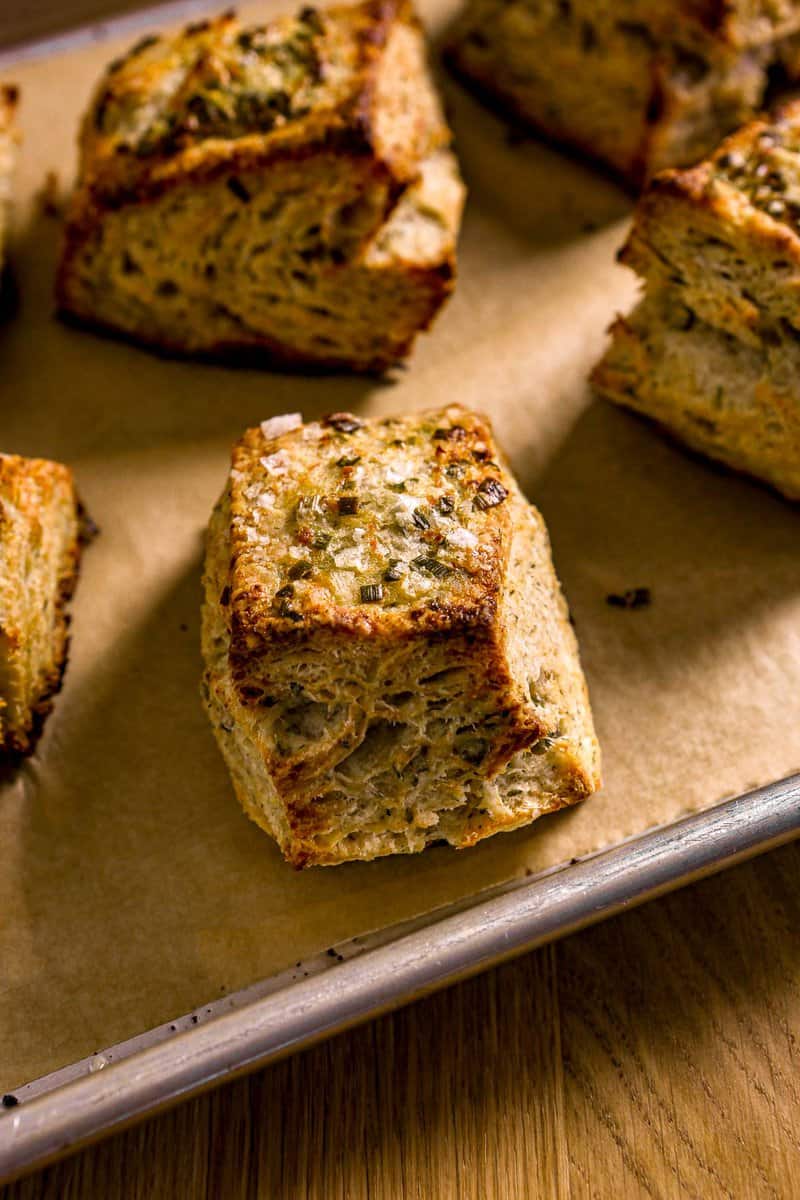
- Flaky, buttery layers: if you’re looking for a tall biscuit with buttery layers, this is the recipe for you! The simple yet effective technique of folding the dough in on itself creates layers upon layers of buttery, tender goodness.
- Crisp edges: the high amount of butter in these biscuits makes for very crisp bottoms, tops and edges. Some of the butter melts and pools around the edges of the biscuits making for slightly fried, crisp bottoms while the tops caramelized during browning.
- Full of savory chicken flavor: to up the ante on flavor, these biscuits are not only made with buttermilk and butter, but a hearty dollop of Chicken Bouillon, chives and dill. These are inspired by the ever-craveable Chicken in a Biskit crackers!
- Easy to make: no specialty equipment or biscuit cutters needed. This biscuit dough comes together in one bowl and just requires a large hole grater and a knife.
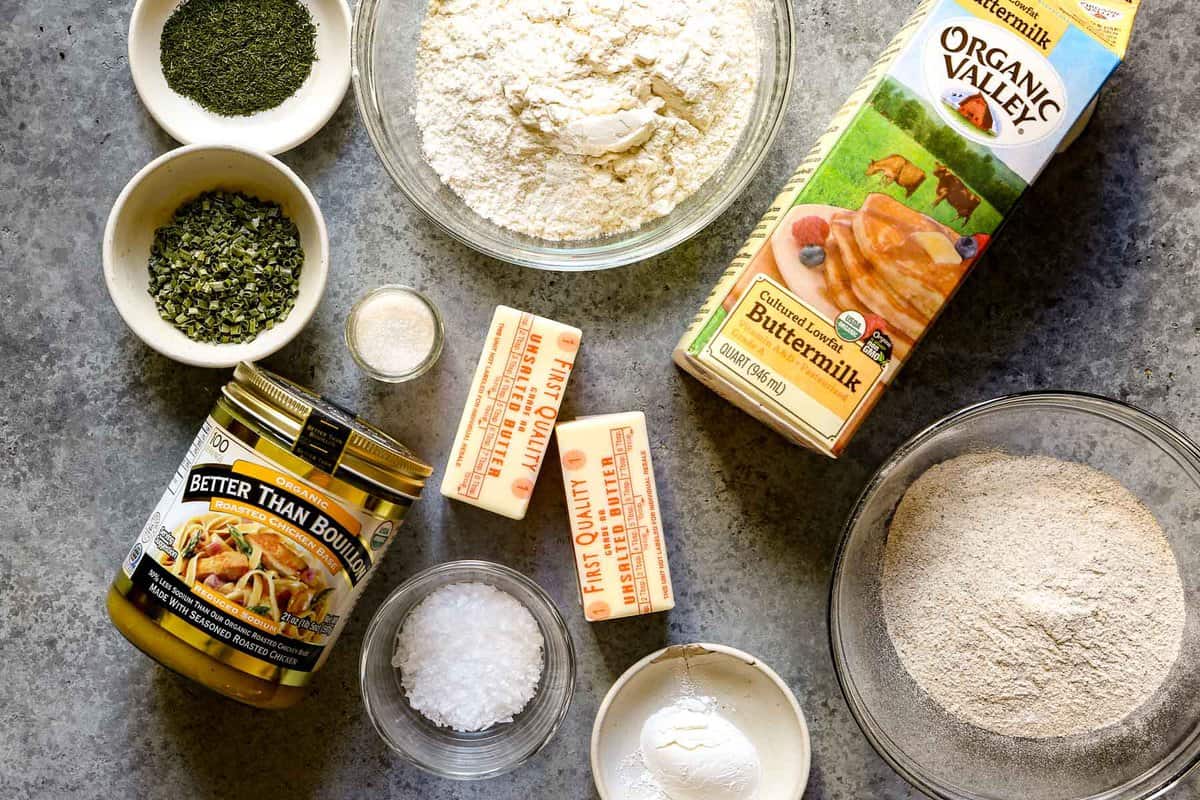
Ingredients Needed
- All-purpose flour: the majority of the flour in these biscuits is all-purpose flour. You’ll need 2 cups.
- Rye Flour: a great rule of thumb when adding alternative flours to classic baking recipes is to replace only 20% of the all-purpose flour with the alternative flour. This is a safe ratio for replacing regular flour while not having an impact on the texture. The addition rye flour adds a lovely nutty flavor to the biscuits.
- Baking Powder: you’ll need a tablespoon of baking powder for this recipe. That may seem like a lot—because it is—but it’s needed to give lift to the butter-rich dough.
- Butter: use unsalted butter for this recipe and season the dough yourself—this gives you more control.
- Buttermilk: an important ingredient for adding flavor to the biscuits! Buttermilk is also key to creating a tender biscuit. I recommend using bottled buttermilk instead of making your own—it just has a better texture and creates better results. If you’ve got extra buttermilk, make Whole Wheat Muffins!
- Salt: you’ll need kosher salt for this recipe. Morton or Diamond Crystal works, though the measurements will be slightly different so be sure to read the recipe notes. I also recommend topping the biscuits off with flaky sea salt before baking.
- Sugar: just a tiny bit is added to the dough to balance out the flavors.
- Better than Bouillon Roasted Chicken Base: a surprise ingredient! This is the main flavoring ingredient of these biscuits. First and foremost, this recipe is all about being the best buttermilk biscuit out there. But secondary, I want it to transport you to the inside of a Chicken in a Biskit cracker box. YUM! What could be better.
- Dried Herbs: to drive home the “chicken soup” flavor of these biscuits, you’ll need some dried minced chives and dried dill.
How to Make Buttermilk Biscuits
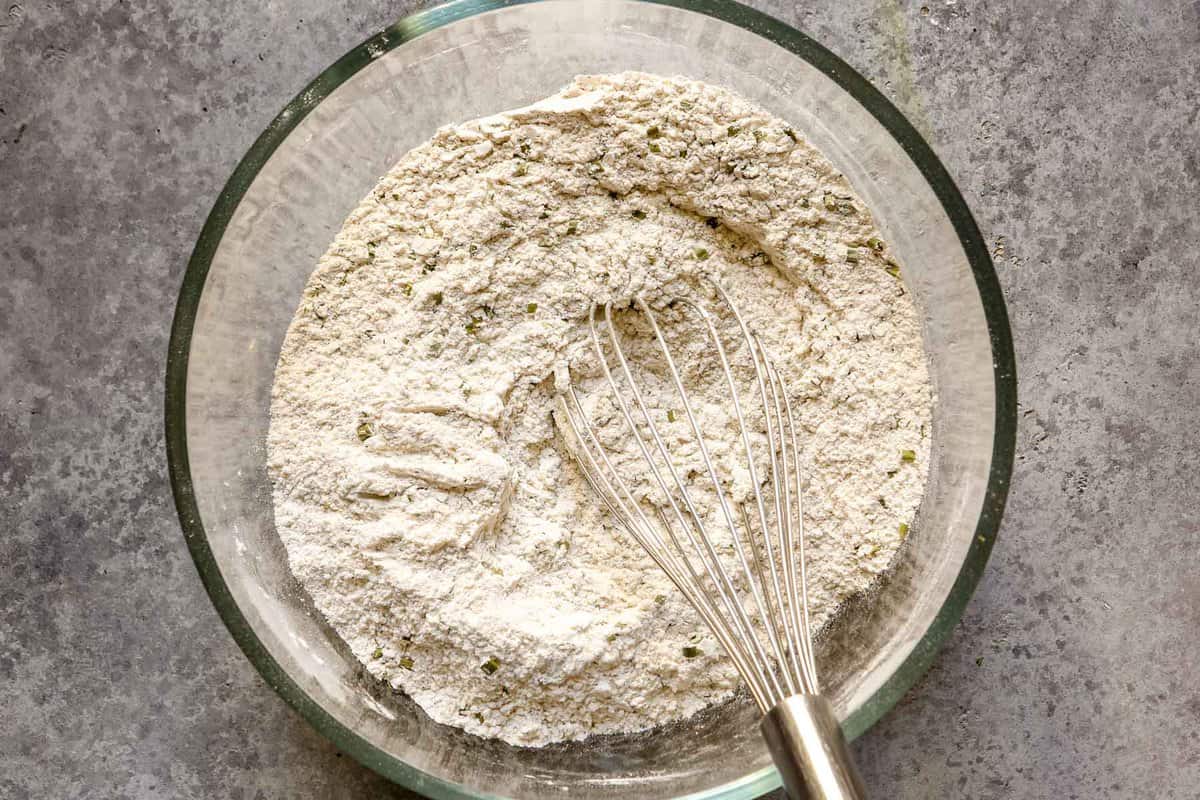
- Whisk together the flours, baking powder, dried herbs, salt and sugar in a large bowl.
- Grate some of the butter using a large-hole grater. The butter should be really cold for this step, so I recommend freezing the butter for a while before grating.
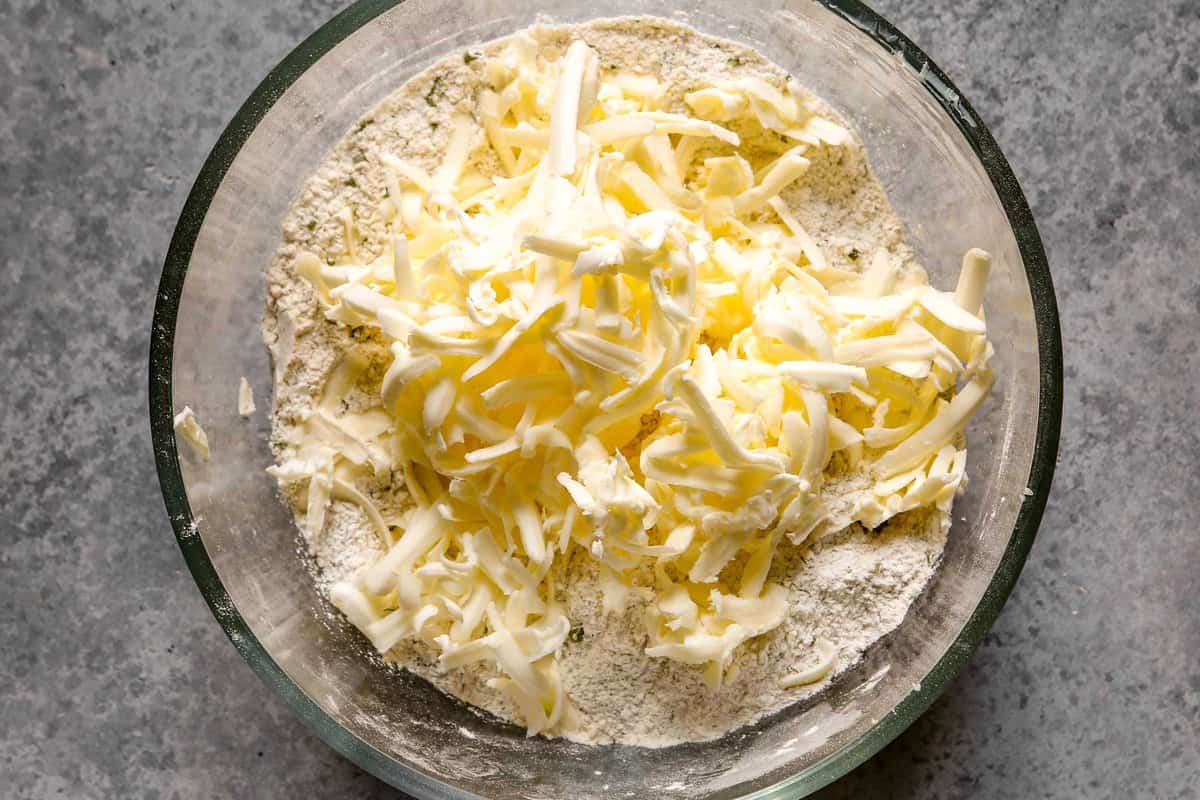
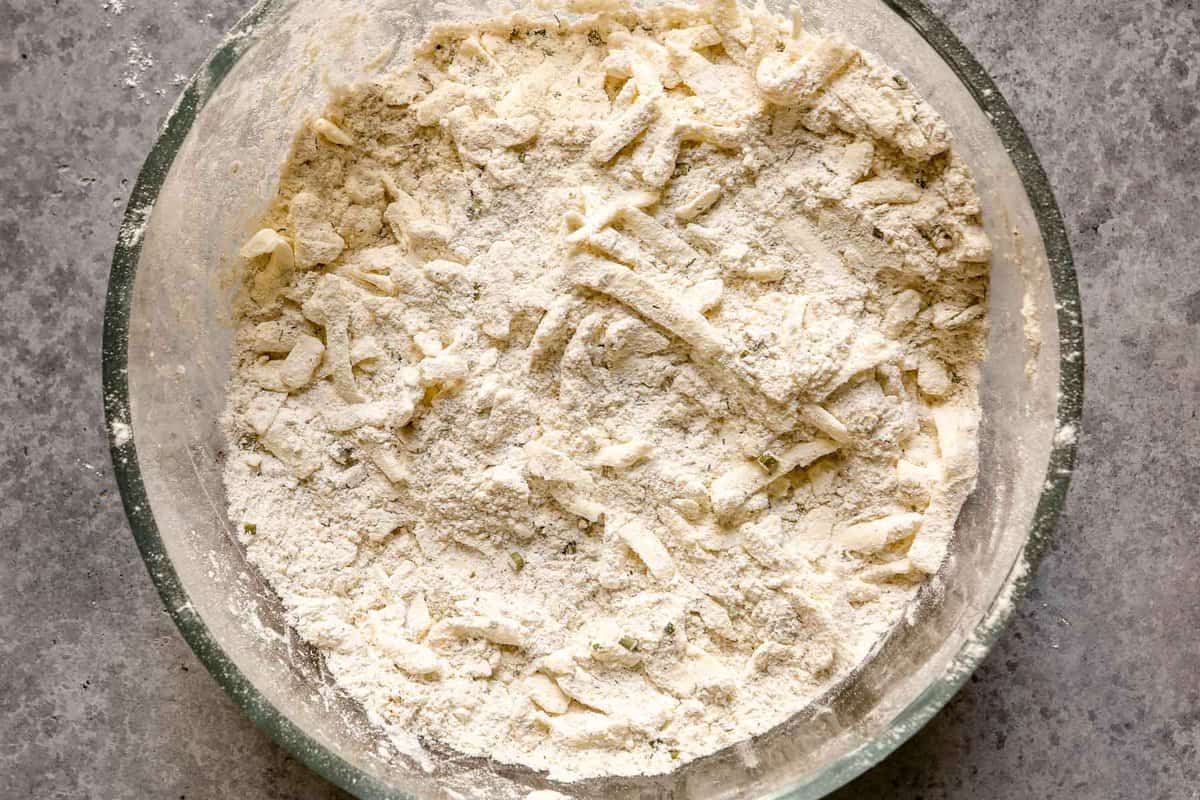
- Add the grated butter to the flour mixture and toss to combine. All of the butter should be evenly coated in flour and evenly distributed.
- Add the Better than Bouillon to a liquid measuring cup. Add a splash of buttermilk and mix to combine. Fill the remainder of the cup with buttermilk to the 1 cup mark.
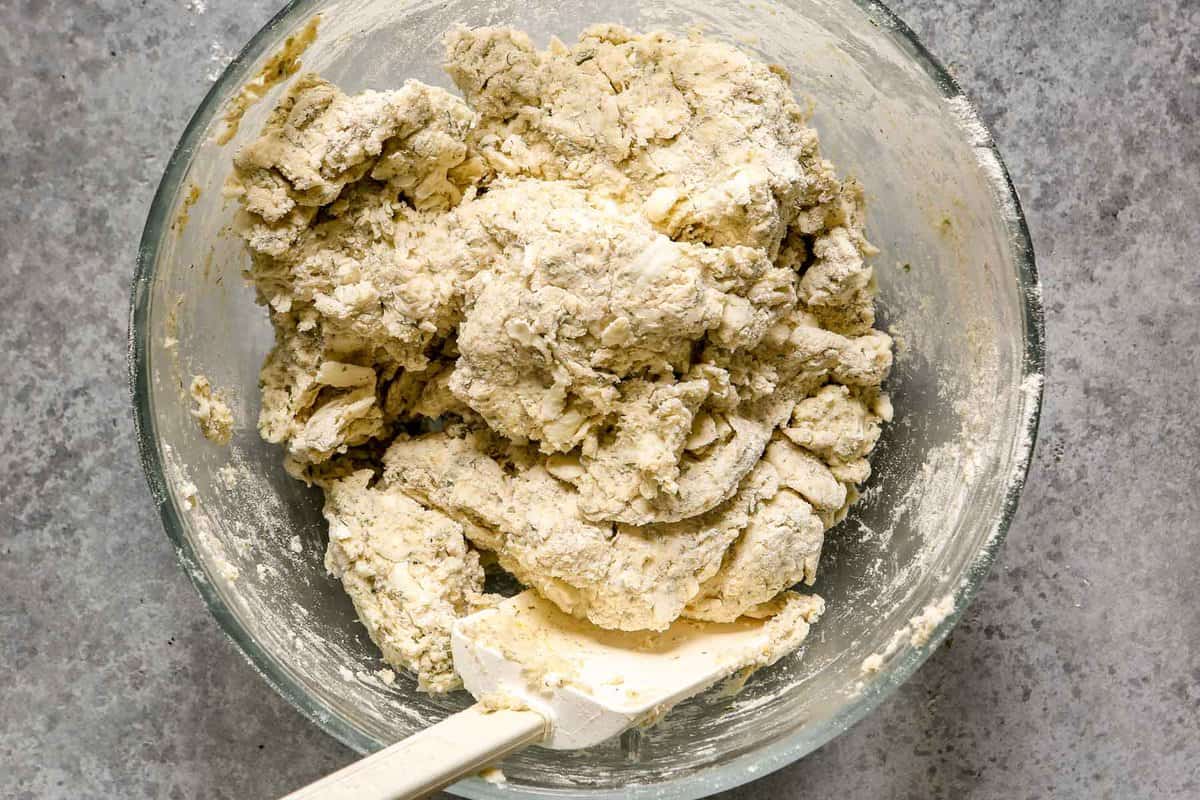
- Make a well in the center of the flour mixture using your hand or a spoon. Pour the buttermilk mixture into the well and use a spoon to gently mix everything together into a shaggy dough.
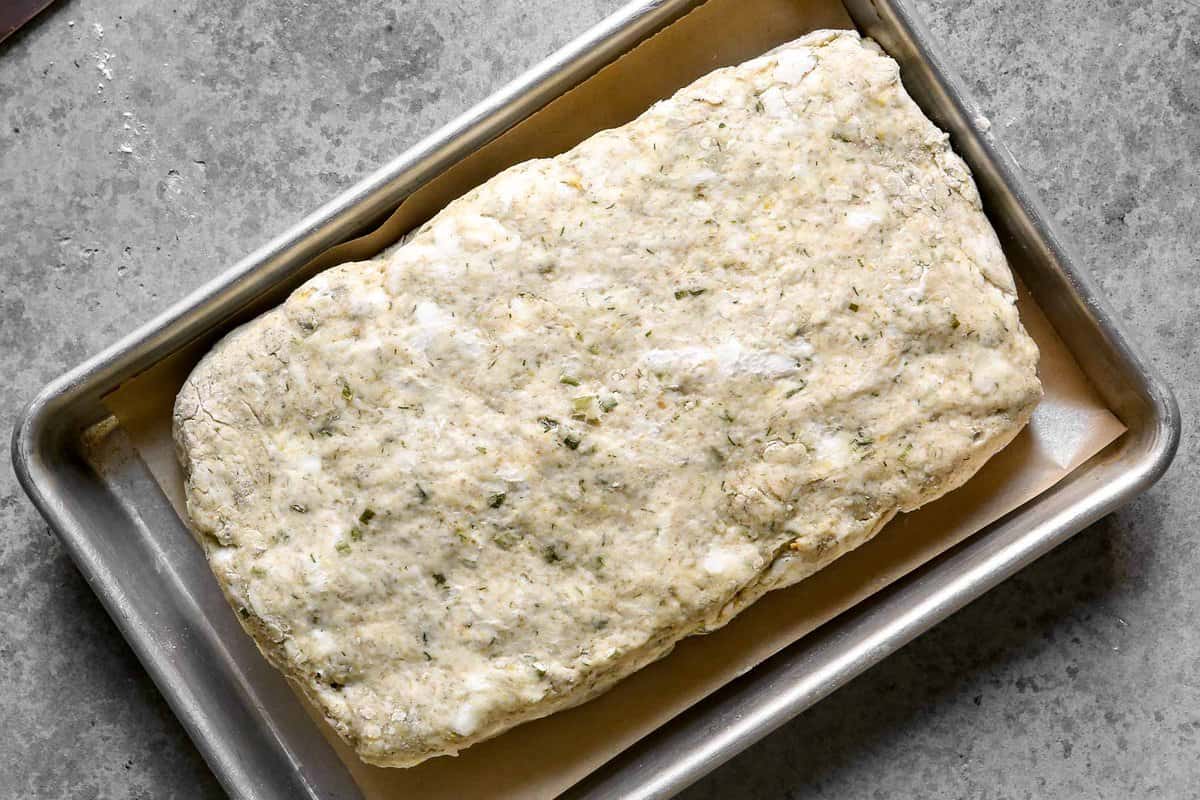
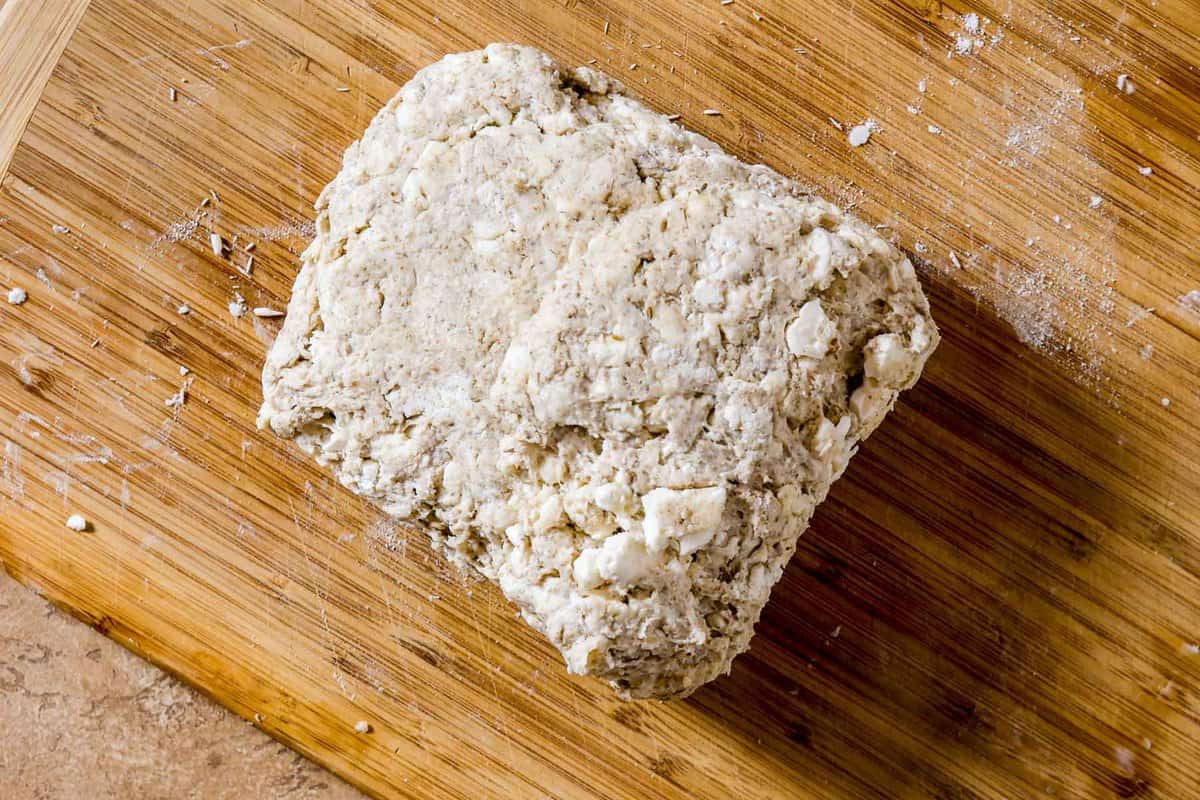
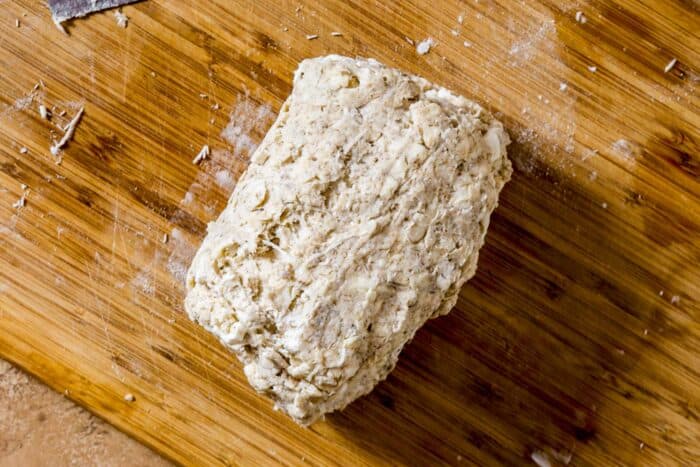
- Turn the dough out onto a lightly floured surface and form into a thick rectangle (it should be about 8✕5-inches).
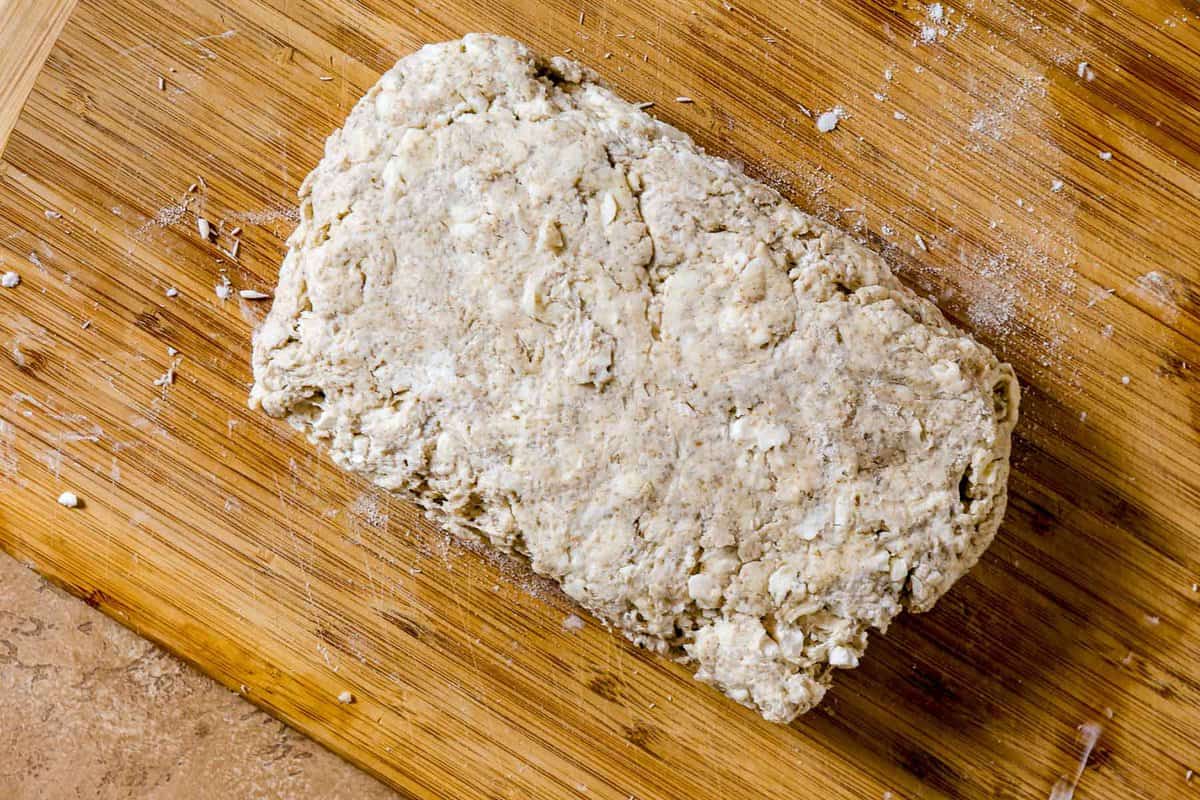
- Fold the dough into thirds onto itself, like a letter, then pat back into a thick rectangle. Repeat the folding and shaping twice more.
- Chill the biscuit dough for 1 hour in the refrigerator.
- While the dough chills, melt the remaining butter in a small bowl. Add in the Better than Bouillon and chives and whisk to combine.
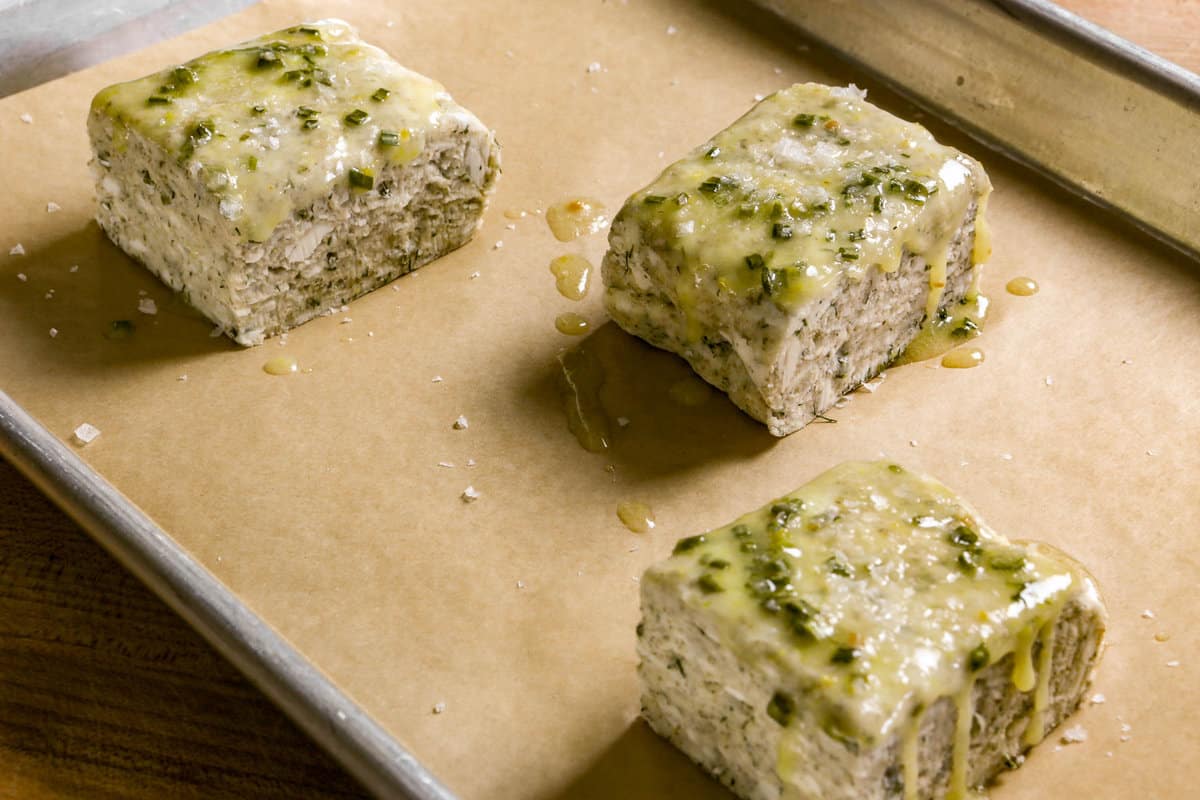
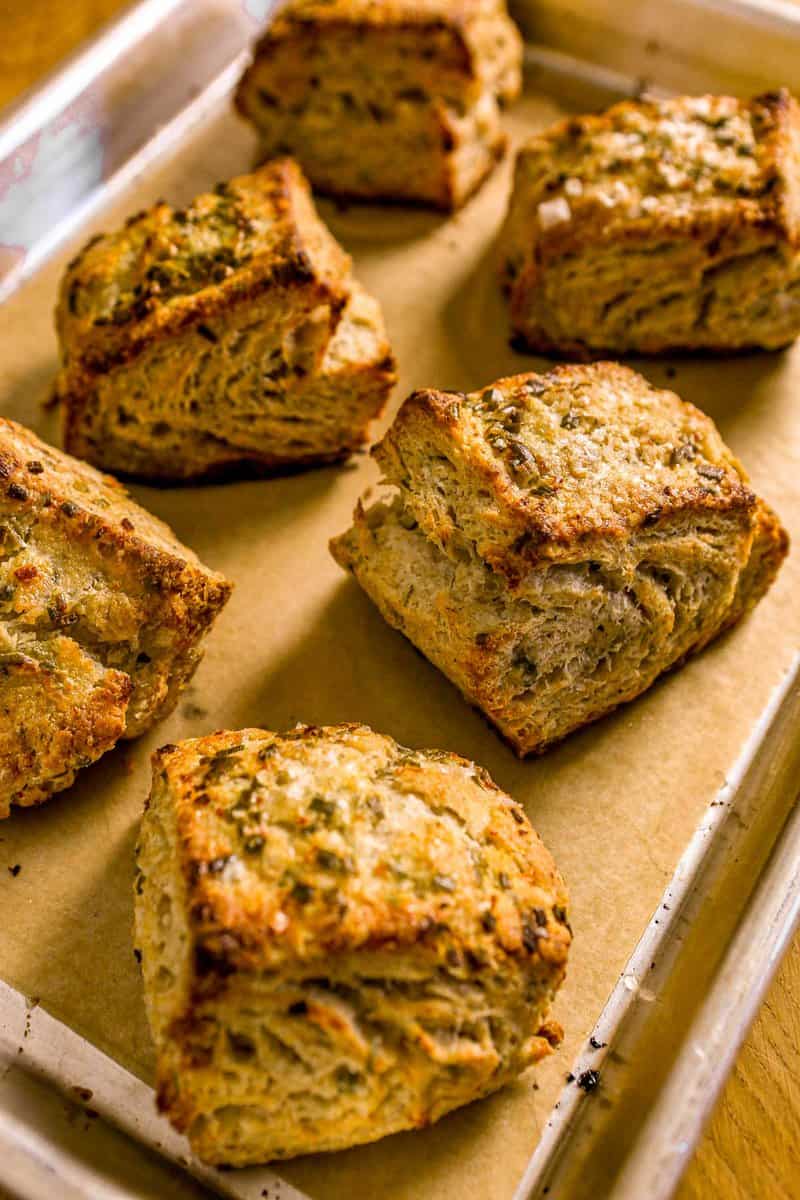
- Cut the chilled biscuit dough into 8 equal squares then brush with the melted butter mixture. Top each biscuit with flaky sea salt and bake until puffed and deeply golden brown.
How to Fold Biscuit Dough
The key with buttermilk biscuits is to achieve layers of butter. To do this, you’ll use a very abbreviated version of lamination (used in pastry making for things like croissants).
For this recipe, pat the dough into a rectangle, then fold the dough in on itself, in thirds, like a letter.
Repeat patting out the dough and folding it onto itself a couple more times. This process will form layers of butter between dough which will result in tons of flaky and buttery layers.
Expert Tips for Making Flaky Biscuits
- Prior to using the butter, pop it in the freezer. Using very cold butter will allow you to evenly disperse the butter into the dough without it melting (the enemy of flakiness!).
- Avoid working the dough too much. The dough should be fairly shaggy with pockets of dry flour prior to dumping it out onto the work surface and forming it.
As you form, fold and form it again, the dough will come together.
Freezing Homemade Biscuits
The good news is you can freeze these gorgeous homemade biscuits. There are two ways you can do this.
Freeze Fully Baked Biscuits: Freeze the baked biscuits on a baking sheet, then once solid, transfer them to a zipper-lock bag and freeze for up to 3 months. Allow them to thaw at room temperature for a couple hours before reheating in a 300-degree oven just to warm through and re-crisp the exterior.
Freeze Unbaked Biscuits: Freeze the individual, unbaked biscuits on a baking sheet until solid then transfer to a zipper-lock bag and store in the freezer for up to 3 months. Then when you’re ready to bake, while the oven is pre-heating, place the frozen biscuits on a parchment-lined baking sheet. Bake as directed, adding on additional baking time as needed.
Storage Instructions
- These biscuits will last up to 3 days stored in an airtight container at room temperature.
- For longer storage, place the airtight container of biscuits in the refrigerator for up to 1 week.
- And for long-term storage, freeze the biscuits. To freeze biscuits, freeze the biscuits on a baking sheet. Once solid, transfer to a zipper-lock bag and freeze for up to 3 months.
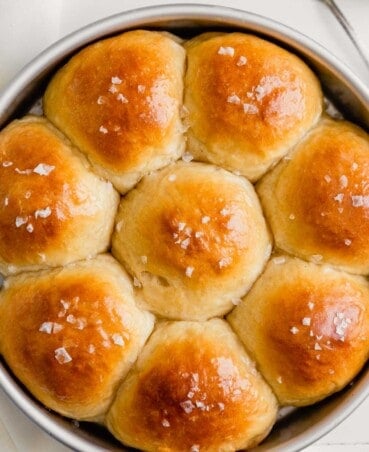
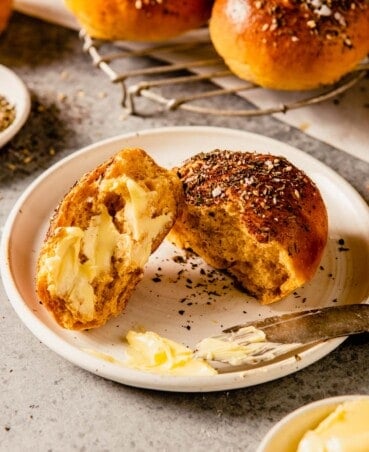
More Biscuits and Rolls to Try
If you love this recipe, then you’ve gotta try these Cheese Biscuits! The dough is similar, so you’ll already have most of the ingredients you need. They’re made with feta, cumin and onion flakes—so much flavor!
For something a bit lighter and fluffier, make Japanese Milk Buns. They are ever so slightly sweet and reminiscent of Hawaiian Rolls.
If you’re looking for a great dinner roll or burger bun, make Kaiser Rolls. A twisted classic!
Sweet Potato Rolls are a fun take on a classic dinner roll. Made with sweet potato puree and flavored with za’atar, these are unique and delicious!
Baking Recipes
Cheese Biscuits
Baking Recipes
Japanese Milk Buns

Baking Recipes
Kaiser Buns
Baking Recipes
Sweet Potato Dinner Rolls

Homemade Buttermilk Biscuits (Chicken Soup Flavored)
Description
Save This Recipe!
Ingredients
- 12 tablespoons (170g) unsalted butter, cold
- 2 cups (250g) all-purpose flour
- ½ cups (60g) rye flour
- 1 tablespoon (14g) baking powder
- 4 teaspoons dried chives
- 1½ teaspoon dried dill
- 1 teaspoon sugar
- 1 teaspoon salt
- 1 scant cup (222g) cold buttermilk
- 1 tablespoon Better than Bouillon roasted chicken base, reduced sodium
For the topping:
- 4 tablespoons melted butter
- 2 teaspoons Better than Bouillon roasted chicken base, reduced sodium
- 2 teaspoon dried chives
- Flaky sea salt
Instructions
- Grate 12 tablespoons butter on a large hole grater.
- In a mixing bowl, combine 2 cups (250g) all-purpose flour, ½ cup (60g) rye flour, 1 tablespoon baking powder, 4 teaspoons dried chives, 1½ teaspoons dried dill, 1 teaspoon salt and 1 teaspoon sugar.
- Add shredded butter to flour mixture and lightly mix with fingers until combined and butter pieces are completely coated in flour.
- Add 1 tablespoon Better than Bouillon to a liquid measuring cup. Add a splash of buttermilk and whisk until combines and smooth. Add buttermilk to reach 1 cup mark.
- Form a well in center of flour butter-mixture; pour buttermilk mixture into well. Using a spoon, mix dough gently until a dough comes together.
- Transfer dough to a work surface and lightly press dough into a rough 8✕5-inch rectangle (about 1-inch thick)
- Fold rectangle into thirds (like a letter) and press down into a 1-inch thick rectangle. Repeat folding and pressing twice more.
- Shape rectangle into a rough 8✕5-inch rectangle (about 1¼-inches thick). Transfer to a parchment lined baking sheet and chill 30 minutes.
- Meanwhile, heat oven to 450ºF (232ºC) with rack set in middle position.
- Cut biscuit dough in half lengthwise then cut each half into 4 squares.
- Arrange biscuits about 2 inches apart on parchment lined-baking sheet.
- In a small bowl, melt remaining 4 tablespoons butter in microwave in 20 second increments on 80% power. Add 2 teaspoon Better than Bouillon and 2 teaspoon dried chives. Brush biscuits with seasoned butter then sprinkle flaky sea salt over top.
- Bake until tops are golden brown and crisp, about 20 minutes. Remove from oven and let cool on sheet 5 minutes before transferring to a wire rack.
- Brush biscuit tops with additional seasoned melted butter mixture and serve.
Notes
- These biscuits will last up to 3 days stored in an airtight container at room temperature.
- For longer storage, place the airtight container of biscuits in the refrigerator for up to 1 week.
- And for long-term storage, freeze the biscuits. To freeze biscuits, freeze the biscuits on a baking sheet. Once solid, transfer to a zipper-lock bag and freeze for up to 3 months.
Nutrition