
This post may contain affiliate links.
This recipe is my version of homemade pumpkin bars. And instead of using canned pumpkin, it uses roasted and pureed honeynut squash which give the bars a vibrant orange color and a deep squash flavor. Plus, to enhance the spices and the squash, the cake batter, frosting and the crunchy pepita topping all featured browned butter. Infused with warm spices, this cake is the perfect dessert for casual gatherings or holiday parties.
There are three reasons I love this cake recipe. For starters, it’s very forgiving and can be made with either roasted honeynut squash or butternut squash. Second, the ultra-soft cake stays moist for days, even when stored in the fridge. The combo of butter and oil in the batter is the best of both worlds—adding ample flavor while keeping it tender and moist. And third, the cake can be served as a sheetcake or cut into bars and served like pumpkin bars.
Ingredient Notes
- Honeynut Squash: These little squash look similar to butternut squash but are smaller in size and have a slight darker skin. Either squash will work here.
- European-Style Butter: European-style butter has a higher fat content than most standard grocery store butter. Here, I used Vital Farms, but you can use any European-style butter. The higher the fat, the more flavorful it is!
- Cream Cheese: Make sure you’re using full-fat brick-style cream cheese for the best flavor and texture!
Tips for Making the Best Squash Cake
- First and foremost, this cake is baked in a jelly roll pan, which is a 10×15-inch pan. It’s slightly smaller than a half sheet pan and is the perfect size for sheet cakes (I use it to make my Chocolate Mint Cake).
- Once the dry ingredients are added to the wet, give the batter a good whisk to ensure no dry pockets of flour remain.
- Most ovens run a bit hot or a bit cool. To ensure you’re baking at the right temperature, I recommend getting an affordable oven thermometer. This will save you from over baking or under baking!
Honeynut Squash Cake
Description
Save This Recipe!
Ingredients
Squash Purée:
- 4 Honeynut Squash or 1 large butternut squash
- 2 tablespoons unsalted butter
Cake:
- 2 cups (460g) honeynut or butternut squash puree
- ½ cup (113g) European-style unsalted butter, such as Vital Farms
- 1 cup (205g) packed light brown sugar
- ¼ cup (50g) granulated sugar
- 3 large eggs (150g)
- ½ cup (110g) vegetable oil
- ¼ cup (65g) whole milk
- 2 teaspoons pure vanilla extract
- 2 cups (250g) all-purpose flour
- 2 teaspoons (10g) baking powder
- 1 teaspoon (6g) baking soda
- 1 teaspoon ground cinnamon
- 1 teaspoon dried ground ginger
- ¾ teaspoon kosher salt
- ½ teaspoon grated fresh nutmeg
- ¼ teaspoon ground allspice
Frosting:
- 4 tablespoons (56g) European-style unsalted butter
- 8 ounces (226g) full-fat brick cream cheese, softened to room temp
- 2½ cups (300g) confectioners’ sugar
- 1 teaspoon pure vanilla extract
- Hefty pinch of salt
Crunchy Pepita Topping:
- 1 tablespoon unsalted butter
- 1 tablespoon pure maple syrup
- ⅓ cup raw pepitas
Instructions
Squash Purée:
- Heat oven to 425ºF (218ºC) with rack set in middle position. Halve and scoop out honeynut squash. Arrange, cut side up, on baking sheet then place ¼ tablespoon butter in each well. Roast until a toothpick easily slides in and out of squash; about 45 minutes. Remove from oven and let cool; scoop out roasted squash and transfer to a food processor; discard squash skins. Process until very smooth.
- Reduce oven temp to 350ºF (176ºC). Line a 10×15-inch baking pan with parchment paper.
Cake:
- Meanwhile, heat butter in skillet over medium heat until melted, about 2 minutes. The butter will bubble and splatter, continue cooking, swirling or stirring with a rubber spatula, until butter starts to turn golden, about 2 minutes. Turn off heat and continue cooking over warm (but off!) burner until deeply golden and has a nutty aroma, about 1 more minute. Pour butter into a heatproof glass bowl or cup and set aside to cool.
- In a large mixing bowl whisk together 2 cups squash purée, sugars, eggs, oil, milk, vanilla and browned butter until smooth, about 1 minute.
- In a separate bowl, combine flour, baking powder, baking soda, cinnamon, ginger, salt, nutmeg and allspice.
- Add dry ingredients to wet and whisk until no pockets of dry flour remain.
- Spread batter evenly into prepared pan and bake until a toothpick inserted in the center comes out clean or with a few moist crumbs, 19–21 minutes. Transfer pan to a wire rack and allow cake to cool, in pan, for 30 minutes. Remove cake from pan by inverting onto wire rack. Let cool completely.
Frosting:
- Heat butter in skillet over medium heat until melted, about 2 minutes. The butter will bubble and splatter, continue cooking, swirling pan or stirring with a rubber spatula constantly, until butter starts to turn golden, about 2 minutes. Turn off heat and continue cooking over warm (but off!) burner until deeply golden and has a nutty aroma, about 1 more minute. Pour butter into a heatproof glass bowl or cup and transfer to refrigerator to re-solidify.
- When ready to make frosting, whip cream cheese in a stand mixer until smooth. Add butter, vanilla and salt, and blend to combine. With mixer on low, gradually add confectioners’ sugar. Once combined, increase speed to high and whip until smooth and creamy.
Crunchy Pepita Topping:
- Melt butter and pepitas in a large skillet over medium-low heat. Cook, stirring frequently, until butter and pepitas are golden brown and fragrant, 4–5 minutes. Immediately remove from heat and stir in maple syrup and coriander (mixture will bubble). Season with a pinch of salt and let cool.
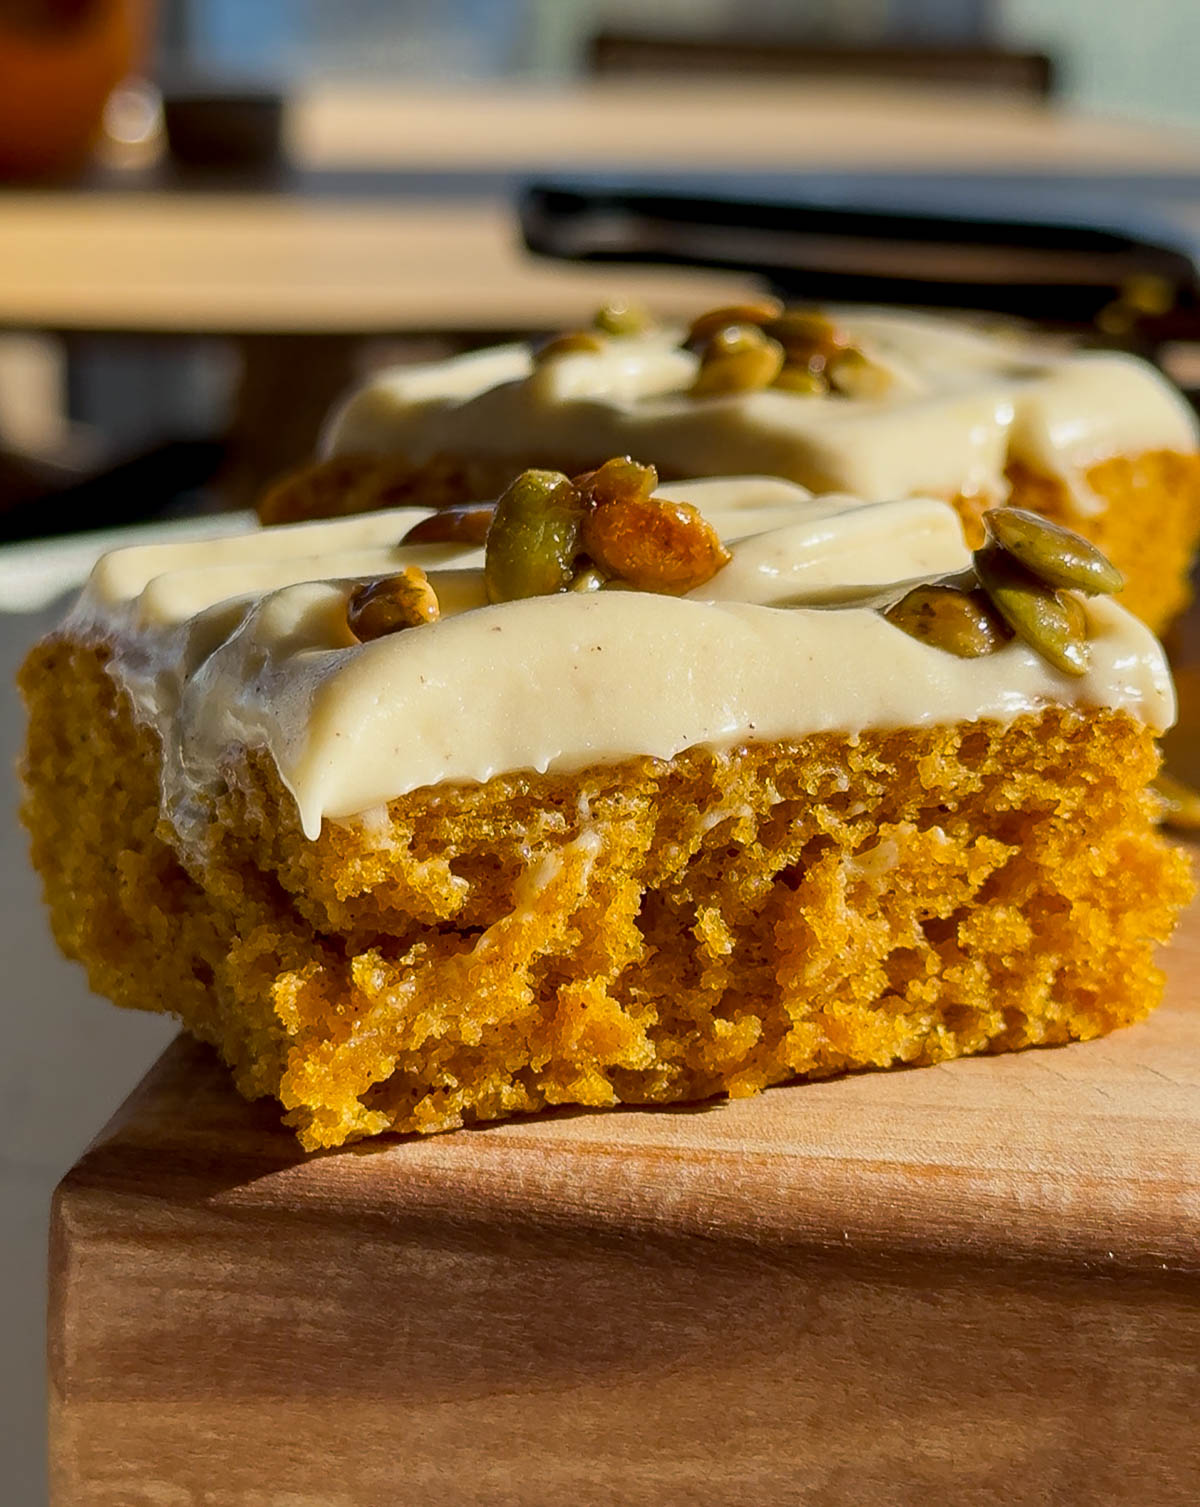
- Spread frosting evenly over cake, top with pepita topping and cut into bars.
Excellent flavourful light cake, a great ‘keeper’!
Thanks you.
Molly