This post may contain affiliate links.
Are you a blogger who wants to learn how to develop recipes better? Or maybe you’re a food science student who wants to learn the ins and outs of professional recipe development. Whatever it may be, I’m here to take you through the process of how to develop a recipe like a professional recipe developer.
Developing a recipe can be a well choreographed dance between research, testing and tasting. Other times it can feel as though there’s no possible way to create the desired end goal.
The process can feel incredibly creative but can also feel very defeating.
Are you interested yet?! For the most part it’s a very positive process, so don’t turn away already!
I often talk about the importance of mastering the classics—techniques and recipes—but I also want to instill the idea that everything should be up for interpretation. However, to successfully interpret something or creating something new, you must first understand what make a technique or recipe so classic. Once you have a grasp on that, it’s much easier to create something that’s unique and different while also maintaining the integral components of what makes classics, well, classic.
If you’re curious to learn what it’s like to work in a professional test kitchen, check out part 1 of this “test kitchen series.” I chat all about day-to-day tasks, the similarities and differences between kitchens, taste panels and so much more!

The Recipe Development Process
As a general overview, here’s the process of developing a recipe.
Step 1: Ideation & research
Step 2: Draft a preliminary recipe
Step 3: Initial recipe test
Step 4: Taste panel
Step 5: Additional recipe tests
Step 6: Final recipe write up
You can refer back to this as a quick guide or reminder. But let’s dive into each step to help you grasp each concept.

Ideation & Research
This first step is a really important part of the development process. It begins with ideation. Whether you’re coming up with a unique and creative take on a classic recipe, want to recreate a dish you had at a restaurant or are looking to make something healthier, it all starts with an idea.
From there it’s on to research. It’s essential to research and reference a variety of sources. The goal with research is to take note of ingredient ratios, cooking techniques, times and temperatures.
I recommend looking at a few reputable test kitchens in addition to cookbooks and blogs. This variety will work as a guideline and will also encourage you to think creatively. The research step is not meant to drive your development, it’s meant to inform and lay the groundwork for it.
If you’re struggling to find ways to make a recipe your own think of ingredients that you always enjoy cooking with and take note of what’s in season. Can you make the recipe using whole-wheat flour? Or maybe try a marinade that’s more citrus-forward instead of herb-forward.
The key takeaway: get creative, think outside of the box, and don’t be tempted to copy (not cool!).
Draft a Preliminary Recipe
Once you have done your research it’s on to culling through the recipes. Notice which cooking techniques stand out to you, take note of the ratios of ingredients, and compare cooking times and temperatures.
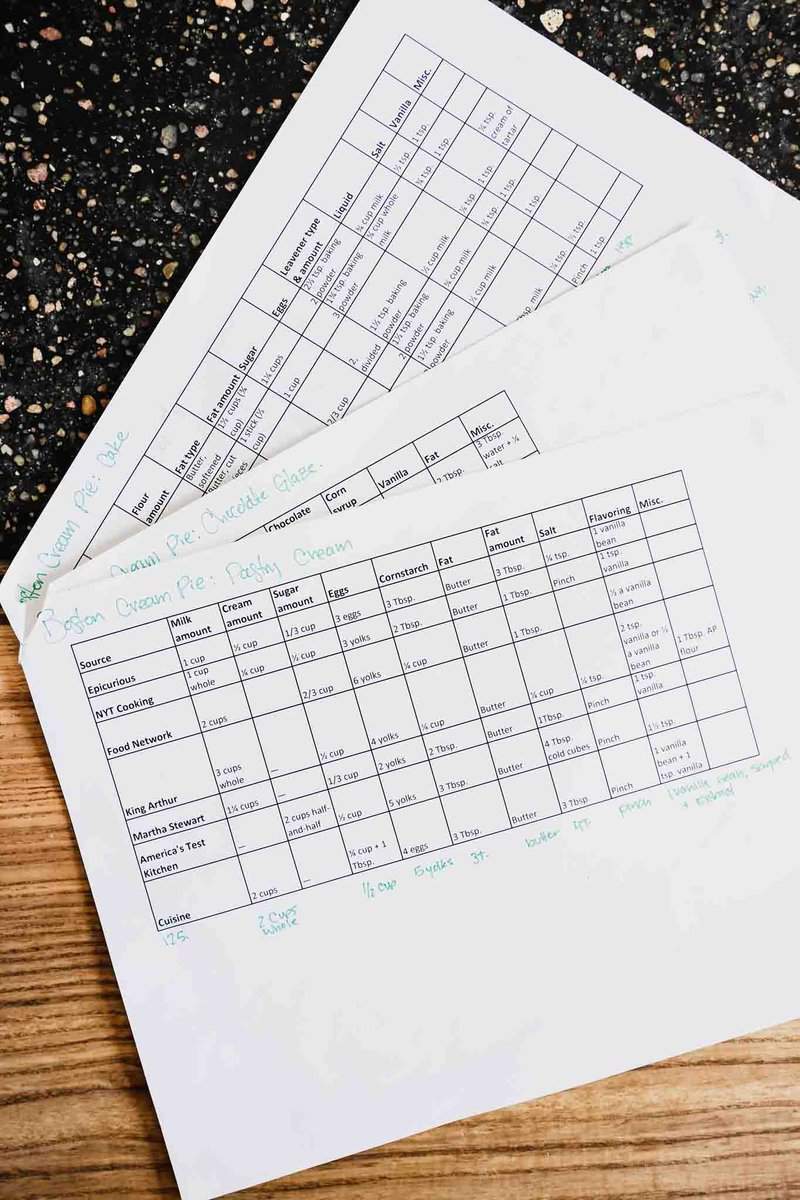
Some test cooks like to utilize charts for this, I’m more of a chicken-scratch-it-out kind of person. I write and rewrite my preliminary recipes a couple of times before I think it feels right. Find what works for you!
I also find it incredibly helpful to use a recipe testing template when writing up and testing recipes. Sometimes I print off the recipe and make handwritten notes and other times I work digitally and make changes right to the document. Again, do what works for you. Just be vigilant about taking notes!
The key takeaway: writing a preliminary recipe will keep you focused and organized.

Initial Test
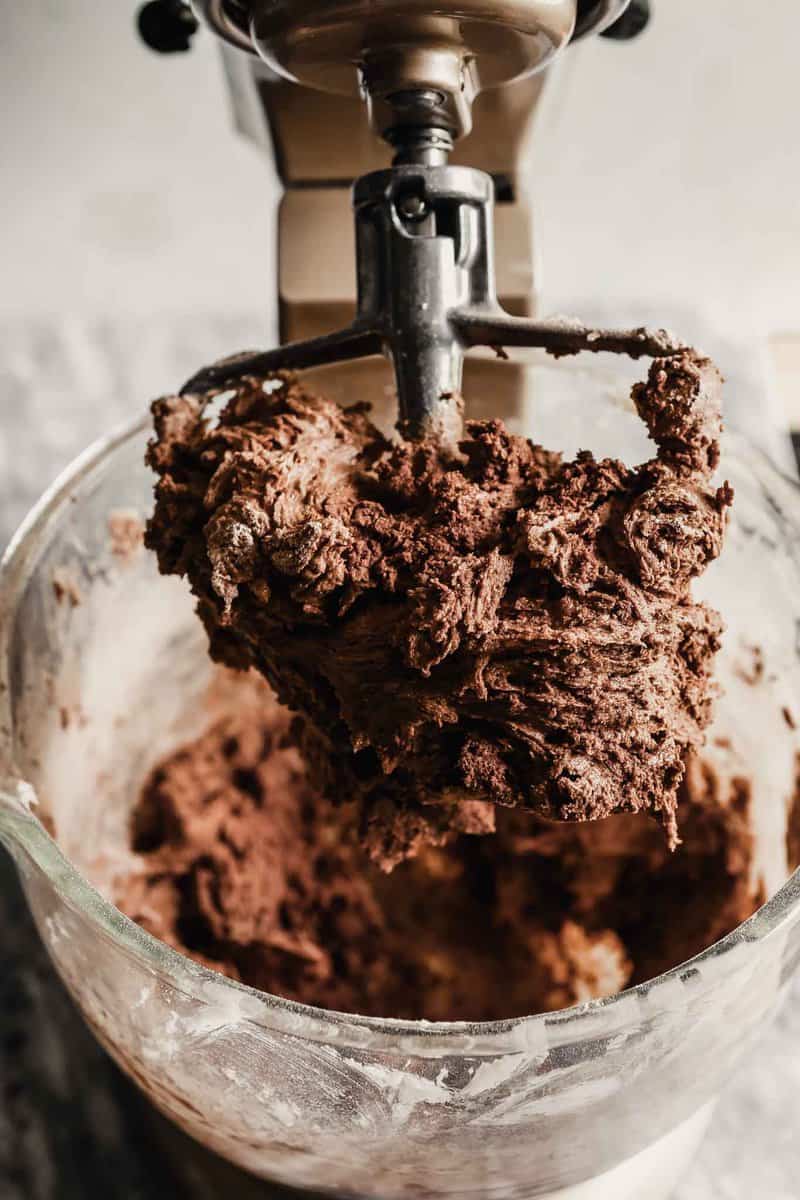
The initial test is where things get fun! You may have a plan written out, but be prepared for that to change. The ingredient amounts in my initial recipes always change, even if just slightly.
Ingredients may be increased, decreased or taken out altogether on the spot. Ingredients might even be added! Techniques (searing, sautéing, roasting, etc.) or ingredient applications (peeled, diced, sliced, minced etc.) may be altered during the initial test as well. This is where you work out the kinks! The takeaway—you may have a plan, but listen to your instincts and change it as needed.
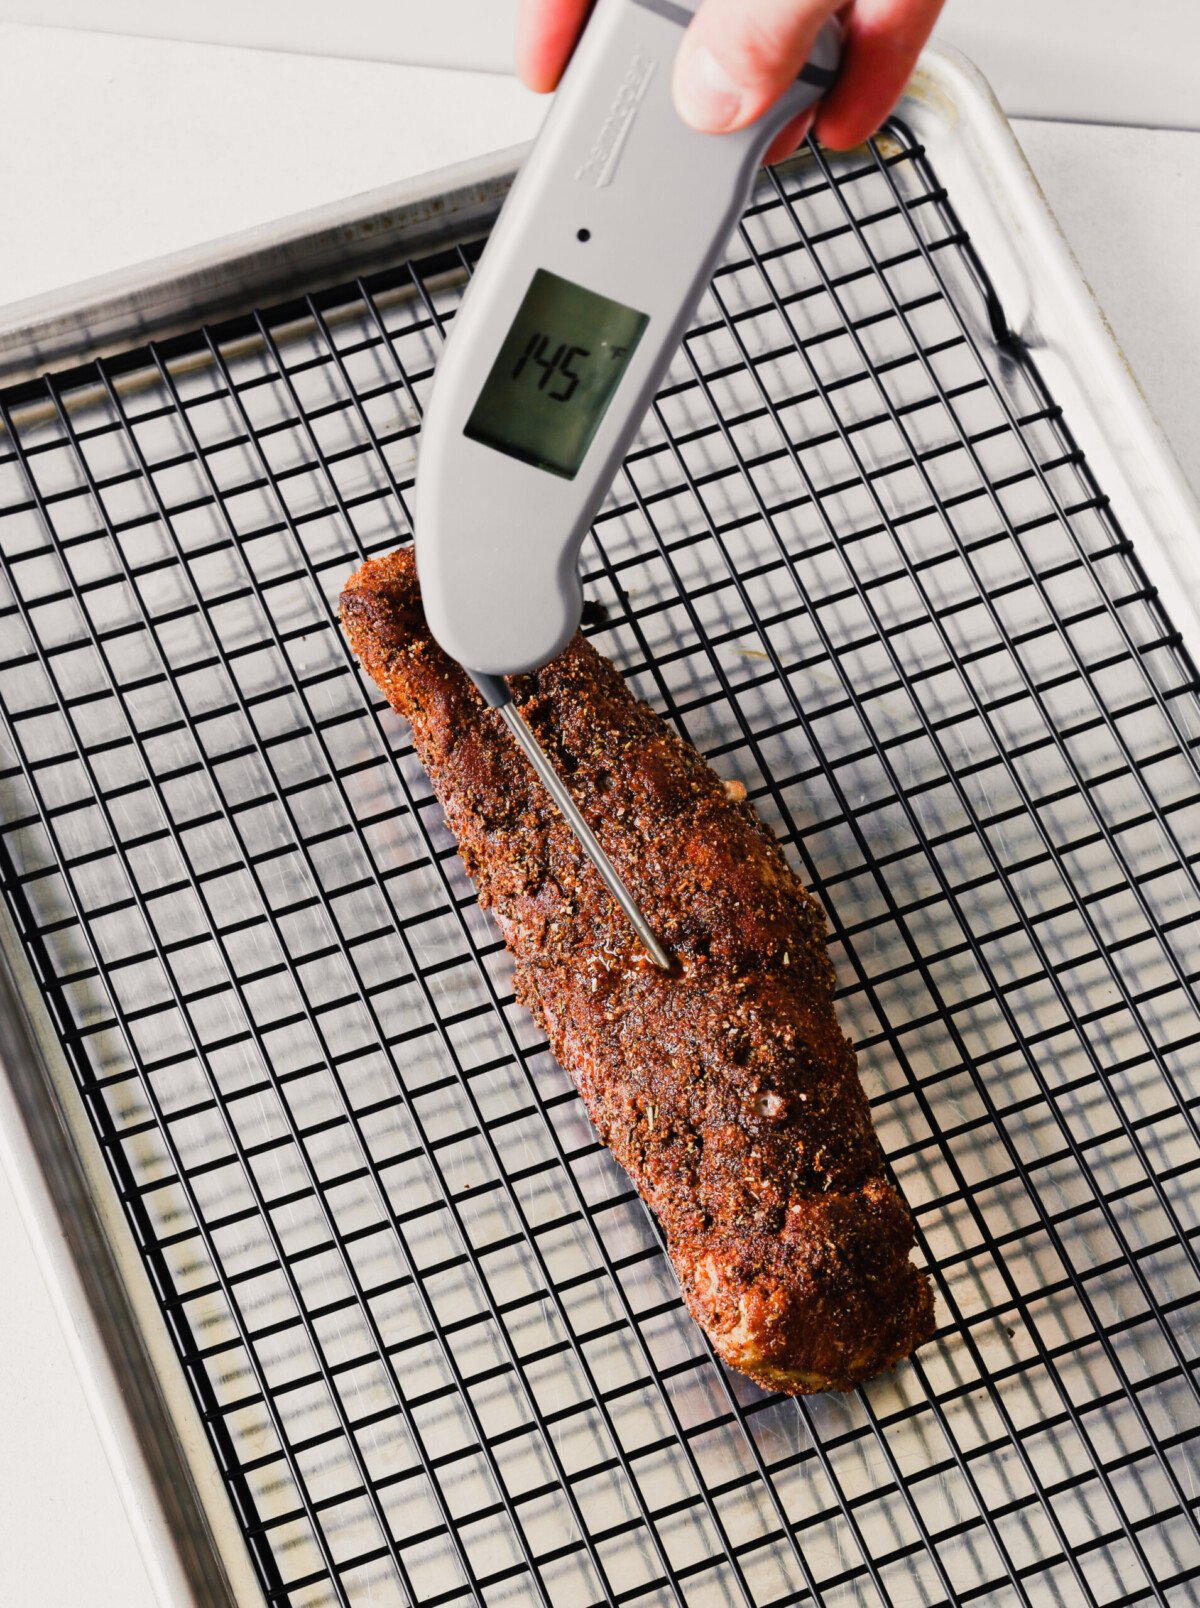
The initial test is also the time to get weight measurements of ingredients (having a digital food scale is essential). It’s really helpful to have measurement options when it comes to writing up the final recipe. Cup measurements are often just fine, but weight measurement are incredibly helpful for baking recipes and make it easier for cooks to purchase ingredients sold by pound.
Don’t forget to record times and temperatures! I recommend you get yourself a Polder Kitchen Timer. It works as a regular kitchen timer and also counts time up, which is a great for recording cook times of various steps in the recipe. As for a kitchen thermometer…absolutely essential. The ThermoWorks Thermapen is my favorite by far but their budget option, the ThermoPop is also wonderful.
Check out my 15 Essential Kitchen Gadgets Every Cook Should Have
Accurate cook times are important to creating a successful recipe. But I would argue that visual cues are just as important, if not more. Cook times are largely dependent upon the cooks’ interpretation of recipe instructions. Their medium heat might look like your medium-high heat and visa versa. Some ovens just run hotter than others, which can completely change the outcome of a baked good. This is why visual cues are essential.
In your initial test, be vigilant about taking notes on what is happening to the food at certain steps in the cooking process.
- Has the liquid just come to a simmer before you added the pasta? Or was it a rolling boil?
- Did you mix the dough just until it came together? Or did you mix it until everything was thoroughly incorporated?
- Did you pull the cookies from the oven when their edges were just set and their tops were still soft or did you pull them when their edges were pretty dry and their tops yielded to pressure?
- How has the smell changed? Is it toasty? Or “fragrant” (often used to describe when garlic and dried herbs are done cooking)?
- Has the color changed? Are the tops golden or deep brown?
All of the in-depth descriptors will not make it into the final written recipe, but they will help you write clear and concise instructions. They’ll also be a great reference for the additional recipe tests to come.
The key takeaway: a good recipe offers both cooking times and visual cues.
Taste Panel
This is where you evaluate whether or not the recipe was a success. This can include everything from process and timing to ingredient amounts, when ingredients are added, and what may be missing from the recipes.
Recipe Characteristics to Evaluate (this is just a starting point):
- Seasoning
- Is there enough salt?
- Does it need more acid?
- Or a dash of sweet to offset the savory?
- Balance of flavors
- Is there one flavor taking over the dish?
- Or is a spice not coming through enough?
- Could something be enhanced by an additional ingredient that’s currently not in the recipe?
- Texture
- Is the product cooked through?
- Over cooked?
- Is it too grainy
- Too greasy?
- Is it smooth where it should be chunky?
- Maybe it’s too dense or too airy?
- Amounts
- Is there enough sauce for each serving?
- Are the serving sizes big enough or maybe too big?
- How are the ratios of ingredients? For example, too many noodles to sauce? Maybe you have too much sauce?
- Process
- Could this recipe benefit from broiling at the end?
- Maybe sautéing would be better than steaming?
- Should the garlic be added earlier? Or maybe it should be added later so it doesn’t burn and become bitter.
The key takeaway: something might taste good but that doesn’t mean it can’t be better. Ask yourself inquiring questions about the taste and texture of a recipe but also the process and ingredient list.

Additional Recipe Tests
Keep testing until the recipe passes taste panel! A few tricks of the trade—half batches are magic and testing multiple variables in one test can save time and cost.
Testing a half batch is pretty self-explanatory. So how do you test multiple variables? Here are a few examples.
- When testing muffins:
- Test a quarter of the batch with paper lines, another with nonstick spray, some with nonstick spray plus flour, and some just bare.
- When testing cookies:
- Split a batch of cookies in half and bake at different times or temperatures. For example, bake half the batch at 12 minutes and the other half at 15. Or try baking half at 325-degrees and the other half at 350-degrees.
- When cooking individual pieces of meat (chicken breast, pork chops, steak etc.)
- Pull pieces of meat at different time intervals. Let’s say you’re testing baked chicken breasts. Pull one out at 20 minutes, another at 25, and another at 30.
- When deciding between garnishes or “finishing” ingredients such as cheese, nuts or herbs.
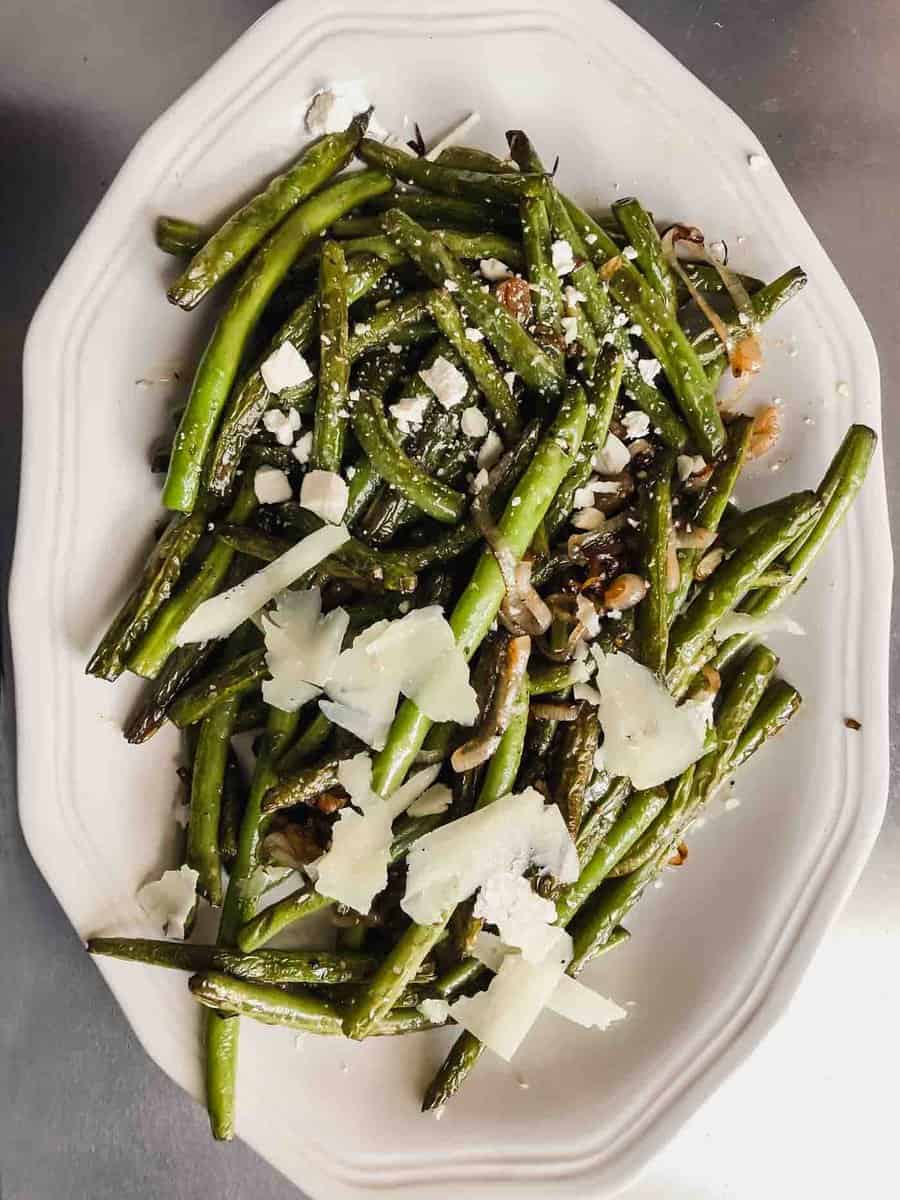
- Prepare dish as directed. Top one half of the dish with one type of cheese and the other with a different type of cheese (I recently did this with green beans).
How does the recipe “pass” taste panel?
Most of the things that were mentioned at previous taste panels have been acknowledged and/or tested.
The key takeaway: a recipe “passes taste panel” when there isn’t anything you would change about the recipe.
 Final Recipe Write Up
This step is where it all comes together. If you have taken good notes during testing this should be fairly easy!

This was super helpful! I love the recipe test chart/card – going to draft something similar!! Thanks so much!!
Thanks Joanne! I’m glad it was helpful! 🙂
Thank you so much for writing this, it was very helpful
I’m so glad you found it helpful!
Thanks so much for writing this up, Lo 🙂 This has been a super-helpful article – especially the research side of things.
Thank you so much for this. I wish I could love this a thousand times over. This is super helpful.
Thank you, this is very helpful. I’m trying to start a food blog and feeling quite overwhelmed at the moment. I definitely need all the advice I can get. The links above to your templates are not working though. I’d love to be able to print them out.
Excellent article! Very helpful. Thank you
So glad it’s helpful!
I always did these things without knowing they are being used all around the globe thank God I am not alone, I always thought I was crazy, it just came natural without have learnt. I am greatful by meeting you while browsing, my take was trust your instincts and never doubt yourself. I will follow you